Table of contents
Checklists
Friday March 8, 2024-10 min readIntroduction
Managing complex processes in your business can be tough, especially when you need to keep everything consistent and ensure tasks are done right. Checklists are a great way to keep track of what needs to be done. They give you a clear list of actionable tasks to follow, making it easier to complete your goals in a clear and organized manner.
Creating a checklist
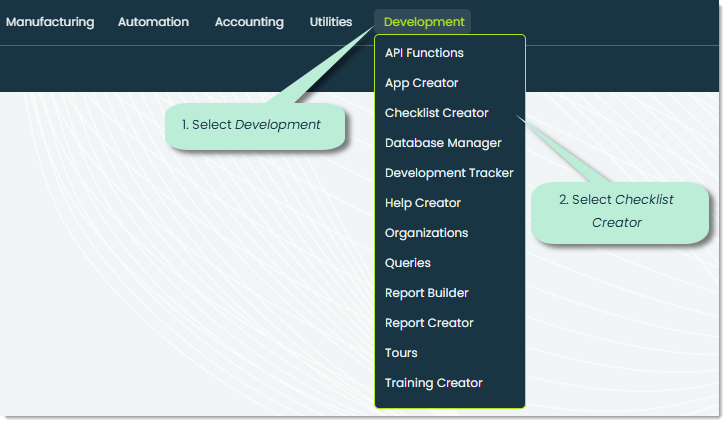
To use checklists within the frontline of any app in the Appward ecosystem, we must first go to the Checklist Creator app and create a checklist. Navigate to the Development category in the main navigation bar and select Checklist Creator.
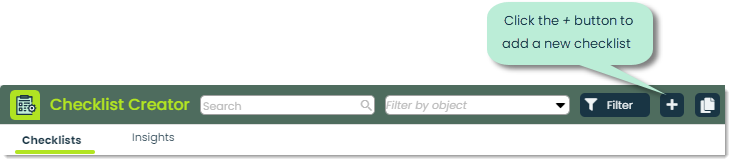
You can add a new checklist by clicking the + button at the top of the app screen.
This will bring up the Add Checklist popup, where you can go through the five main steps of creating a new checklist. Let’s go over the process.
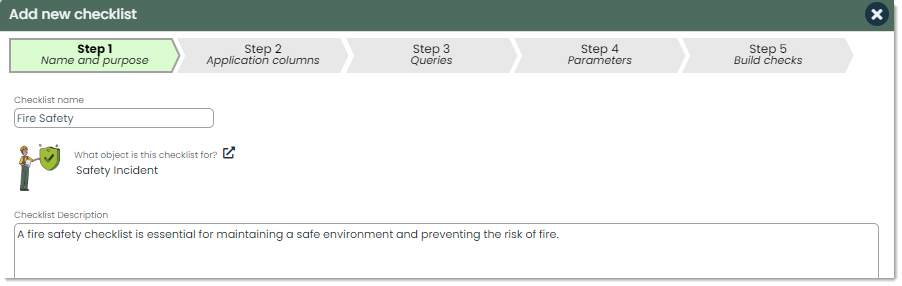
Step 1: Name and Purpose
Checklist name – The Checklist name refers to the specific title or name that you can assign to a checklist. It serves as a distinctive identifier for the checklist, helping your organization easily recognize and categorize it.
Checklist object – You can define the specific object this checklist will belong to within the What object is this checklist for field. Simply click the external link icon to bring up a popup where you can select from a list of your organization’s objects. If your organization is new to Appward, then this window will be empty until you create objects.
Description – In Description, you can provide additional information about the checklist, with details that highlight the purpose or contents. You can also provide extra context or guidance to anyone using the checklist in this field.
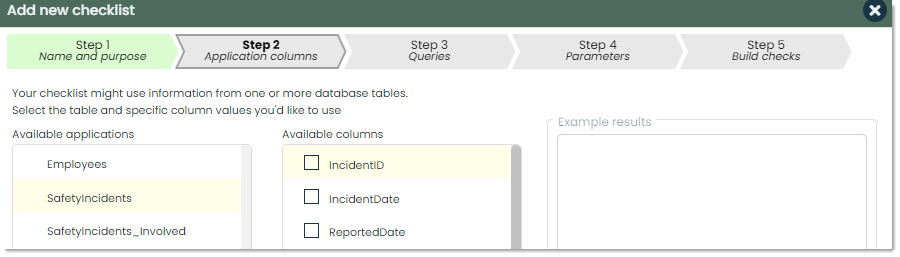
Step 2 : Application columns
Available applications – During the creation of your checklists, you may want to include data from specific data tables within your organization. You can select an available table from your organization within the Available applications field. This gives you the opportunity to integrate relevant data or information from these tables directly into the checklist.
Available columns – Within the Available columns field, you can specify and choose from the columns present in the selected data table. This customization enables the incorporation of relevant details and ensures that only necessary information that you need is presented in the checklist.
Example results – In Example results, you can view a preview of the data that will be imported from your select data table and columns.
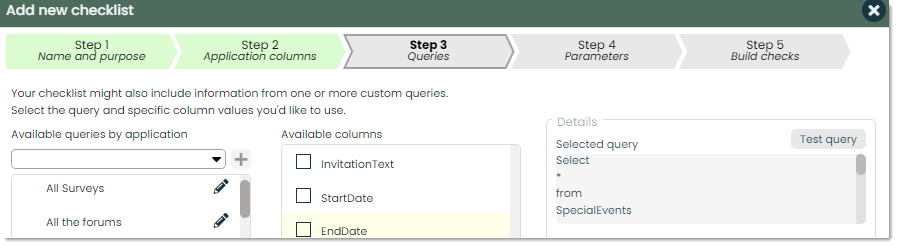
Step 3: Queries
Available queries by application –Within your checklists, you can incorporate custom queries to bring up specific information. You can select from a list of queries or incorporate your own within the Available queries by application field. Your checklist might include information from one or more custom queries, involving one or more columns from different data tables.
Available columns – Similar to step 2, you can select the available columns from your selected database tables. However, in this step, it’s possible to select columns from multiple tables, giving you a fully customized experience when importing data into your checklists.
Details –In Details, you can view the query required to grab the data from your selected data tables and columns. Within this field, you can test your selected queries with the Test query button. This button will run the query on your selected data tables and columns to provide you a preview of the information returned.
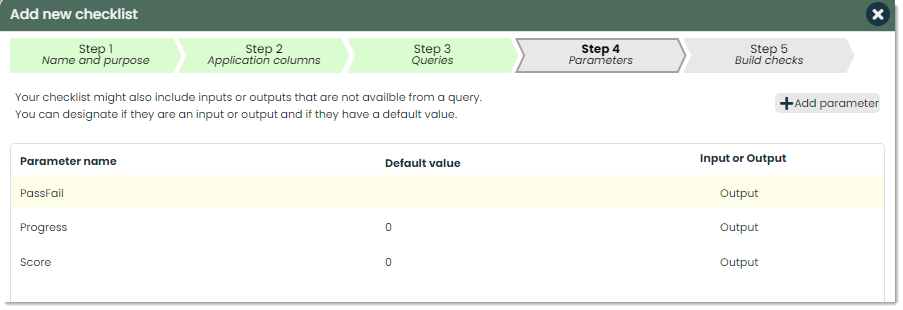
Step 4: Parameters
Parameter name – Your checklists can also include inputs or outputs that are not directly available from a customized query. In your checklists, parameters can cover more than just direct inputs and outputs from custom queries. The Parameter name
servers as a unique label for variables and values in your checklists.
Default value – Default value refers to the value of the parameter before it has been put into your checklist. The Default value is defined as the preset value a parameter holds before any specific value is assigned. This default ensures a standard when no specific input or output is defined.
Input or Output – In Input or Output, you can define whether your specified parameter is designated to be an input or output.
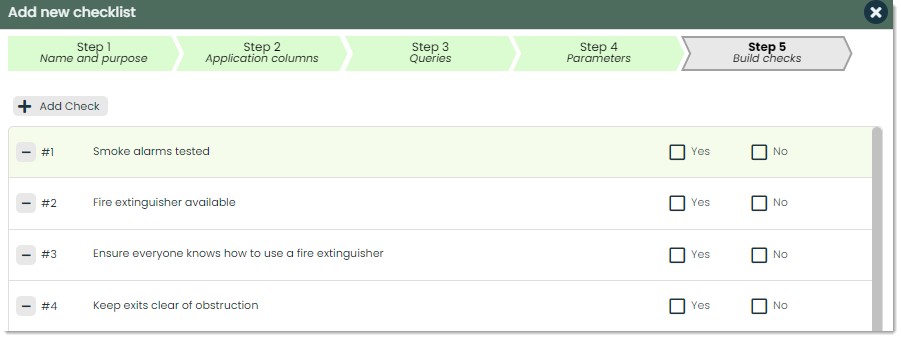
Step 5: Build Checks
Add check – During the final step of creating your checklist, you can add the content and checks of your list. Within Step 5, you can press the +Add Check button, which will prompt you with the Build Checks popup. In this window, you can start providing the details and create the styles for your checklist. Let’s go over some of the customization options you can select from before submitting your checks.
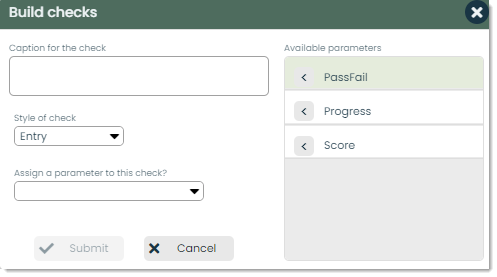
Caption – In Caption you can define the question or details of the check.
Style – You can tailor the appearance and functionality of the check you’re creating to suit your preferences. Depending on the nature of the check, you may need a longer reply or opt for a straightforward yes or no answer. Let’s explore the different formats available.
Button: Assign a button that performs a specific action. This option is suitable for scenarios where you need a single click to trigger a function.
Entry: You can use the Entry option, which provides you with text boxes in your check. This is the ideal field to use when requiring a text input or a detailed explanation.
YesNo: A YesNo field is perfect for when you require a yes or no response for a check. This often simplifies the process of a check and avoids lengthy responses.
Ok: You can use this style to request a response to confirm that the check was read.
Choice: Prompt users of the checklist to pick from a group of different choices. This style is valuable when there is no single response expected from a check.
Assign a parameter – This is where you can assign your previously created parameters to your check.
Available parameters – In Available parameters, you can view a list of your parameters and click on them directly to add them to the check.
List of checks –As you add checks to your checklist, you can view them within the list of checks displayed within Step 5 of the Add new checklist popup.
Adding a checklist to a record
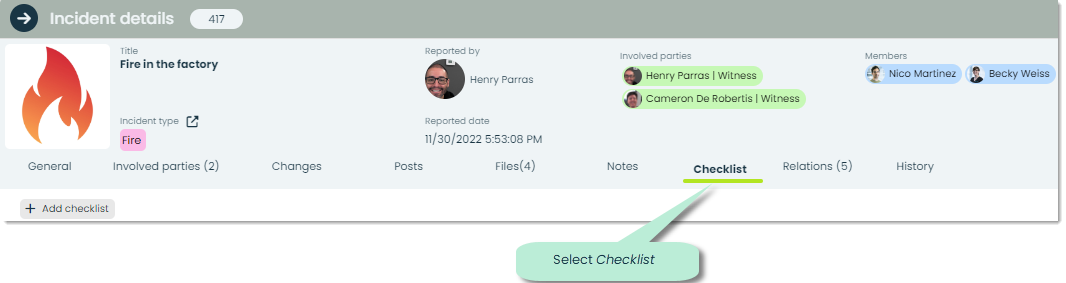
Let’s add the checklist we just created to a record in another app. A great example of where checklists are often used is the Safety Incidents app.
The first step of adding a checklist to a record is navigating to the frontline of a record and selecting the Checklist tab.
Next, press the +Add checklist button.

This will trigger the Select checklist popup to appear. Let’s go over how to navigate this popup.
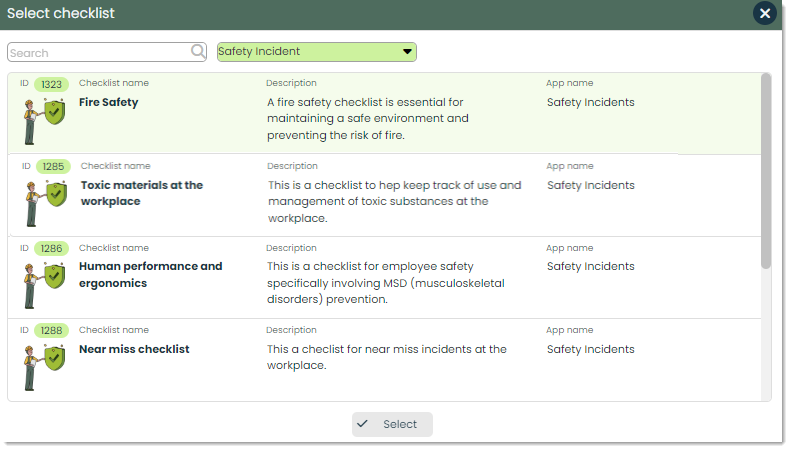
Search – Using the search bar, you can filter through your organization’s list of checklists.

Object – Additionally, you can filter the list by the name of the object. The object generally refers to the singular version of the app name. As an example, in the Safety Incidents app, the object you would filter this list by is Safety Incident.

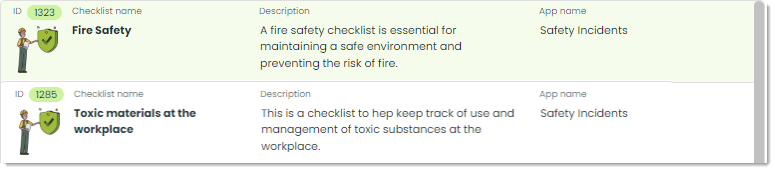
List of checklists – A list that is filtered based on what object you filter by or what you search for.
Select – After you have made your decision on which checklist to add to the record, you can press the Select button to confirm your selection.

You will then see your newly added checklist in the within the Checklists tab.
How to start and finish a checklist
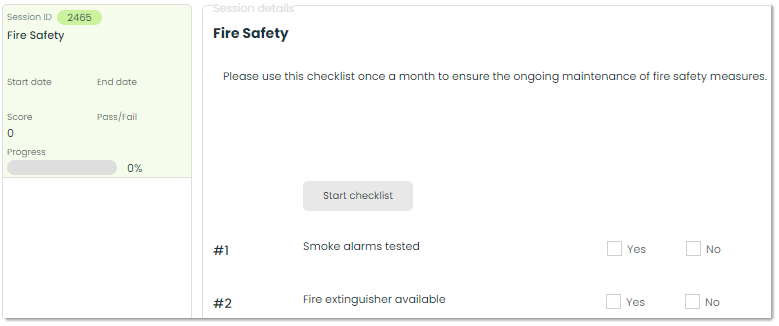
To use a checklist you have added to a record, navigate to the Checklists tab and press the Start checklist button.

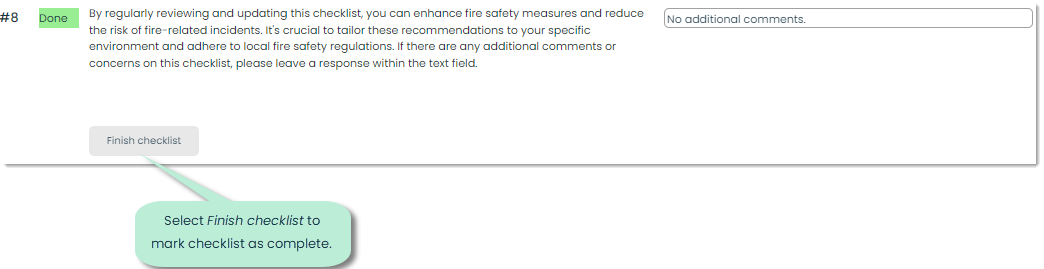
When you are done with the required checks in your checklist, you can mark the checklist as complete by pressing the Finish checklist button.
After you have marked your checklist as complete, you’ll see a note at the top indicating who completed the checklist and when it was completed.
