Table of contents
Getting Started with Checklist Creator
Thursday January 4, 2024-16 min readIntroduction
Managing multistep processes across your business can be difficult, especially when you need to maintain consistency and ensure tasks are being completed correctly. When steps are missed or not signed off on correctly, vital elements can be overlooked, and more time is wasted in following up or revisiting specified tasks. Checklist Creator gives you the power to keep your business organized by generating tailored lists that are clear and actionable. Create and utilize checklists throughout the Appward ecosystem to streamline operations and promote efficiency.
Let’s get started
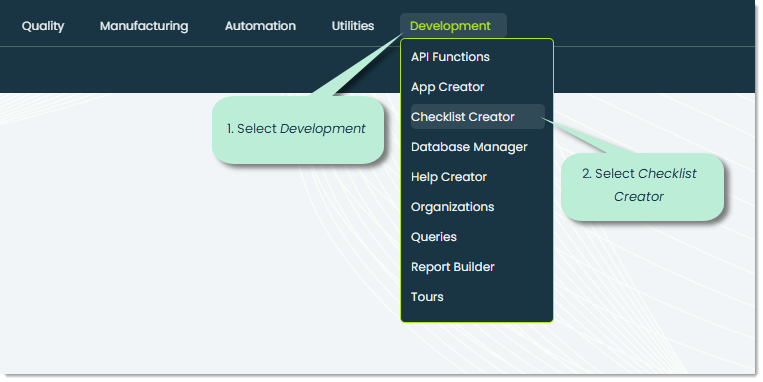
To open the Checklist Creator app, go to the Development category and select Checklist Creator.
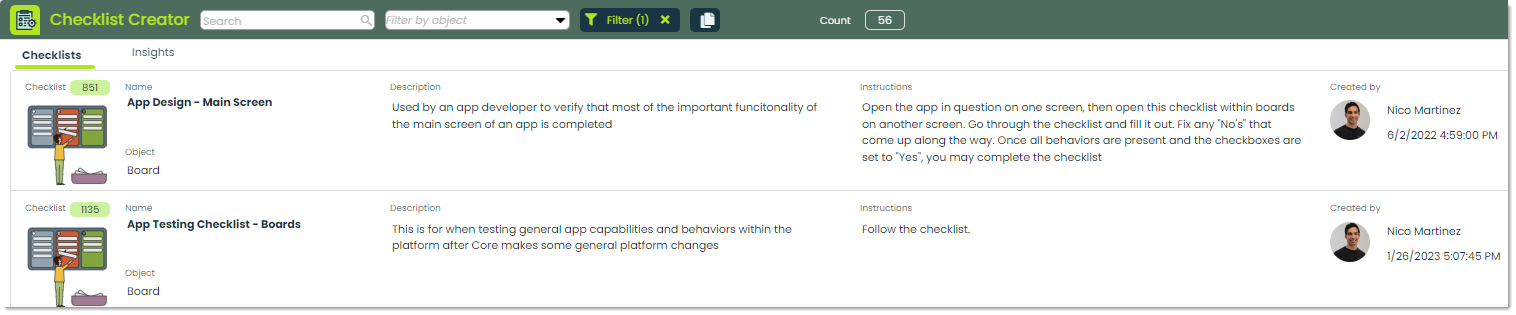
When you first open the app, you’ll see a list of checklists created by members of your organization.
At the top of the app screen, you’ll notice two tabs. Let’s briefly highlight them now.
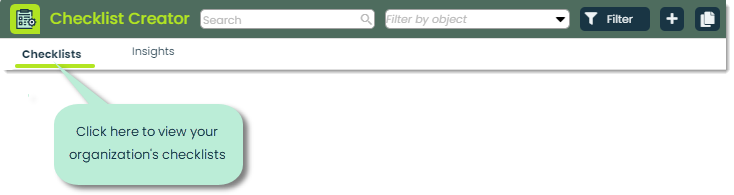
Checklists – The initial view upon accessing the application is the Checklists tab, which serves as the default landing page. In this tab, you will find a comprehensive display of all the checklists that have been created by your organization. It functions as a centralized hub where the key details of each checklist are readily accessible.

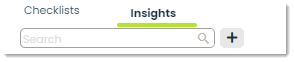
Insights – In the Insights tab, you can analyze collected data from your organization’s checklists. Valuable information related to checklist status, responses, or type of checklist can be learned and uncovered using insights. For more on Insights, please check out our
Getting Started with Insights Guide.
Note: If this is your organization’s first time using the Checklist Creator app, these tabs will be empty.
How to add a new checklist
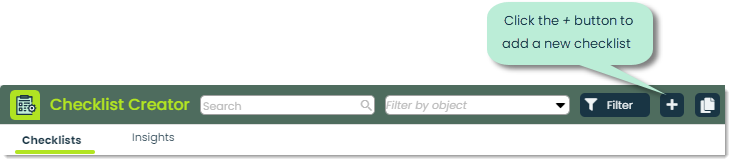
To add a new checklist, click the + button at the top of the app screen.
This will bring up the Add Checklist popup, where you can go through the five main steps of creating a new checklist. Let’s go over the process.
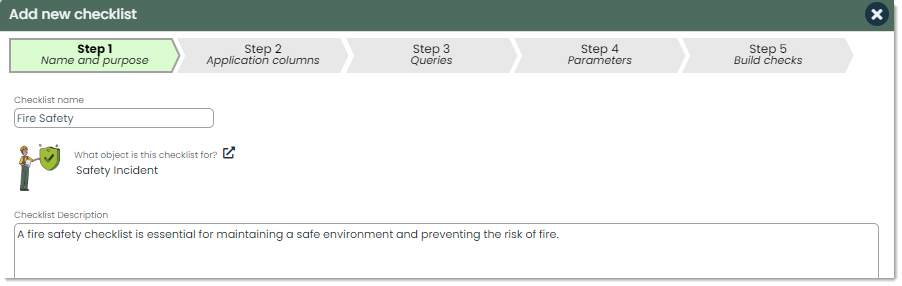
Step 1 : Name and Purpose
Checklist name – The Checklist name refers to the specific title or name that you can assign to a checklist. It serves as a distinctive identifier for the checklist, helping your organization easily recognize and categorize it.
Checklist object – You can define the specific object this checklist will belong to within the What object is this checklist for field. Simply click the external link icon to bring up a popup where you can select from a list of your organization’s objects. If your organization is new to Appward, then this window will be empty until you create objects.
Description – In Description, you can provide additional information about the checklist, with details that highlight the purpose or contents. You can also provide extra context or guidance to anyone using the checklist in this field.
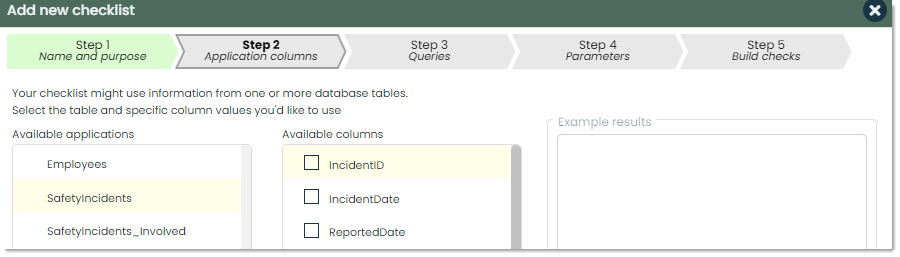
Step 2 : Application columns
Available applications – During the creation of your checklists, you may want to include data from specific data tables within your organization. You can select an available table from your organization within the Available applications field. This gives you the opportunity to integrate relevant data or information from these tables directly into the checklist.
Available columns – Within the Available columns field, you can specify and choose from the columns present in the selected data table. This customization enables the incorporation of relevant details and ensures that only necessary information that you need is presented in the checklist.
Example results – In Example results, you can view a preview of the data that will be imported from your select data table and columns.
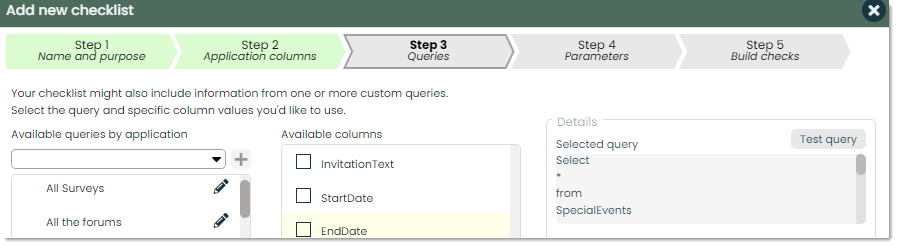
Step 3 : Queries
Available queries by application – Within your checklists, you can incorporate custom queries to bring up specific information. You can select from a list of queries or incorporate your own within the Available queries by application field. Your checklist might include information from one or more custom queries, involving one or more columns from different data tables.
Available columns – Similar to step 2, you can select the available columns from your selected database tables. However, in this step, it’s possible to select columns from multiple tables, giving you a fully customized experience when importing data into your checklists.
Details – In Details, you can view the query required to grab the data from your selected data tables and columns. Within this field, you can test your selected queries with the Test query button. This button will run the query on your selected data tables and columns to provide you a preview of the information returned.
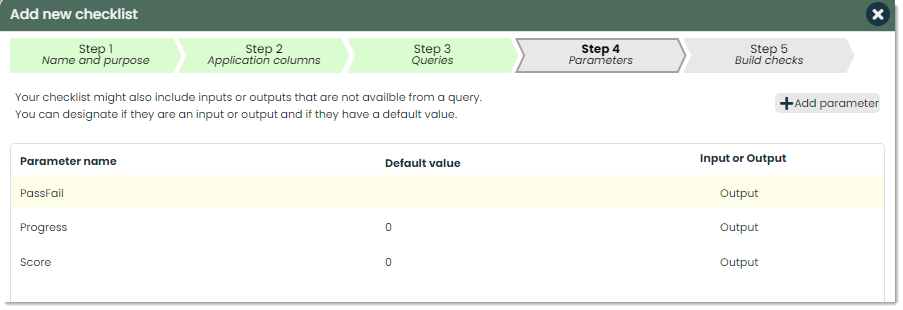
Step 4 : Parameters
Parameter name – Your checklists can also include inputs or outputs that are not directly available from a customized query. In your checklists, parameters can cover more than just direct inputs and outputs from custom queries. The Parameter name servers as a unique label for variables and values in your checklists.
Default value – Default value refers to the value of the parameter before it has been put into your checklist. The Default value is defined as the preset value a parameter holds before any specific value is assigned. This default ensures a standard when no specific input or output is defined.
Input or Output – In Input or Output, you can define whether your specified parameter is designated to be an input or output.
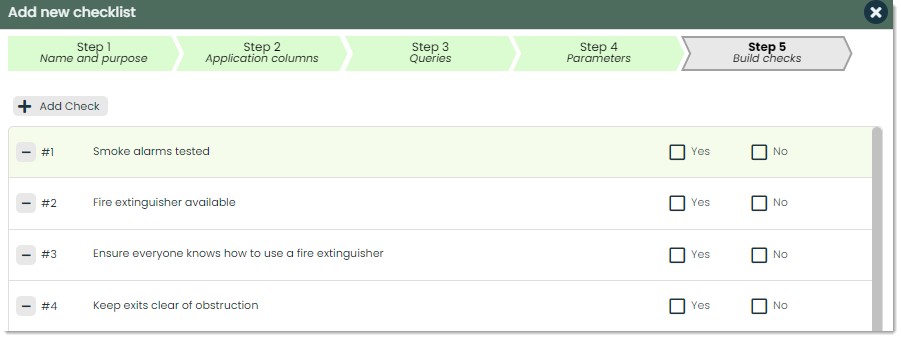
Step 5 : Build Checks
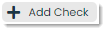
Add check – During the final step of creating your checklist, you can add the content and checks of your list. Within Step 5, you can press the +Add Check button, which will prompt you with the Build Checks popup. In this window, you can start providing the details and create the styles for your checklist. Let’s go over some of the customization options you can select from before submitting your checks.
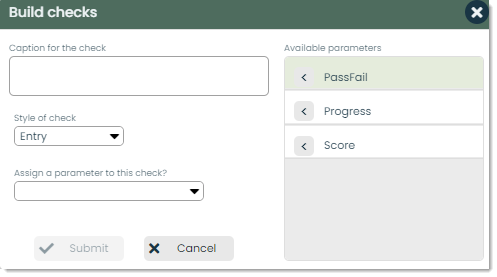
Caption – In Caption you can define the question or details of the check.
Style – You can tailor the appearance and functionality of the check you’re creating to suit your preferences. Depending on the nature of the check, you may need a longer reply or opt for a straightforward yes or no answer. Let’s explore the different formats available.
Button: Assign a button that performs a specific action. This option is suitable for scenarios where you need a single click to trigger a function.
Entry: You can use the Entry option, which provides you with text boxes in your check. This is the ideal field to use when requiring a text input or a detailed explanation.
YesNo: A YesNo field is perfect for when you require a yes or no response for a check. This often simplifies the process of a check and avoids lengthy responses.
Ok: You can use this style to request a response to confirm that the check was read.
Choice: Prompt users of the checklist to pick from a group of different choices. This style is valuable when there is no single response expected from a check.
Assign a parameter – This is where you can assign your previously created parameters to your check.
Available parameters – In Available parameters, you can view a list of your parameters and click on them directly to add them to the check.
List of checks – As you add checks to your checklist, you can view them within the list of checks displayed within Step 5 of the Add new checklist popup.
Viewing the details of a checklist
To view a checklist, navigate to the main Checklist tab of the app.
You’ll then see a list of your organization’s checklists, which is the same screen you’re shown when you first open the app.

To view the details of a checklist, simply click on the row of the record you wish to view.

Upon clicking on a record, you’ll be shown its details flyout. Let’s go over what’s available in that view.
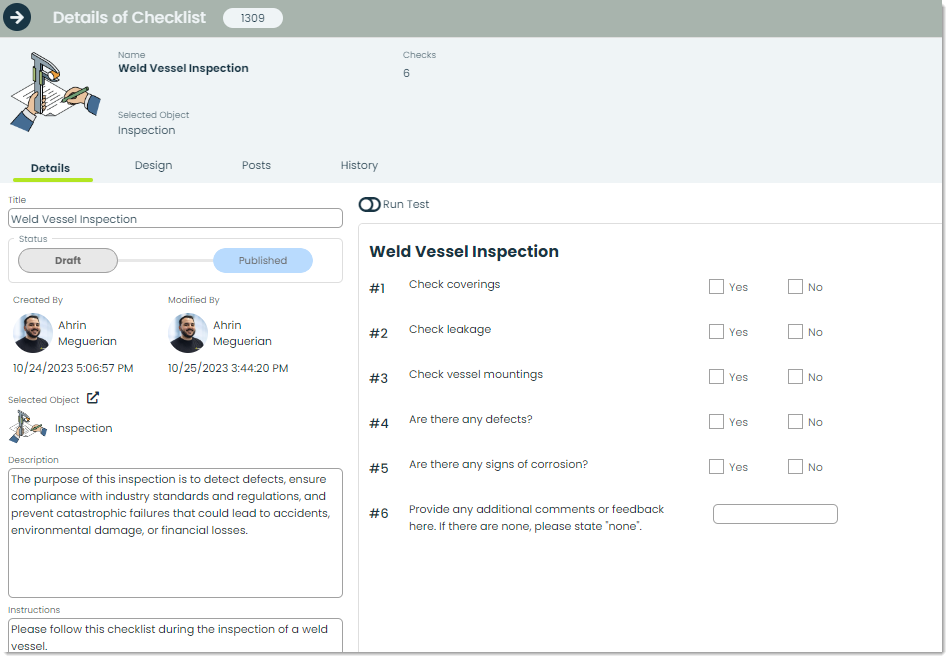
Title – This is where you can define the title of your checklist.
Status – During the creation of your checklists, you can have them in one of two stages.

Draft: In Draft, the checklist is still being worked on and not ready to be published to people in your organization.
Published: When a checklist is Published, it is available for anyone in your organization to use throughout many of applications within Appward.
Created by – In Created By you can see the name and photo of the contact who created the checklist. Additionally, you are shown the exact date and time of when the checklist was published to your organization.
Modified by – After a checklist has been published, those who have access to editing privileges can modify the checklist if required to do so. In Modified By, you can view the details about who modified the checklist and when they did it.
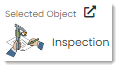
Selected object – You can select the specific object associated with the checklist by selecting the external link icon within Selected Object and picking the desired object from a list. Checklists are generally associated with specific apps or records.
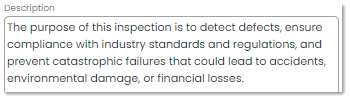
Description – In Description, you can provide a detailed description of the checklist’s purpose, content, or any relevant information to enhance understanding.
Instruction – In Instruction, you can include specific instructions related to the checklist. This could include step-by-step guidelines or additional information to ensure proper execution.

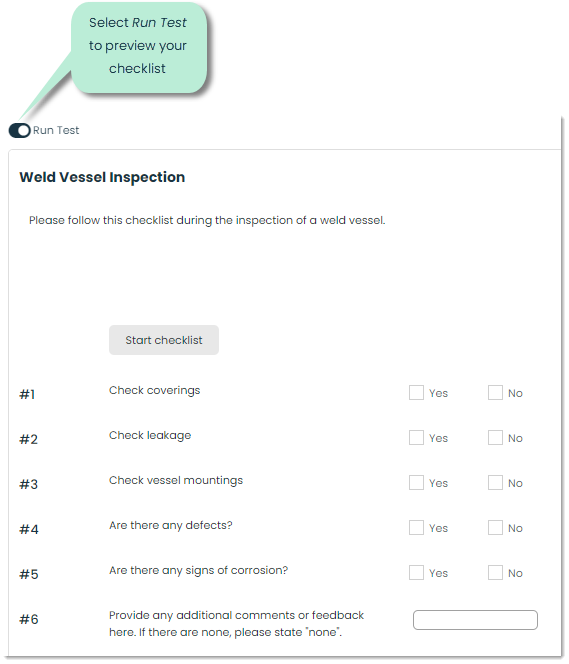
You can use the Run test button to preview the checklist from the user’s point of view. This gives you the opportunity to test every feature of your checklist to make sure it’s ready to be public.
How to design checklists
To design a checklist, navigate to the Design tab within the details flyout of a checklist.
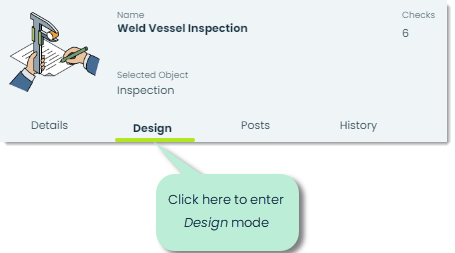
This will show you a similar screen as the Details tab, however it will put your checklist in design mode. Let’s go over the different ways you can customize the design of your checklists.
Resizing – Simply drag either the right side or the bottom of the caption field to expand or shrink its proportions to your preferences. This is especially useful when a question within your checklist is unusually long and requires additional space compared to the other steps included.
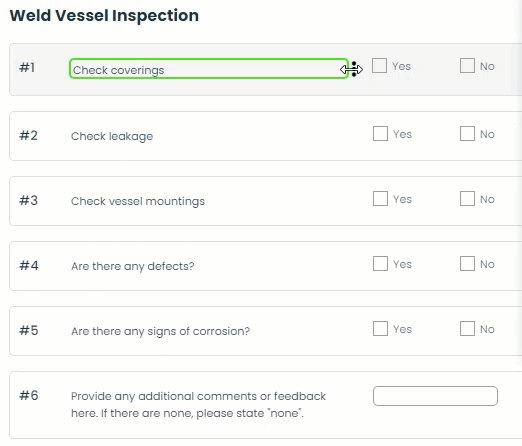
Check settings – You can press the cog icon located on the right side of each individual step to bring up a menu where you can customize or change the design of that specific check.
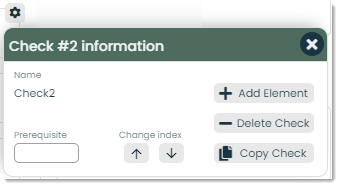
Name: The name of your check.
Prerequisite: In Prerequisite, you can define any prerequisite steps necessary for the completion of this step.
Change index: Easily adjust the order or position of the check within the checklist with the Change index button. This ensures your checklist can be updated in the future and is always ready when needed.
Add Element: With Add Element, you can add new checkboxes, text fields, or buttons to an existing check. This feature is especially helpful as a checklist grows in size and requires additional checks at each step.
Delete Check: To delete a check, simply click on the Delete Check button. This will remove the check from its spot in the checklist and renumber the remaining steps.
Copy Check: To copy a step you can press the Copy Check button which will create a new step with identical details. This feature is incredibly useful when creating a checklist that consists of steps that all follow the same structure.
Frontline Features of Checklist Creator
Posts – A post is a comment which can be replied and reacted to by other users in your organization. You can write a post to ask questions or remind a colleague about a revision that needs to be made to a checklist.

History – You can monitor changes and updates made to a checklist through the History tab. Within this tab you can track the changes made, date of change, and the individual responsible for making the change. Additional search filters can be applied to narrow down the displayed list of activities. You can sort by time of activity, name, and even search by specific keywords.

Additional features of Checklist Creator
Help – Look for the help button in most of the apps in Appward. This resource offers insightful tours and information collected specifically to guide you through the app’s functionalities. Interactive, step-by-step tours are designed to give you the foundation to start using all the robust features within Appward.

Archive – Archiving is a common feature within the majority of apps in Appward. Archive serves as an effective tool when you wish to remove a record from sight without permanently deleting it. Archived records are essentially concealed from the main screen but remain accessible through specific search filters.