Table of contents
Getting Started with Special Events Director
Wednesday February 21, 2024-18 min readIntroduction
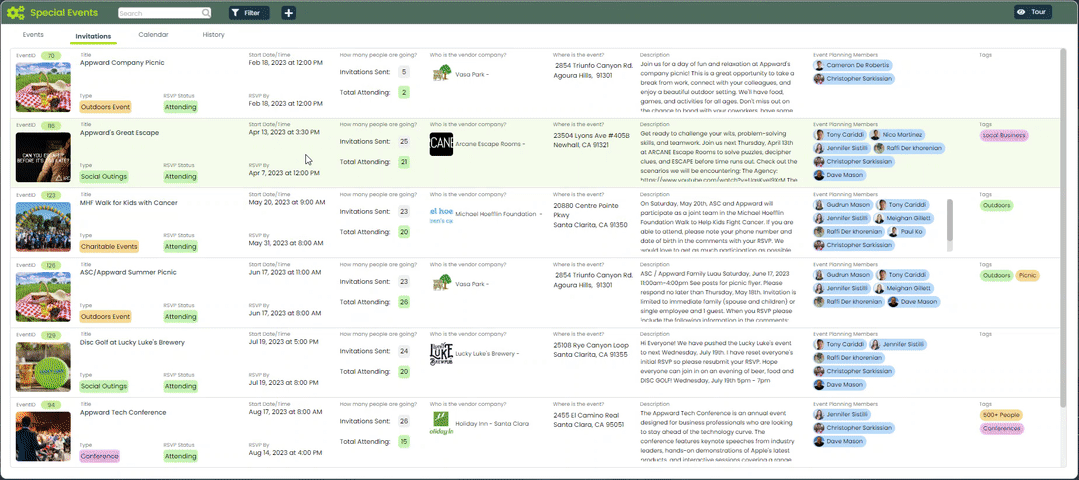
Special Events Director is a companion app to Special Events. It is used to create and manage organized events such as conferences, summits and parties. In this guide, we’ll cover how to add, view and manage every detail of your events.
Let’s get started
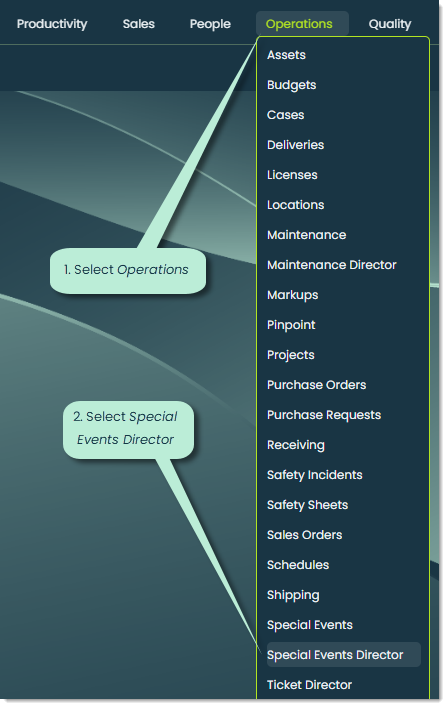
To open Special Events Director, go to the Operations section of the main navigation bar and select Special Events Director from the dropdown.
When you open the app, you’ll see a screen that looks similar to the following.
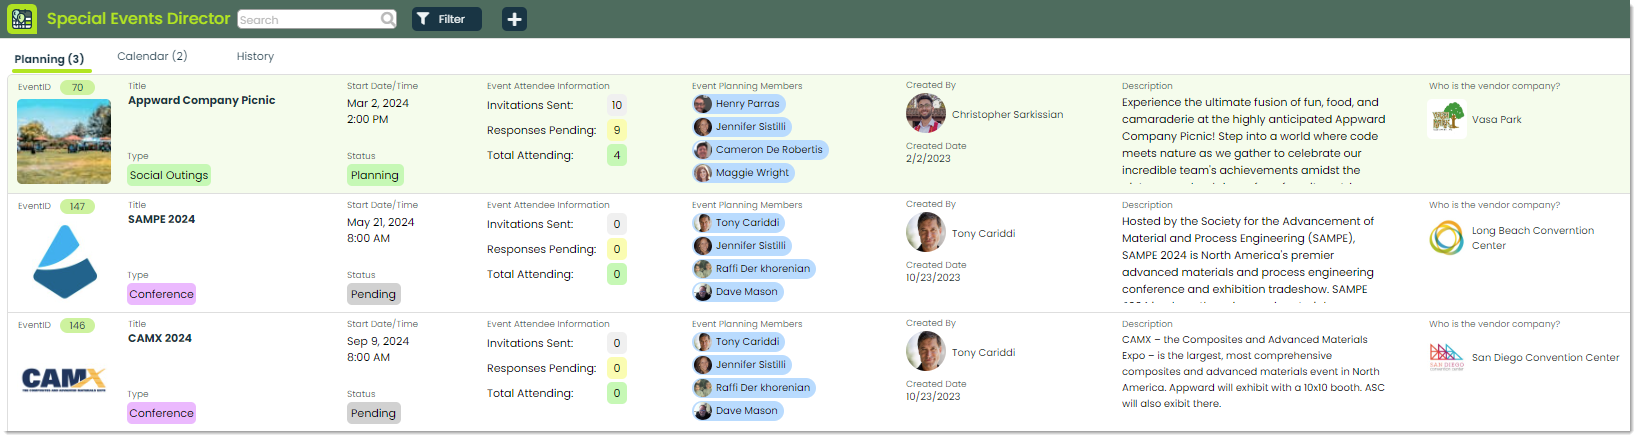
These are the main tabs and their purposes.
- Planning – This tab contains all events for which you are a planning member. You can control the different details of events from this tab.
- Calendar – This tab provides a calendar view of events.
- History – This tab provides a detailed log of the changes made to any special events. This is useful for tracking who made edits to specific events.
How to add an event
To add a new event, click the + button at the top of the main screen.

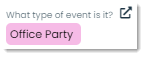
First, select the type of event from the following popup.

Then, enter the details of the event in the next popup.
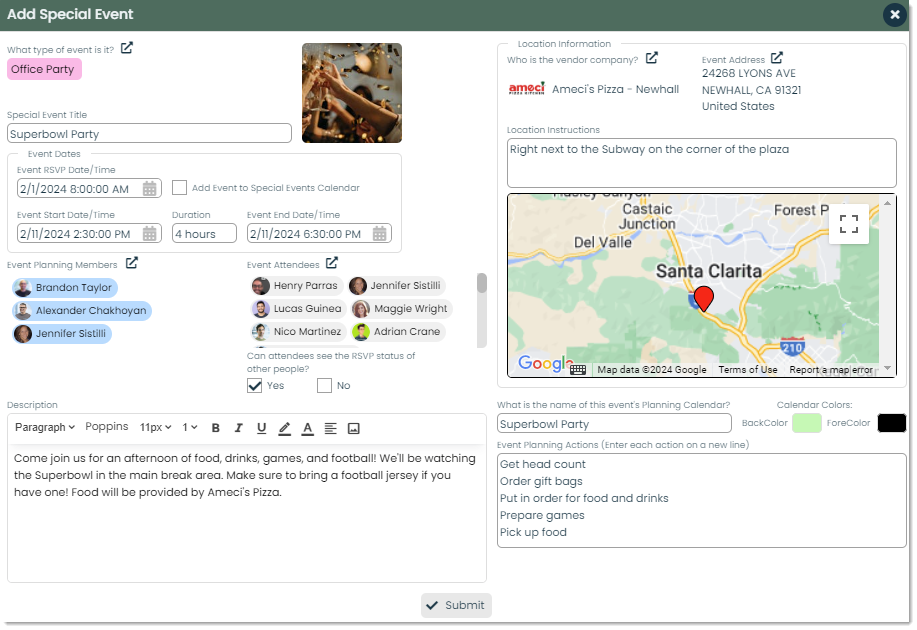
Let’s cover each of the fields of this screen.
Type – You can categorize your event by indicating an event type. You can add a primary category, defined by you or your organization, that this event falls under. This is a great way to organize your events into singular, distinct categories.
Title – This is the name of the event.

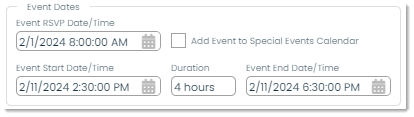
Event dates – Here, you can indicate when invitees should RSVP by, as well as when the event starts and ends. Additionally, you can add the event to the Special Events Calendar which is a calendar used to hold events from the Special Events app.
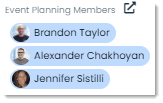
Event planning members – These people will have access to the decision-making of the event. They can view the event in the Planning tab before any invitations are sent out, and they can control the different details of the event planning process.
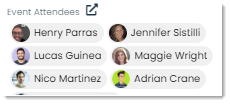
Event attendees – This is the list of all people that you want to send an invite to.
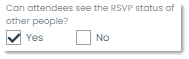
RSVP viewing access – You can control whether or not you’d like the invitees to be able to see who else has RSVP’d.
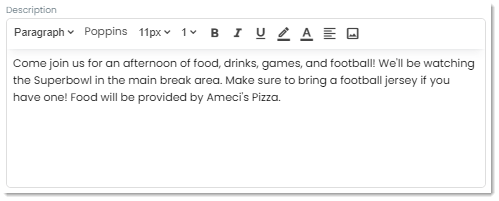
Description – You can add a description of the event here.
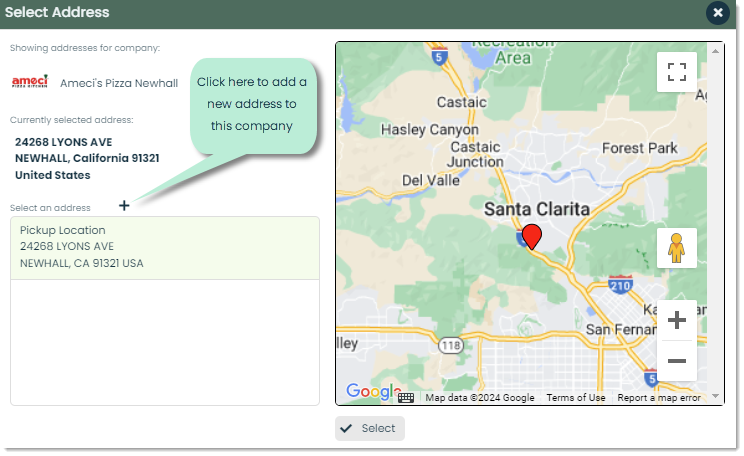
Location information – If it applies, you can link the vendor company of the event as well as the event address.
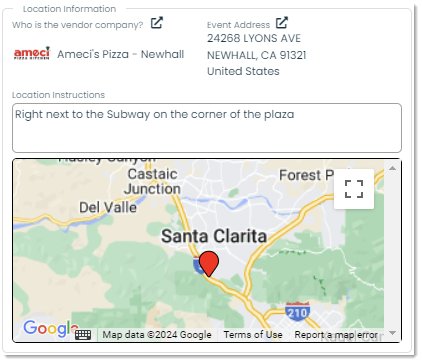
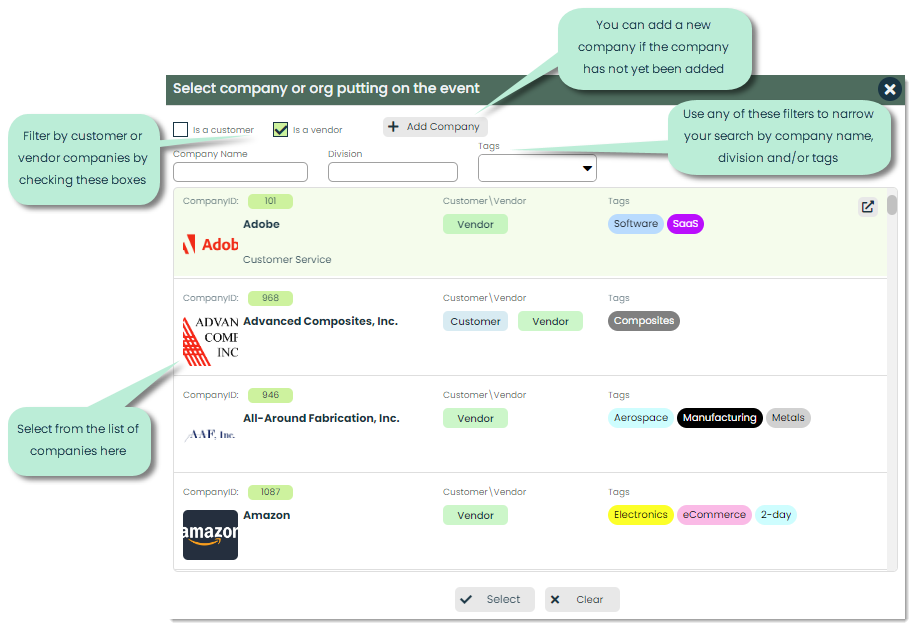
When you click the link icon next to Who is the vendor company?, you’ll get a popup of all the companies from your Companies app.
If the selected company has an address, that will be used as the event address. If you want to add a new address, you can click the link icon next to Event Address to link a new address to that company.
Planning Calendar – When you create an event, you a new calendar specifically for that event is created. Here, you can name that calendar as well as choose the colors of it. You can then access the calendar via the Calendar tab or the Calendars app.

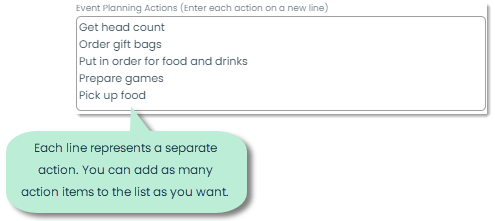
Planning Actions – These are the action items related to the event. Each new line represents a separate action item. You can add as many action items as is required for the event’s success.
Once you’ve added all the details of the event, click Submit at the bottom to add the new event record.
How to find, view and edit the details of an event
Finding
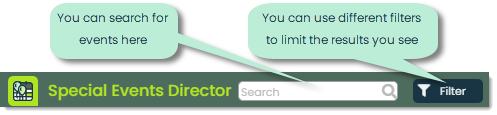
To make finding records easier, Appward provides searching and filtering options to help you quickly find what you need. These features can be found at the top of the app.
For Special Events Director, you can search by any of the following criteria:
- Event ID
- Title
- Description
- Event creator’s name
- Event company name
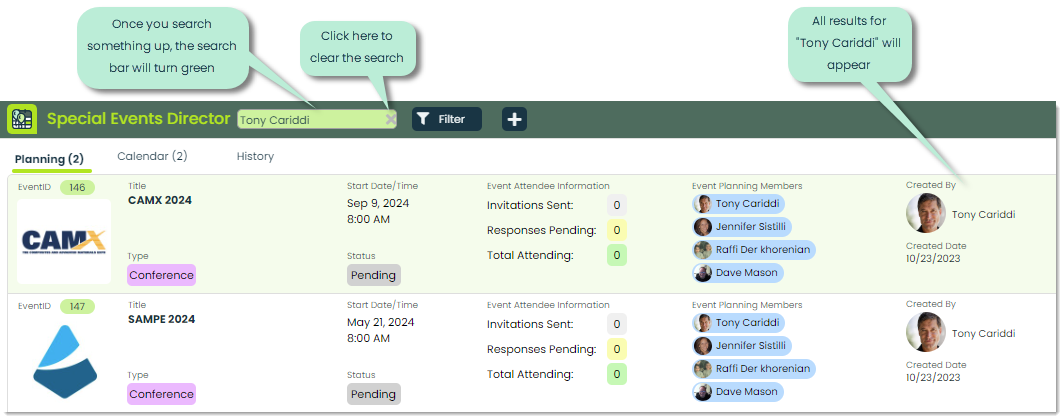
After you type something in the search bar, press Enter to search.
Additionally, you can use advanced searches, another powerful feature for finding exactly the information you want. Advanced searches use a format of “Field=Value” like the following example.
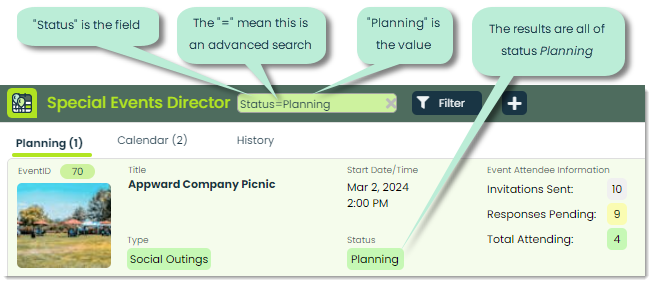
With Special Events Director, you can use the following keywords for your advanced searches. We’ve provided some examples as well.
- EventID or ID (eventid=356)
- Title (title=superbowl)
- Description or Desc (desc=football jersey)
- Type or T (type=social outings)
- Status or S (s=planning)
Note: Searches are NOT case sensitive, so no need to worry about capital letters.
In addition to searches, you can choose from the following filters to narrow results by clicking the Filter button.

You can use a combination of searching and filters to get the exact results you’re looking for.
Viewing and editing
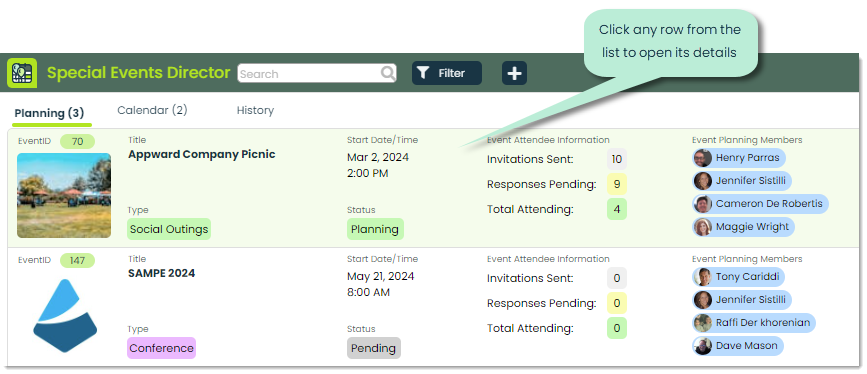
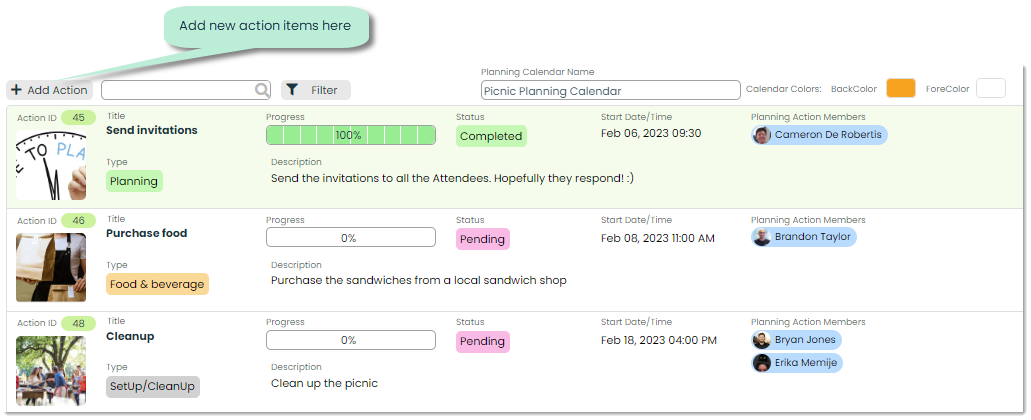
Once an event has been added, you can view and/or modify the details of that event by clicking one from the main list. Inside the Planning tab, you can find the event from the list and click its row.
Doing so will open a separate window which looks similar to the image below.
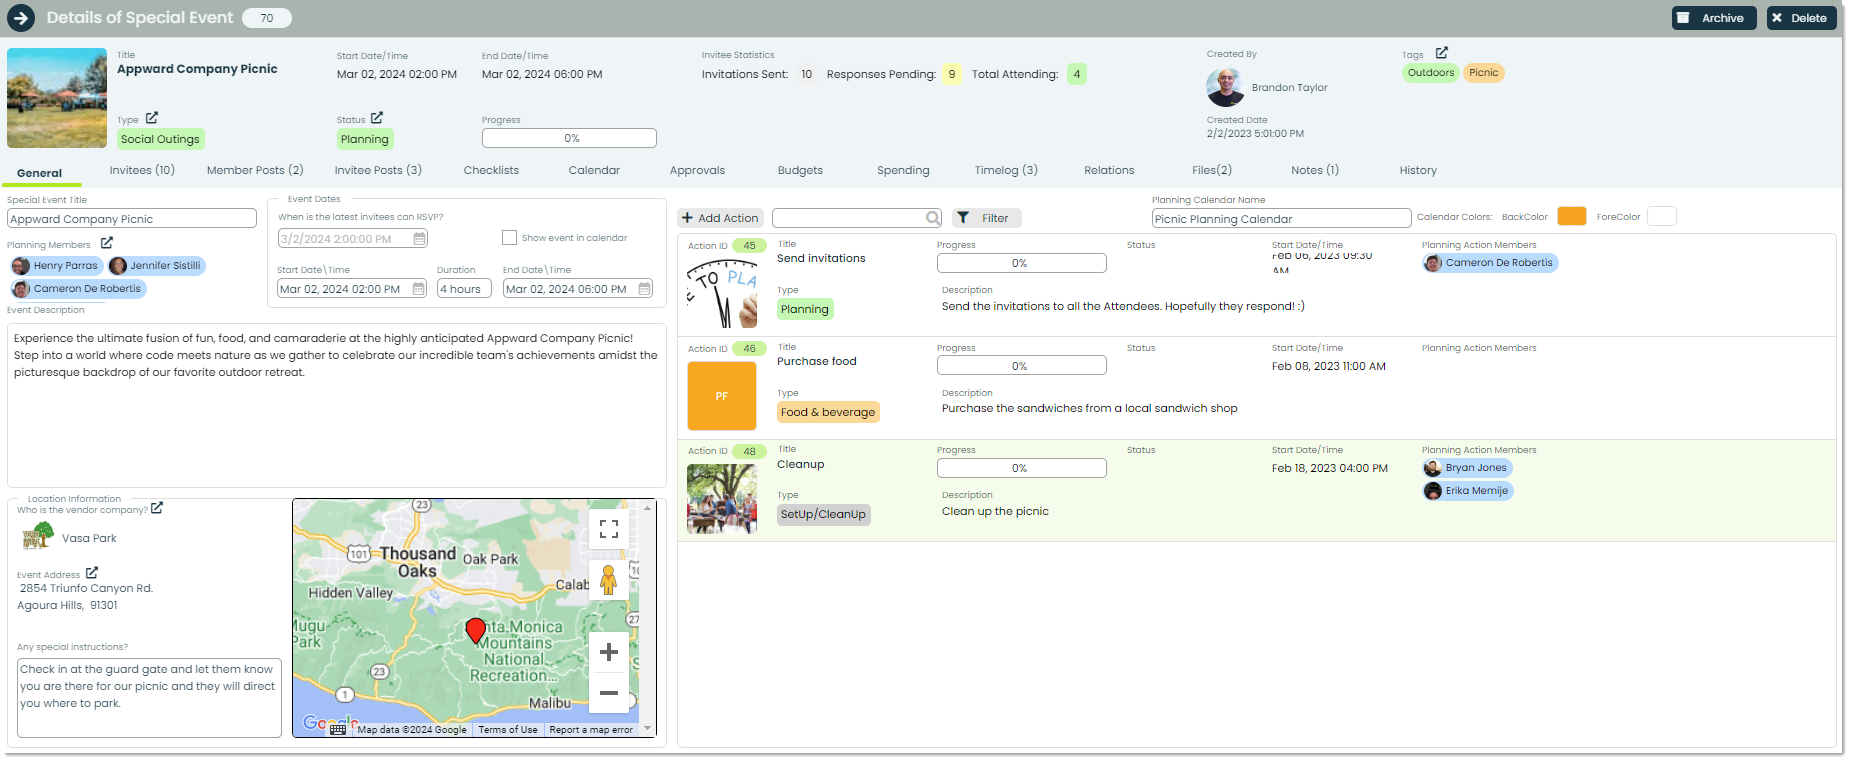
From this screen, you are able to view all the details of the event. Also, given that you are the creator or a planning member of the event, you can make any edits to any of the existing information. Any changes will get automatically saved.
Here are some additional features of the details screen.
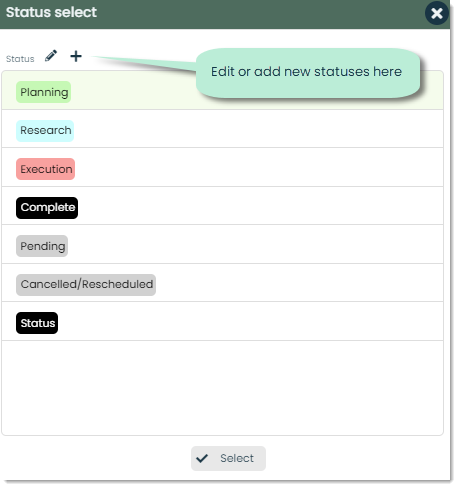
Status – As you make progress on the event, you can adjust its status or current state of the event lifecycle. Appward provides a default list of statuses, but you can add your own for what makes sense to your event-planning workflow.

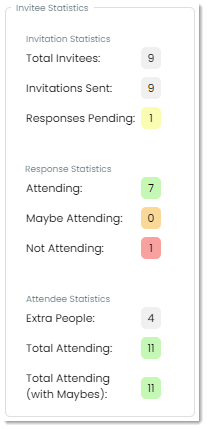
Invitation Statistics – Here, you can get an idea of the invitations and responses. Note: The number of invitations sent will not necessarily equal the Responses Pending and Total Attending values combined. Guests and +1’s count toward the Total Attending field.

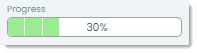
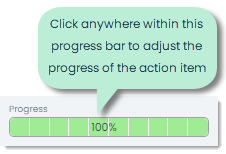
Progress – You can track the progress of the event with this progress bar. This links to your list of action items for the event and will automatically increase as action items are completed. You can also manually adjust this bar by clicking to the proper percentage.
How to complete event action items
Within the details page of an event, the action items for that event will appear on the right side.
For each item, you can keep track and adjust the progress of each action item by clicking on it from the list. Here’s an example of clicking on the first item from the list.
Similar to the details of an event, you can view and edit the details of this action item given that you are a planning member of the event. The progress bar of an action item can be moved in one of three ways:
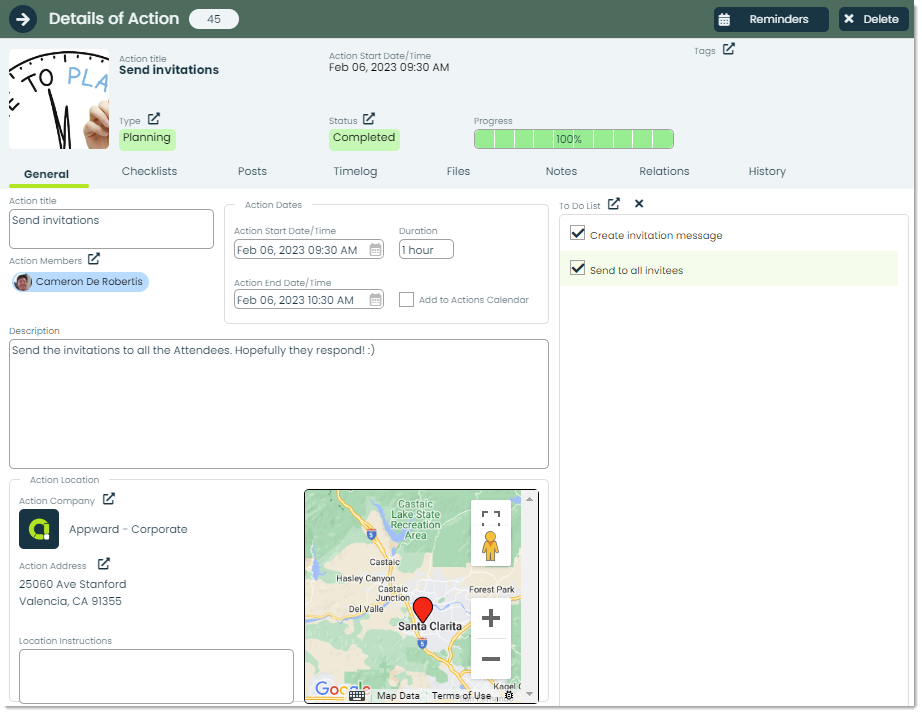
1. To Do List
Under the To Do List section, you can add tasks. As you complete them, you can check the boxes and the progress bar will move proportional to the total number of tasks. For example, if you complete one task out of a total of three, the progress of the action item will be 33%.
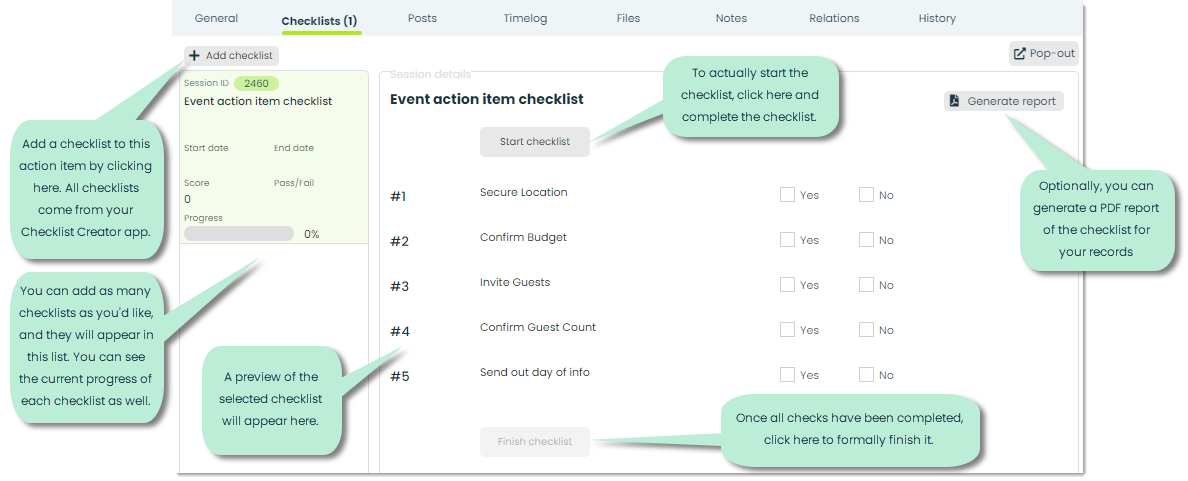
2. Checklists
Checklists are a feature that can be found in many Appward apps. They create a formal, standardized list of items to complete for any purpose you need them for. In the case of action items, these are important for making sure a standard process is followed. You can add new checklists in the Checklist Creator app. For more on how to create checklists, check out Getting Started with Checklist Creator.
3. Manually adjust the progress bar
You can simply click within the progress bar to signify that progress has been made.
Note: Each action item has a set of tabs, or Frontline Features, to give full traceability of each item. Events and action items have a similar set of features, and we’ll cover the purpose of each one in the Frontline Features of Special Events Director section.

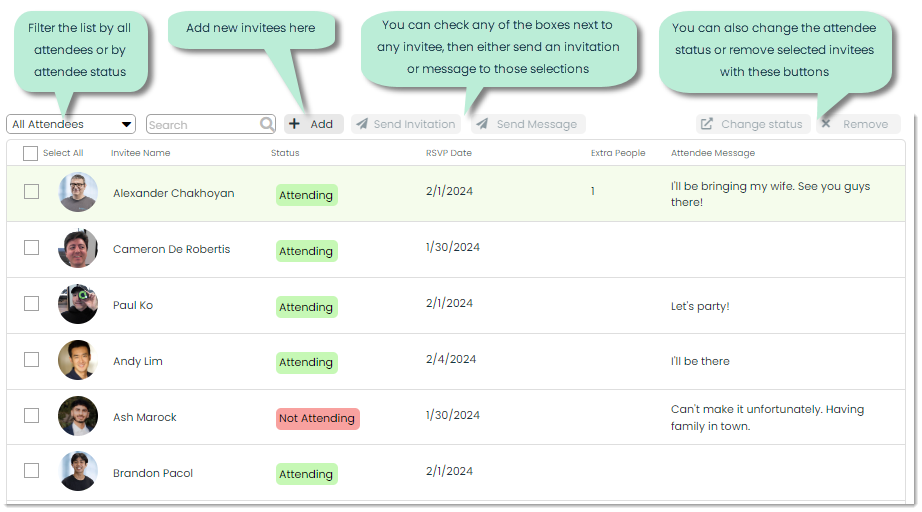
How to manage event invites
You can manage your invites and invitees via the Invitees tab within the details of an event. You can modify the invitation settings that were set up at the time of the event’s creation, as well as track and manage the responses of your invitees.
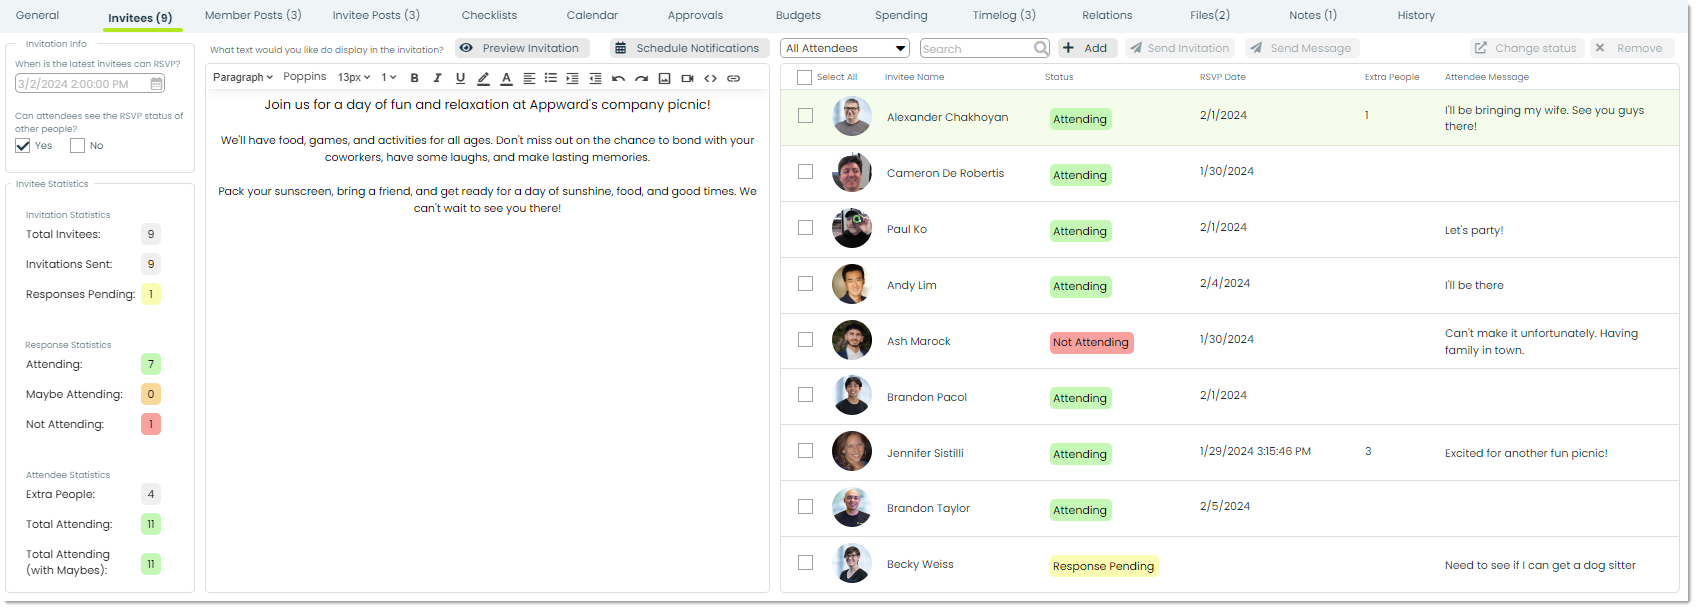
Under Invitee Statistics, you can see the exact headcounts including any extra people.
You can form the perfect invitation in the middle section.
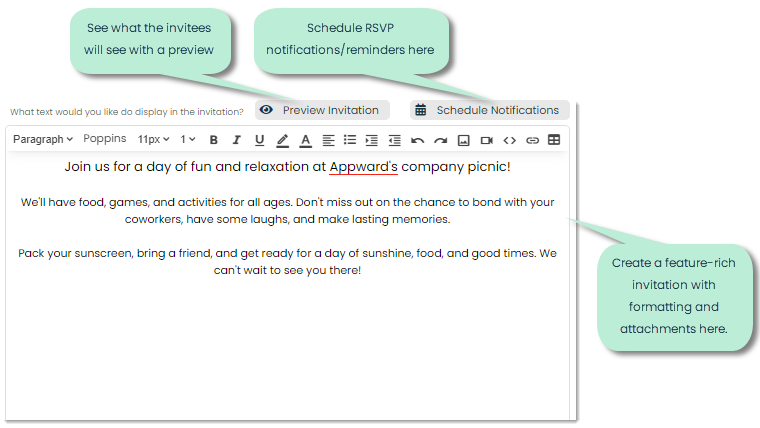
Finally, you can view the list of attendees on the right.
Frontline Features of Special Events Director

In each application, you’ll find a set of tabs which contain a practical set of features for that particular app. In the case of Special Events Director, these Frontline Features are:
- Posts (Member & Invitee)
- Checklists
- Calendar
- Approvals
- Budgets
- Spending
- Timelog
- Relations
- Files
- Notes
- History
Member/Invitee Posts – Posts act like an in-app chat log, making it easy to share updates and communicate with your coworkers about a particular event right from the app. Member Posts are specifically for planning members to communicate with one another. These posts are only visible to planning members. Invitee Posts provide a channel for invitees to communicate among each other and with the planning members. It is an entirely separate set of posts.
You can mention specific people, positions or departments by using the @ symbol followed by the name of the person, position or department. From there, the mentioned parties can jump straight to the relevant record in the app from their notifications. It keeps everything connected and in context. You can also like and reply to posts, creating a space for meaningful dialogue.
Checklists – Checklists are a method of standardizing the steps of any particular process. In the case of Special Events Director, checklists are a great tool for structuring your event management. You can add as many checklists to a Special Event as necessary, and progress on checklists added here will reflect in the progress bar of the General tab.
Calendar – In this tab, you can get a visual look at the scheduling of the event as it appears on a calendar. You can see the timeline of each action item and when each is set to take place.
Approvals – Approvals are requests that serve as a formal communication to the decision-makers of your company. They aim to add structure to the process of event proposals. You can send out approval requests from this tab with a message and expected deadline, and the requested parties will get notified that they have an approval to either reject or approve.
Budgets – With the Budgets tab, you can add in every expense and estimated cost of the Special Event, whether that’s for a product or service. You can add separate budgets for a more organized, modularized set of costs. For example, you may have a Food Budget which consists of costs several different food items, as well as an Entertainment Budget which consists of all the costs associated with the provided entertainment. This approach allows for clearer tracking and management of each aspect of your event expenditure.
Spending – While the Budgets tab is used for estimating expenses, the Spending tab is used for tracking your actual expenses.
Timelog – You can control and monitor the time it takes to set up your events with the Timelog tab. You can use the Start and Stop buttons to start and stop the timer. You can provide a description for each timed session for extra traceability, and the combined time will automatically get calculated. If there are any inconsistencies in the logged times, you can edit the durations and/or descriptions by clicking the pencil icon on the right side of any logged time.
Relations – Relations are used to create links between different pieces of data. Say, for example, you are setting up a Special Event which will involve a trip across the country. You can log all of the information of that trip in the Trips app, then link that Trip record to the Special Event through a relation. From the Relations tab, you can click the + button to form a new relation. You can identify both records based on the type of object they are (one is a Trip, one is a Special Event), then describe the relationship between the two records.
Files – In the Files tab, you can attach important documents to your Special Event records. You can add as many files as necessary and view them through the built-in document viewer. It’s a practical way to include and review relevant documents such as contracts, event plans, catering menus and anything event-related.
Notes – With the Notes tab, you can capture quick thoughts and details directly within the app, making it a handy tool for on-the-go annotations.
History – The History tab is your record-keeper for recent actions on Special Events. This feature is important for tracing back any changes as far as who made the change, when they made it and what kind of change it was.