Table of contents
Getting Started with Tickets
Monday October 2, 2023-17 min readIntroduction
Support tickets provide a structured way to report and track issues or problems you’re experiencing with a product, service, or platform. This can lead to faster and more efficient problem resolution. The Tickets app is a powerful application used to create, track and manage the progress of your support inquiries. This guide will cover how to add, view, edit and keep up to date with your tickets and the parties working on them.
Let’s get started
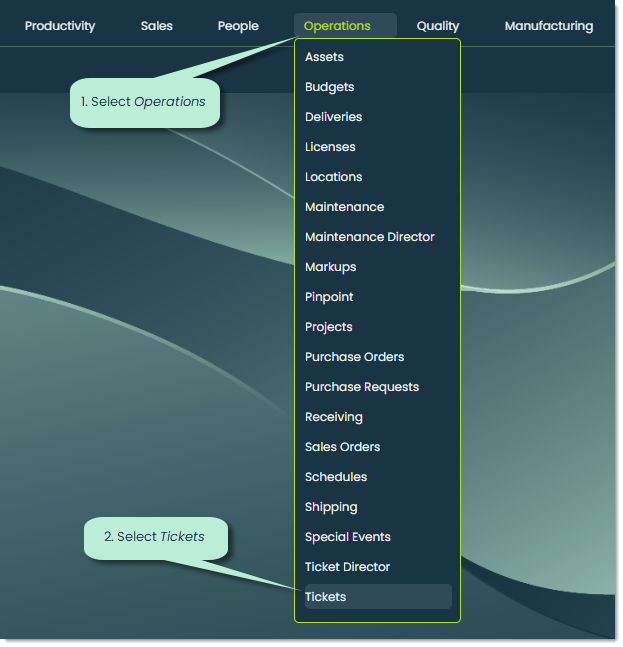
To open Tickets, go to the Operations category of the main navigation bar and select Tickets.
When you open the app, you’ll see a list of your open tickets. These are inquiries that you’ve made.
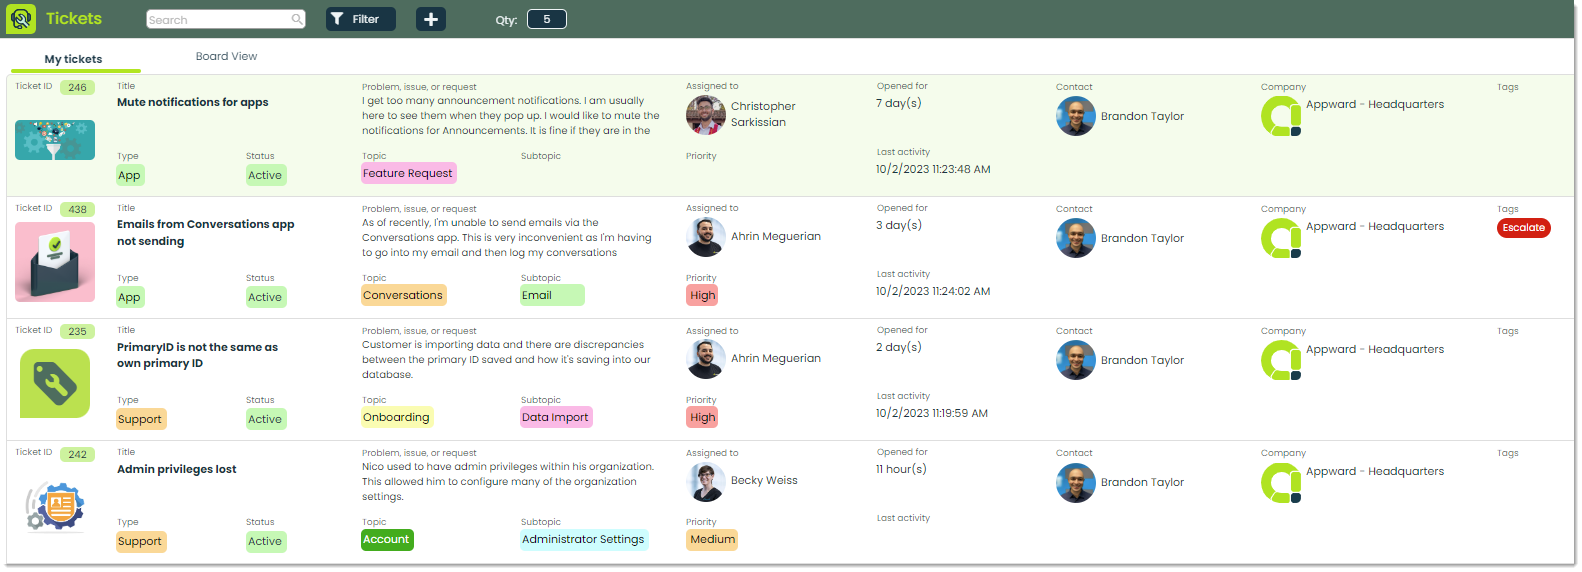
Let’s go over each tab:
1. My tickets – This tab contains all tickets for which you are the person inquiring. This means that you are requesting the assistance of an agent to manage and resolve those tickets. Tickets are sorted by priority level with higher priority tickets showing up first.
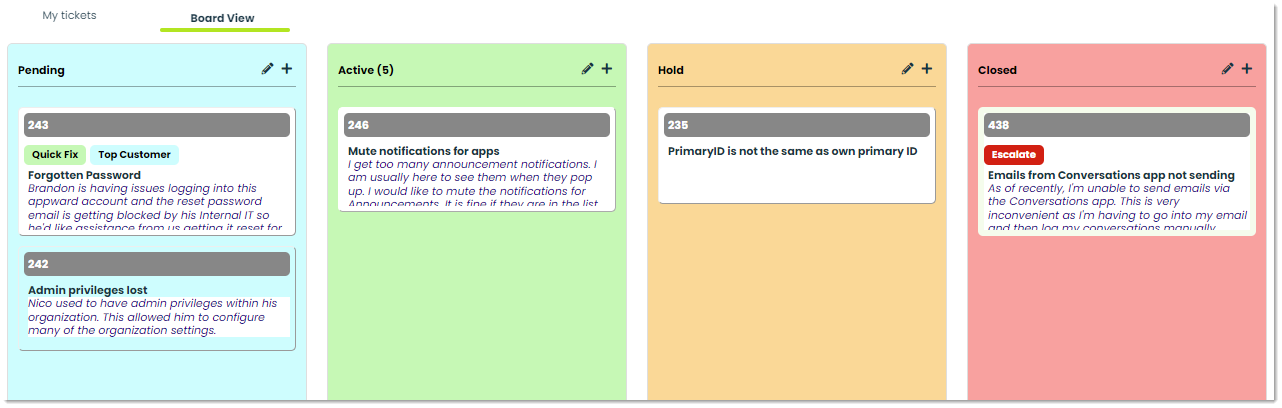
2. Board view – This tab provides a Kanban visual of your open ticket requests. It serves to provide a helpful view of the lifecycle of your tickets.
Let’s try adding a new ticket
Let’s go through the standard process of adding a ticket. To begin, click the + button at the top of the screen.

This will open a popup for entering the ticket information.
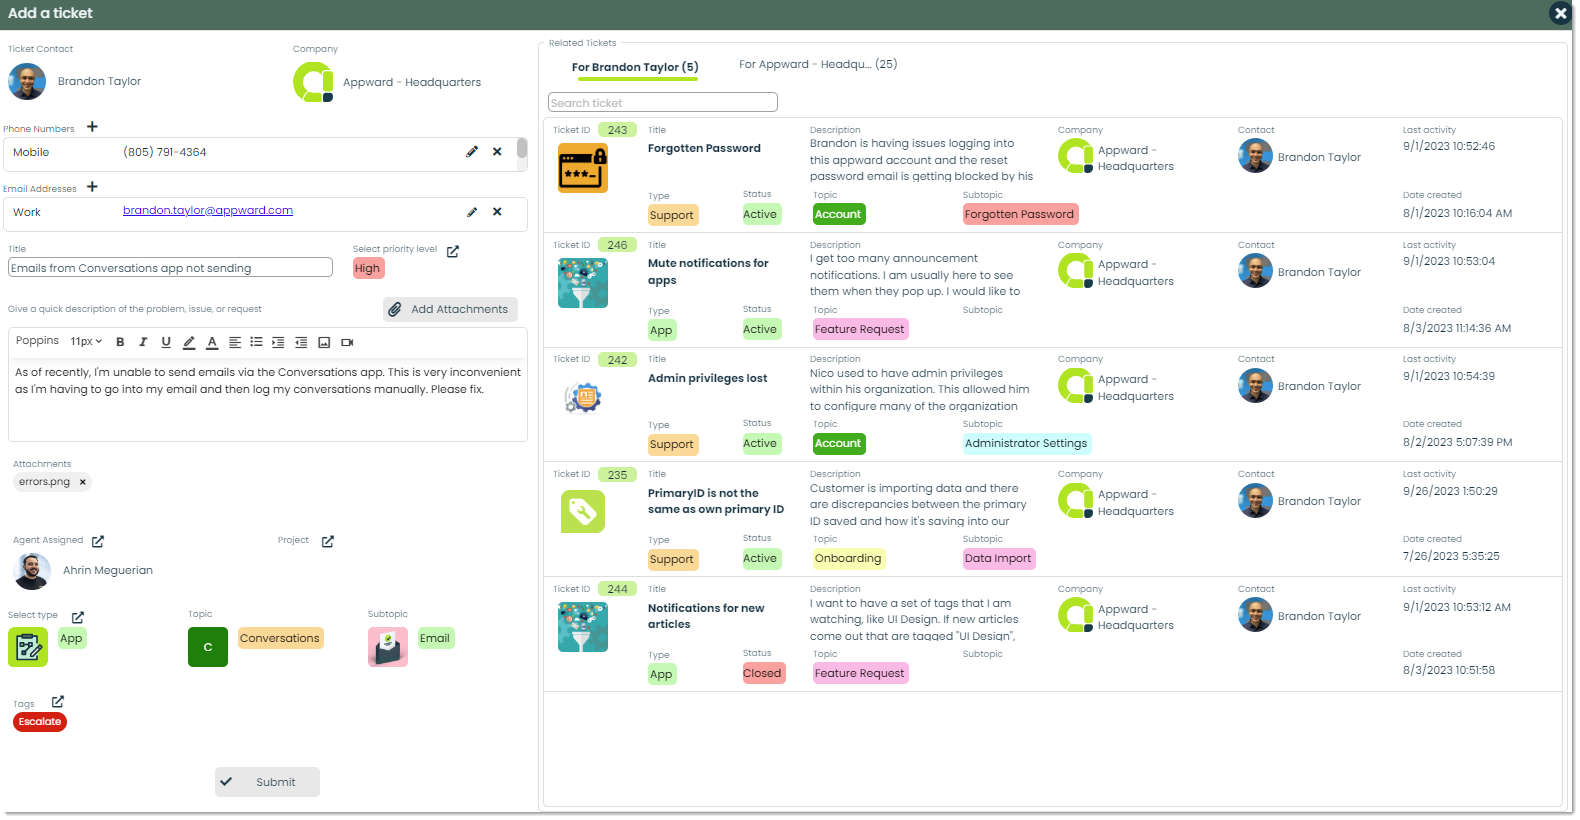
Let’s go over the different fields.
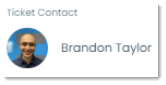
Ticket Contact – This is you, the person who is sending the request for a resolution to an issue.
Company – This is the company you belong to.

Phone Numbers – These are the phone numbers attached your contact record. You can add additional numbers by clicking the + button next to Phone Numbers. Add in the name of the number such as Main or Mobile and the actual number.

Warning: Any numbers added here will be added to your ACTUAL CONTACT. This means that if you add a number here, then go into the Contacts app and pull up your contact, that new number will be there.
Email Addresses – Similar to phone numbers, the addresses here come from your contact record. You can add additional emails by clicking the + button next to Email Addresses. Add in the name of the email such as Work or Personal and the actual email.

Title – The title should provide a clear and concise description of what the ticket is about. It should help the people responsible for handling the ticket as well as other parties quickly understand its purpose and content.

Priority level – Priority levels for support tickets help in categorizing and managing issues based on their urgency and impact on the person making the inquiry. The specific priority levels used can vary from one organization to another, but some examples of priority levels can include High, Medium and Low. To choose a priority level, click the external link icon next to Select priority level and you can either choose from the list or add in whatever priority levels best suit your request.

Description and attachments – The more information provided in the ticket description, the easier it will be to understand and address the issue efficiently. Clear and well-documented tickets help streamline the support process and lead to faster issue resolution. On top of that, attaching any important files is as easy as clicking Add Attachments. With this feature, you can add in any important documents from your computer or the Appward cloud.
Agent Assigned – The assigned agent is the person responsible for resolving the ticket. If you already know who should be working on the ticket, you can click the external link icon and select the appropriate person from your contacts.

Project – If the ticket is linked to a long-term project from the Projects app, you can identify that project with this field.
Type, topic and subtopic – In Tickets, these three fields are closely intertwined.

Let’s define Type, Topic and Subtopic, then go over the process of making your selections.
- Type – Types are a method of classifying tickets into categories for better organization and searchability. Your ticket types will ultimately come down to what best suits your business. For example, at Appward, we have an App type which is for app-related issues and Billing for any inquiries about pricing. For more on Types, check out Using Types.
- Topic – While the type is a broader classification of a record, the topic is a more specific categorization which begins to narrow down what a ticket is about. For example, where App can be seen as the type, a specific app name could be considered the topic such as Training or Contacts.
- Subtopic – When it comes to ticket management and coming up with the quickest, most accurate solutions, specificity is very important. If applicable, the subtopic is the most specific level of categorization you can assign a ticket. Where App is the type and Training is the topic, Testing/Evaluation can be seen as a subtopic where the central issue is something to do with assessments in Training.
Let’s go over the workflow of adding these three fields.
To begin, select a type by clicking the external link icon next to Select type. This will open a three-step popup which looks like this:

You can choose from the default list of types, add in your own by clicking the + button or edit an existing type by clicking the pencil icon when hovering over an option. After you’ve made your selection, click Next to add in a topic.
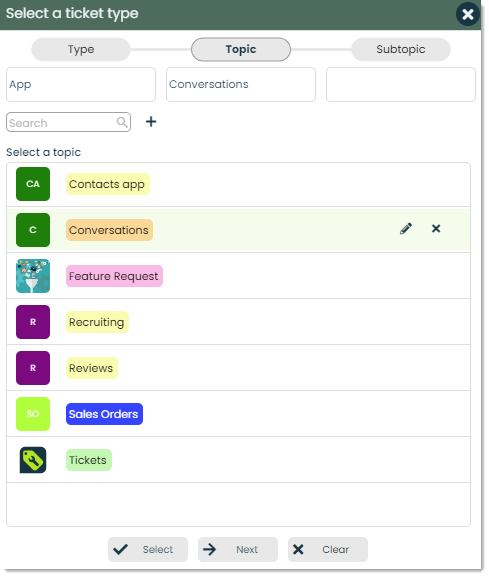
Topics that fall within the type you selected will appear as options. Similar to types, you can choose from the list, edit any topic or add in new topics as you see fit.
After you’ve chosen the topic, click Next to add in a Subtopic.
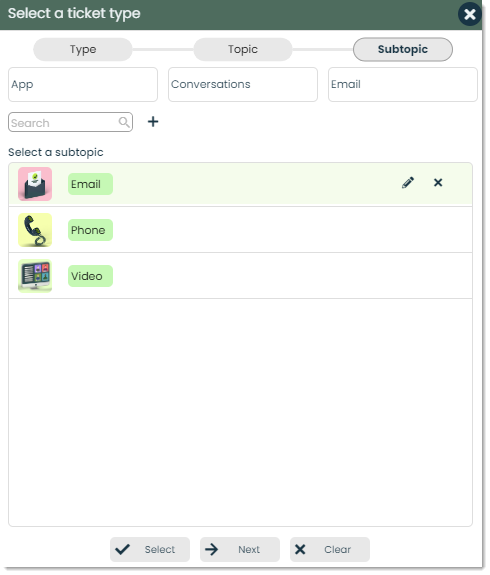
Just like topics, subtopics will appear here based on the topic selected. You can choose from the default subtopics, add in your own by clicking the + button or edit an existing subtopic by clicking the pencil icon when hovering over an option.
Tags – Tags are similar to Types in that they are key terms used to group and organize tickets into different categories. The main difference is that each ticket can only have one type but multiple tags. This is great for providing searchability and context into what a record contains. For more on tags, check out Using Tags.

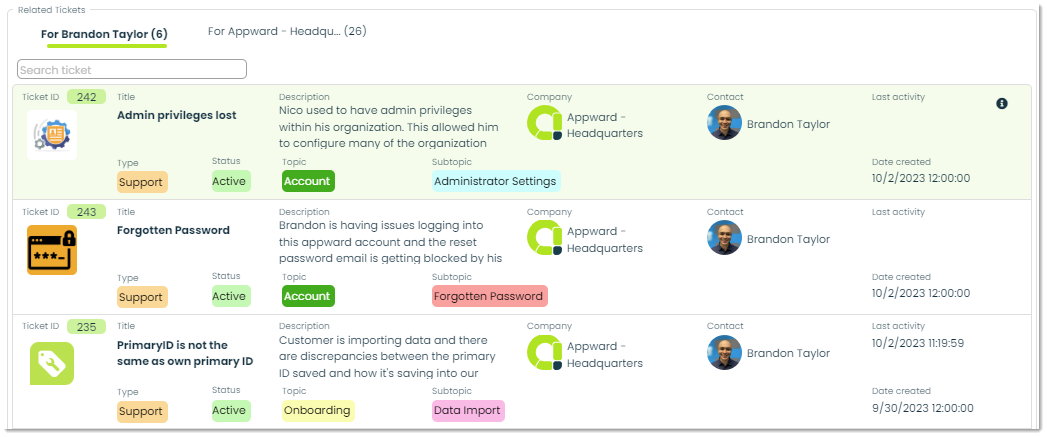
Related Tickets – This section is as an archive of your organization’s previously created tickets. You can view what has been submitted, what has been answered as well as potentially answer your own inquiry without needing to create a new ticket. With this section, you eliminate the need to repeat what has already been solved.
Once you have input all the information of the ticket, click Submit at the bottom to create it.
Let’s open the details of a ticket
If you click on any ticket from My tickets or Board view, you can view its details. Here’s what the Details tab of a ticket looks like.
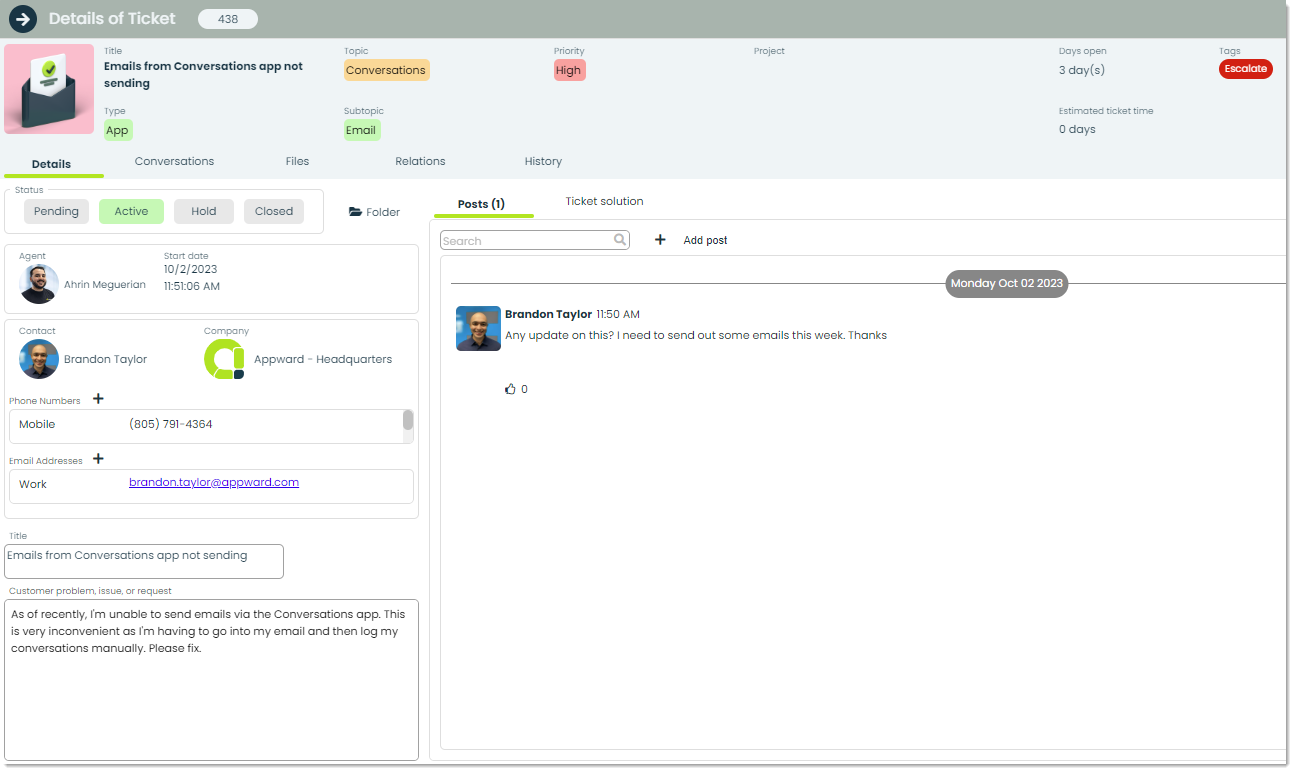
From here, you can edit any information that was input when the ticket was created. Let’s go through some of the additional features of this details screen.
Status – The possible statuses of a Ticket are Pending, Active, Hold and Closed. Here’s what each status means:
- Pending – The assigned agent has not started working on the ticket.
- Active – The ticket is currently being worked on.
- Hold – The ticket has been temporarily set aside until further notice.
- Closed – The ticket has been resolved. All closed tickets are automatically hidden from the main list.
By default, newly-created tickets will start off as Pending. As work gets done on the ticket, you can adjust the status by clicking on the different status buttons.

Folder – If you need to access or add any important documents to a specific ticket, you can click on this button to open up the File Explorer to where the ticket resides and upload or download whatever you need.

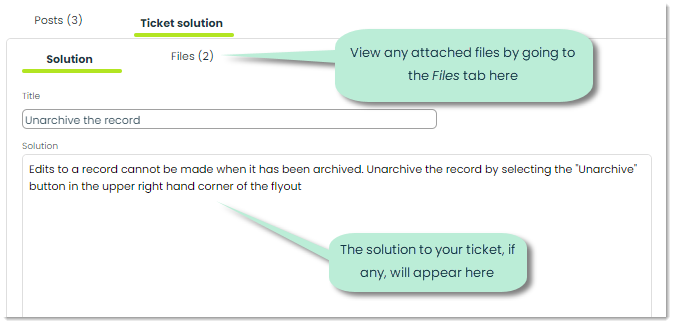
Posts and Ticket solution – This section is where you as the inquirer would go to view any posts from your agent and the solution if available.
Posts

Ticket solution
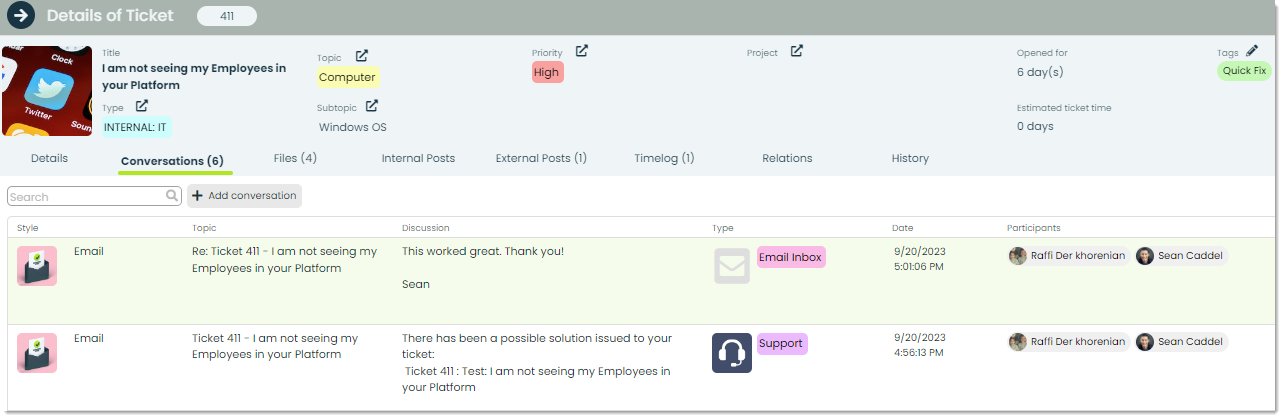
How to use Conversations
Communication over the course of solving a ticket is incredibly important. Tickets provides an intuitive way of sending and storing a log of conversations had between you and the involved parties of each ticket with Conversations. This feature can be found in the Conversations tab of any ticket’s details page.
Conversations are just as they sound. They are interactions had between a group of people. To add a new , click the Add conversation button found next to the search bar.
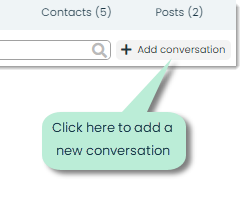
This will open a popup for adding a new conversation to your ticket.
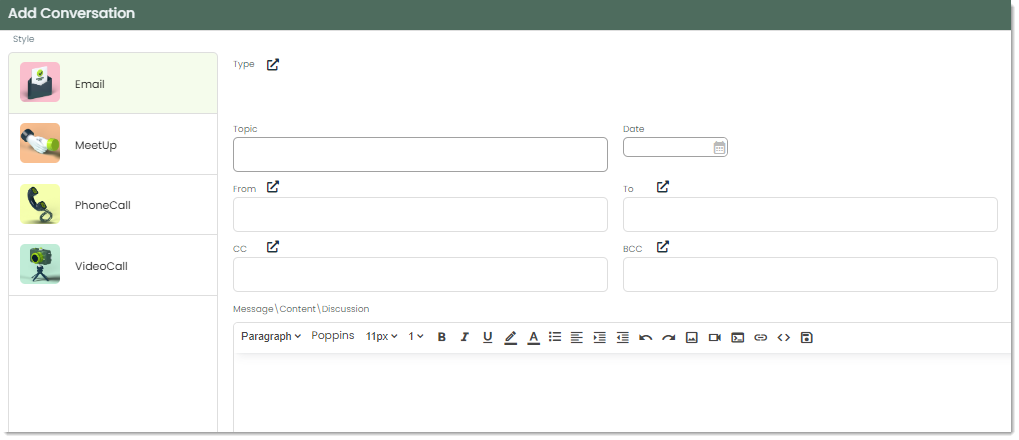
In Appward, conversations can be added in one of the four methods known as styles. The four conversation styles are email, meetup – a meeting of some sort, phone call and video call. Depending on the style of conversation, a slightly different set of fields will appear. For example, emails contain CC (carbon copy) and BCC (blind carbon copy) fields which are standard for any email service. Fill out all the information of your conversation, then press the Submit button at the bottom to add that to the list of conversation records.
Important: If you are adding an email conversation, you can send the email from Ticket Director! As long as you have provided authentication for the From email, you can add the conversation to your conversation thread AND send the email by clicking Send email & submit at the bottom.
For more on Conversations and how to use it, please refer to the Getting Started with Conversations guide.
How to use Files
Appward provides a method of storing important documents for any particular ticket with the Files tab. With this feature, you can add in any files to a ticket and view them with an embedded document viewer.

The Files tab in Tickets is unique in that any files uploaded here will be available for agents to view and download from Ticket Director.
To add a new file, click Add file and select a file from your computer, the Appward file explorer or from your database of articles.
How to use Posts
A post is a written comment which can be replied and reacted to by other people. In Tickets, posts are found within the Details tab of any record’s details page, and any post written here will be visible to the assigned agent via Ticket Director.
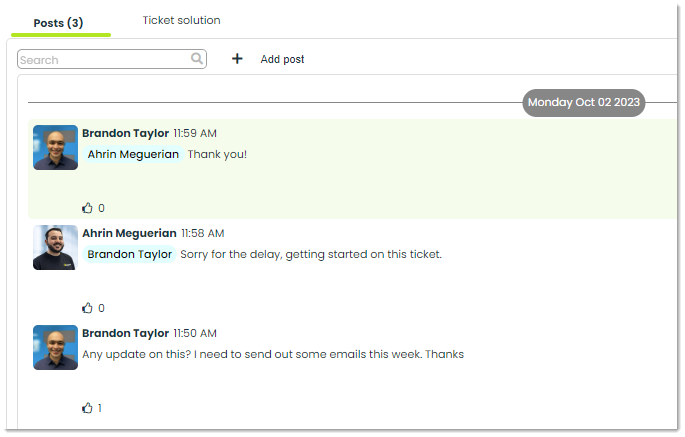
You can write a post with any questions or comments for your agent or any involved party and mention them with the @ symbol to quickly link them to the ticket. To add a new post, click the + Add post button and write out your message. Click Submit to send the post.
How to use the other Frontline Features of Tickets
Each app has a set of Frontline Features which are designed to enhance your Appward experience. For the Tickets app, these are indicated by the tab names in the details page of any ticket. They are:
- Relations
- History
Let’s briefly touch on each of these and how they are used in Ticket Director.
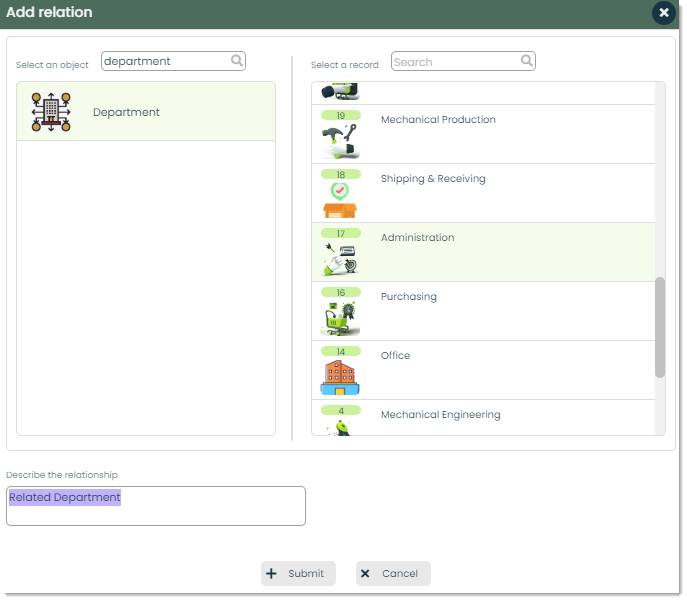
Relations – Relations are used to create a link between different pieces of data. Say, for example, a ticket is related to a specific department from the Departments app. If we wanted to link tickets to their respective departments, we could accomplish this through relations.
From the Relations tab, you can click the + button to form a new relation. You can indicate what kind of object the ticket is related to, identify the specific record and indicate the relationship between the two records.
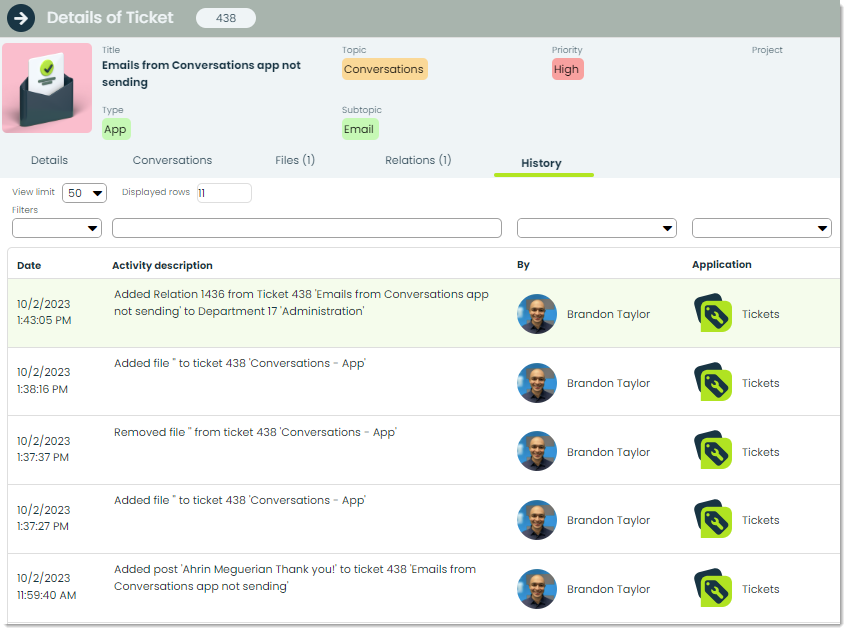
History – The History tab provides a detailed log of recent actions performed on a specific ticket record. This is useful for tracking who did what and at what time.
How to set a reminder or delete a ticket
This section will cover two features that can be found in the top-right corner of the details page of all tickets. These are setting reminders and deleting tickets.

Let’s go through each of these buttons and how they work.
Reminders – Reminders are notifications set for a certain time to a specific person for a specific purpose. In the context of Tickets, reminders are important. for ensuring that you are actively following up with tickets. Sometimes, progress on support tickets or inquiries can fall through the cracks, and reminders are a great way to make sure this doesn’t happen.
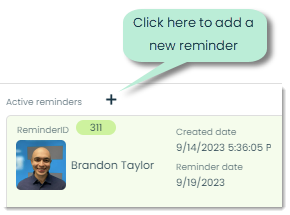
To view all active reminders for a given ticket, click the Reminders button.
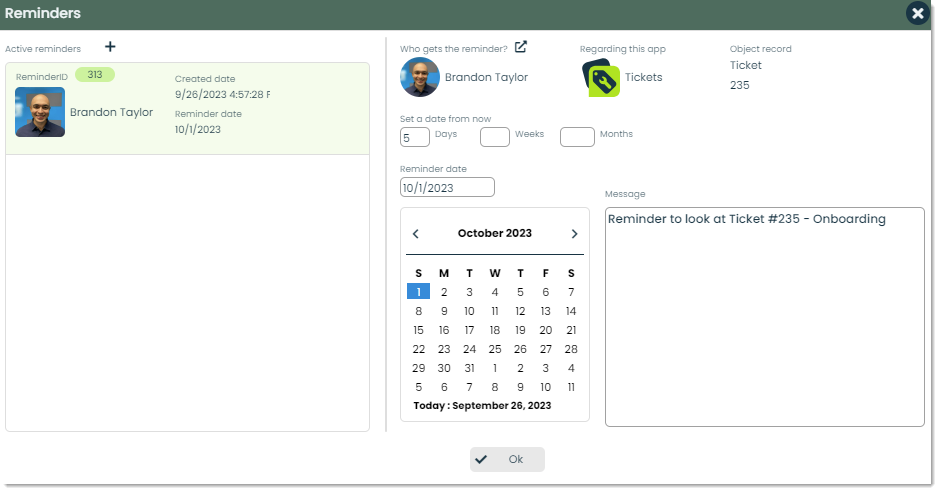
A list of all active reminders will appear on the left side of the screen. To add a new one, click the + button next to Active reminders.
You can indicate who gets the reminder, when the reminder should go out and the message to be included in the reminder. When all desired information has been filled out, click Ok at the bottom to create the reminder.
Delete – To delete a ticket entirely, you can use this feature and the record will be removed.