Table of contents
Getting Started with Time Off
Monday December 18, 2023-15 min readIntroduction
Time Off is an app for both employees and managers to streamline and simplify the entire leave management process. For employees, it offers a user-friendly interface to submit time-off requests, view their remaining leave balances and coordinate with their team’s requests to plan out their time off. On the managerial side, the app provides a centralized platform for quick and efficient approval of leave requests. Managers can easily access team members’ availability, ensuring smooth coordination and minimizing any potential disruptions to workflows.
This guide will cover everything you need to know about Time Off including how to create a new request, approve a request, configure the settings of the app and generate PDF reports of employee time off.
Let’s get started
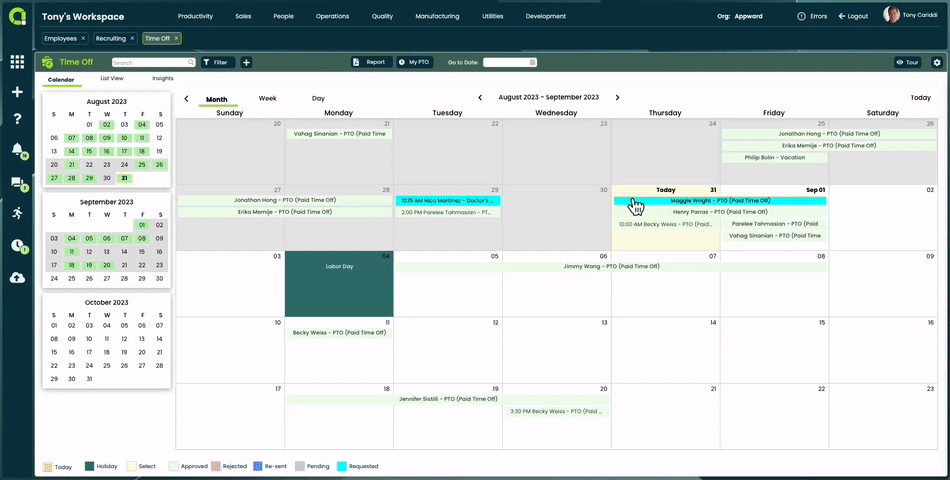
To open Time Off, go to the People category of the main navigation bar and select Time Off.
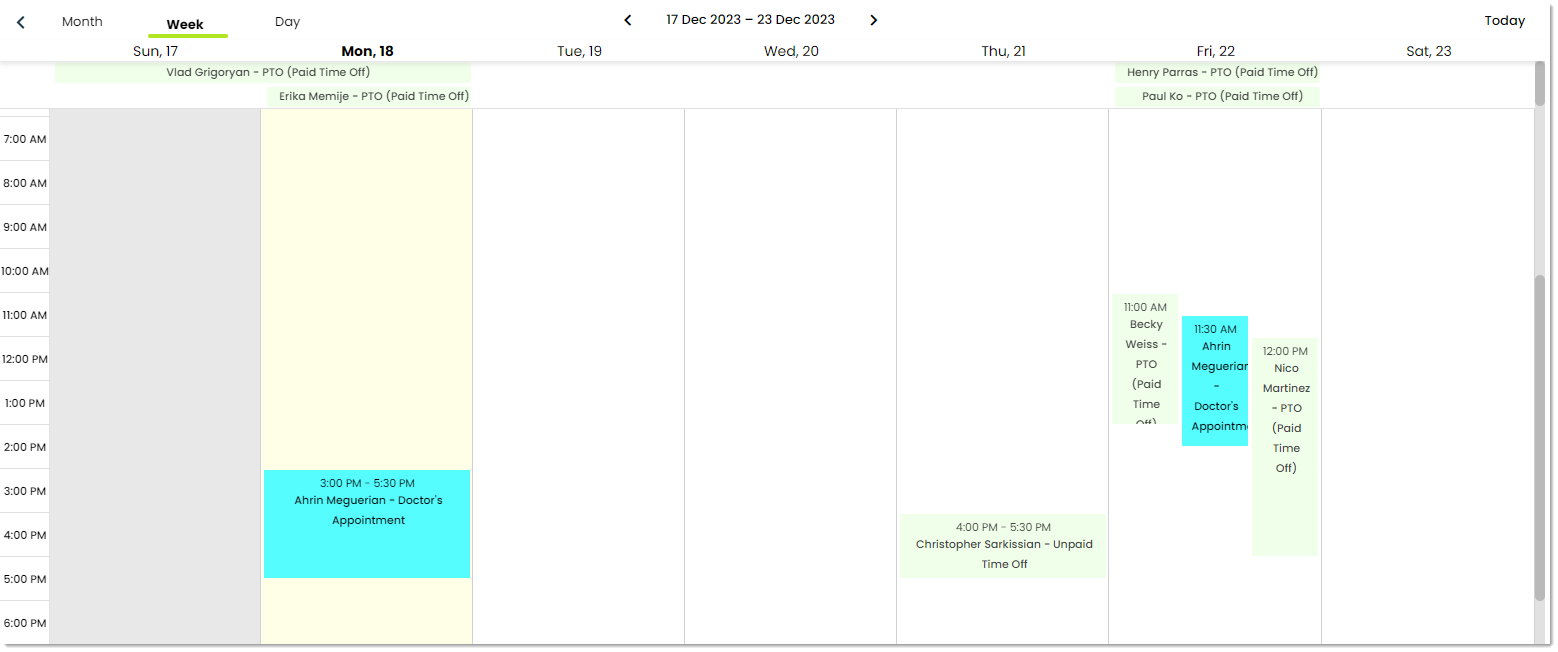
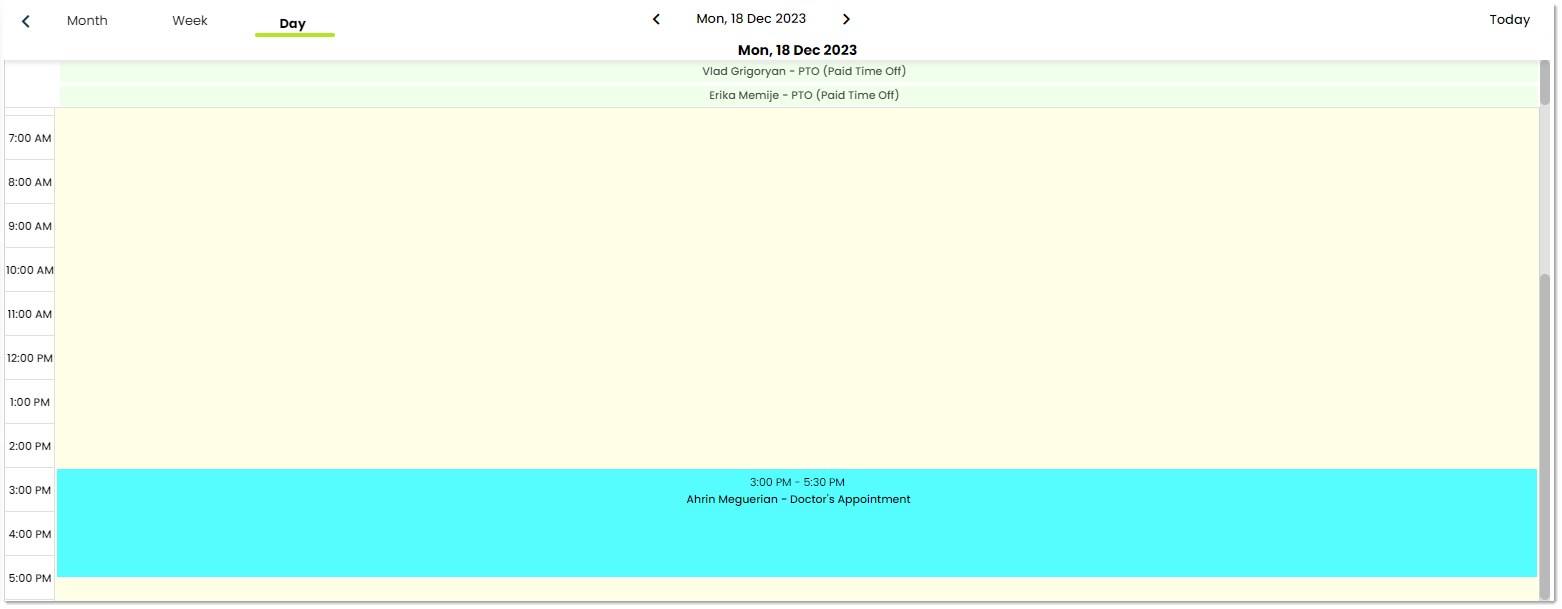
Once you open the app, you’ll find a calendar showing this month’s time off for your team. For each request, you can see the person who made the request, what type of request it was and for what duration of time the request was made. Your view is personalized based on your role. What you see and from which departments depends on your access level, but don’t worry, we’ll get into that in a later section. For now, just know that the calendar gives you a quick snapshot of who’s taking time off and when. You can view requests by month, week or day.
Month view: This is the default view when opening the app. You can see a preview of requests for the next three months with the section on the left side.

Week view: Here’s the weekly view of time off requests, from Sunday to Saturday. The top part shows full-day requests, and below are the partial requests, with time spans indicated on the left side.
Day view: Here is a view of time off requests for a specific day. Similar to the week view, the top part shows full-day requests, and below are the partial requests, with time spans indicated on the left side.
With the color-coded guide at the bottom, you can quickly grasp the status of time-off requests and navigate through the calendar with ease. Let’s go over the different color codes and what they mean.
Today – This color signifies the current day.
Holiday – This color indicates a holiday to be observed by your organization. The list of holidays and their time spans can be configured in the app settings which will be covered in a later section.
Select – This color signifies a day that has been clicked on and selected.
Approved – Indicates that the time off request has been accepted and authorized.
Rejected – Signifies that the time off request has been denied or not approved.
Re-sent – Shows that the time off request has been resent, possibly after some modifications or corrections.
Pending – Denotes that the time off request is awaiting approval or a decision.
Requested – Indicates that a request for time off has been submitted but is still awaiting a response or approval.
Here are the other main tabs of Time Off:
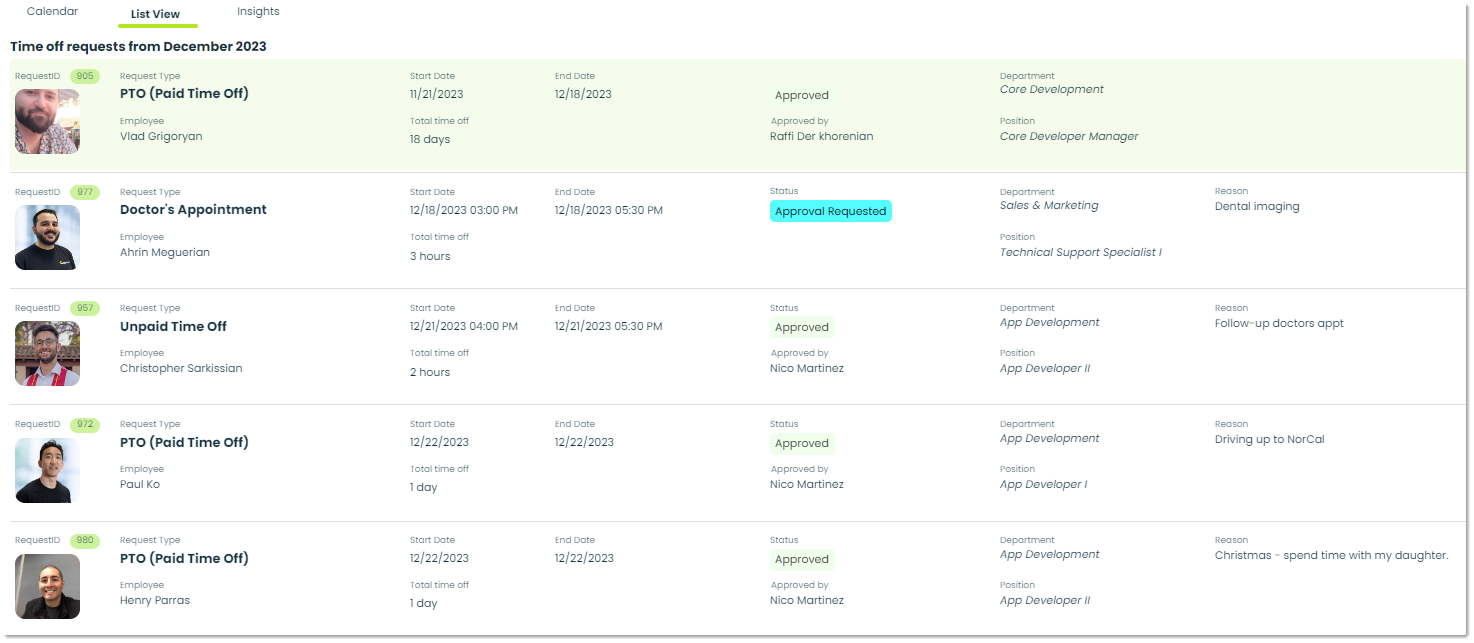
List View – This tab shows a list of time-off requests for the current month. It’s the same information from the Calendar tab, but in a list format. This view comes in handy for quickly scanning and managing requests. Instead of looking at a calendar, you get a clear lineup of who’s taking time off and when.
Insights – Insights give you a visual way to analyze data related to time off. You can make your own insights with custom SQL queries and use charts or tables to display the data. Some useful insights for Time Off might include annual leave trends to pinpoint peak periods or a break down of time-off data by department for targeted analysis. With the flexibility of insights, you gain the capacity to tailor your analysis precisely to your organization’s unique needs for more informed decision-making and strategic planning.
How to add a new time off request
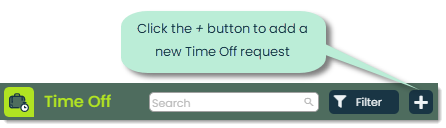
To add a new time off request, click the + button at the top of the app window OR double-click the day on the calendar for the beginning of your request.
This will open a popup for adding the details of the time off request.
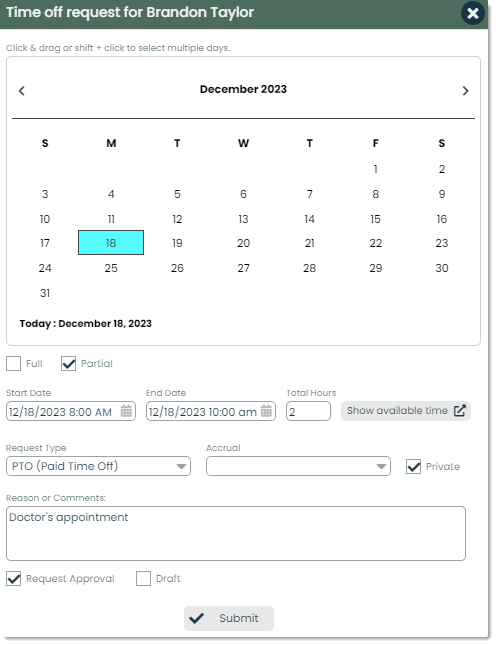
Let’s go over each field:
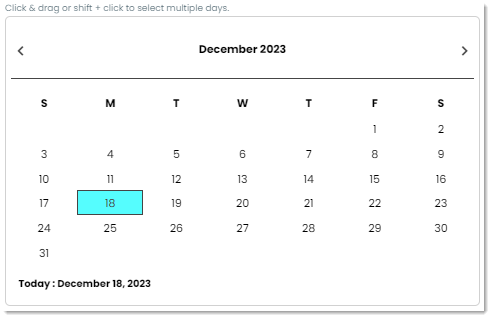
Day(s) selector – This is an intuitive method of selecting the days of your request. Just click and drag on the calendar to choose the days you want off. If you need more than one day, just hold down the Shift key, click on the first day, and then click on the last day.
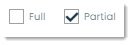
Full or partial day – You can indicate whether or not a day or set of days off will be full days taken off or partial.
Start/end date and total hours – You can choose when your time off starts and ends using these fields. You can also decide the total number of hours for your time off. If it’s just part of a day, there’s a section in the date picker to tweak the time too.

Show available time – This button displays your accrued PTO (paid time off).

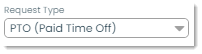
Request Type – You can indicate the type of request with this field. Types are part of a system used throughout Appward to classify different requests. In Appward, these types help organize and categorize information consistently. So, when it comes to your time-off request, using this field lets you specify what kind of leave you’re asking for, making the whole process smoother and more structured. For more on Types, check our our article on Using Types.
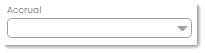
Accrual – In the context of time off and PTO (paid time off), accrual typically refers to the gradual accumulation of leave or vacation hours as an employee continues to work. Instead of receiving all available time off at once, employees accrue or earn PTO hours based on the length of their employment or the number of hours worked. Accrual systems vary, but generally, the longer an employee works, the more leave they accrue. This ensures that employees have a growing balance of available time off as they continue their tenure with the organization. Accruals are often calculated on a per-pay-period basis or another defined time frame. The accrued time can then be used by employees when requesting time off, providing a fair and structured way to manage paid leave.
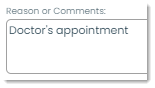
Reason or Comments – With this field, you can optionally provide additional information or context regarding your time-off request. It’s an opportunity for you to explain the reason behind your request or to add any relevant comments that might help the approver understand your situation.
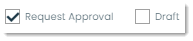
Request Approval or Draft – You can choose between submitting your time-off request for immediate approval or saving it as a draft to revisit and submit later. In Request Approval mode, your request is sent for review as soon as you complete the submission process. On the other hand, Draft mode enables you to save your request in progress without triggering the approval process. This flexibility is beneficial if you need more time to finalize details or if you want to submit the request at a later date.
Once you have filled in all the desired details, click Submit to create the request.
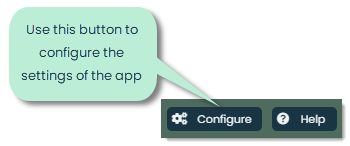
How to configure the settings of Time Off
You can change the settings of the Time Off app by clicking the Configure button in the top-right corner of the app screen.
Doing so will open a popup which contains different settings you can modify based on your access level.

Let’s go over each tab and what they control.
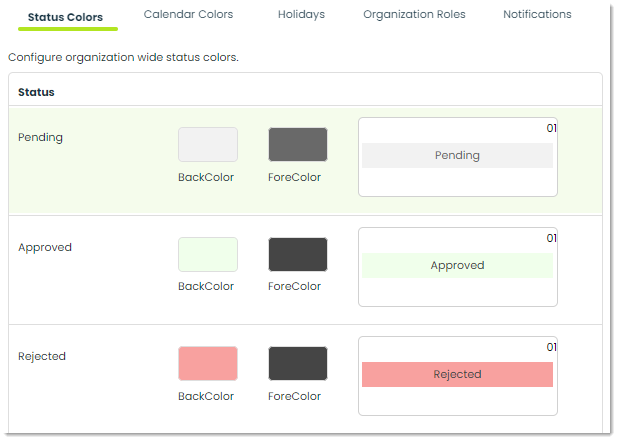
Status Colors – In this section you can modify the organization-wide default color scheme. Anyone who has not modified their calendar colors will inherit this set of colors.
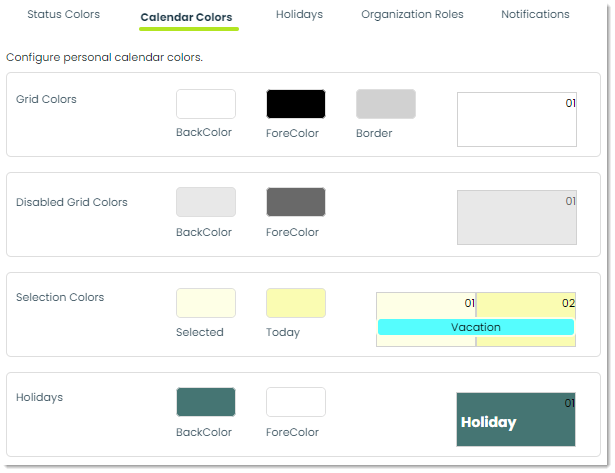
Calendar Colors – Outside of organization-level settings, you can configure your own personal color scheme for your calendar.
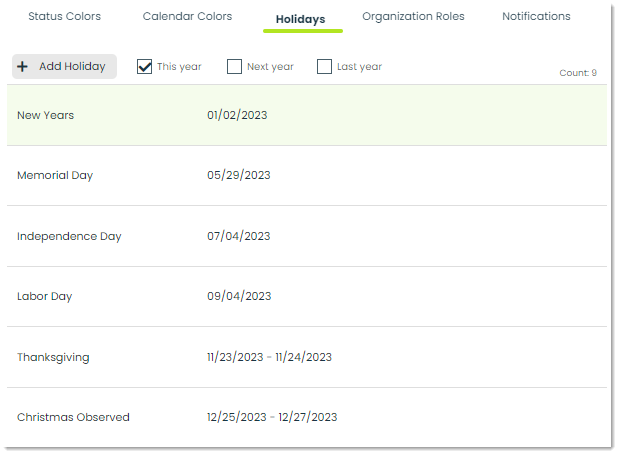
Holidays – This section lets you pick and set the holidays that everyone in the company will see on their calendars. You can add the holidays, say how long they are, and it’ll show up on everyone’s schedule. It’s handy for companies that need a certain number of holidays, making it easy to keep track and organize this info in one place.
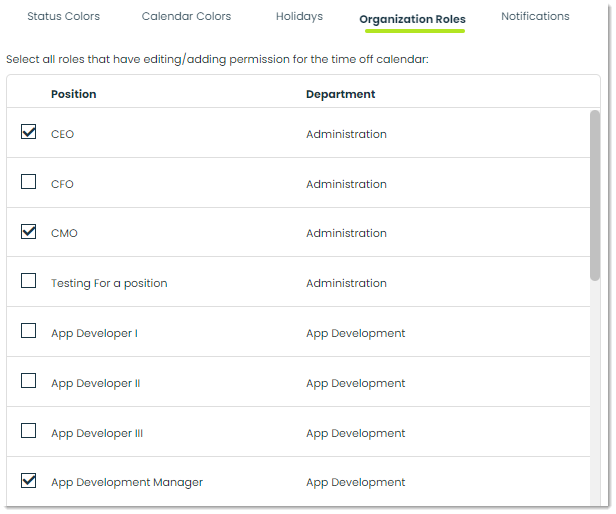
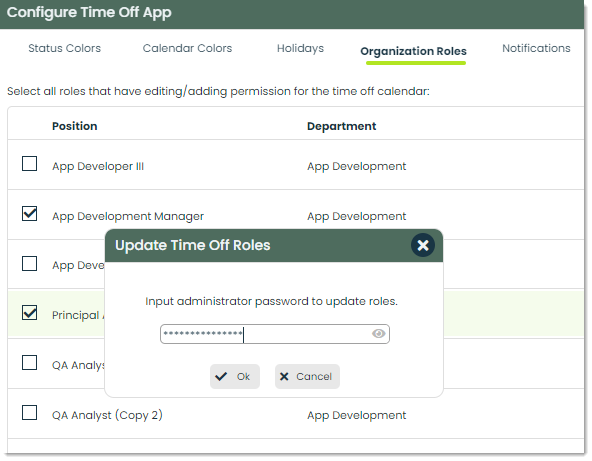
Organization Roles – In this section, you can control who has managerial permissions such as editing, adding and approving requests. Only people with administrative access can modify this list.
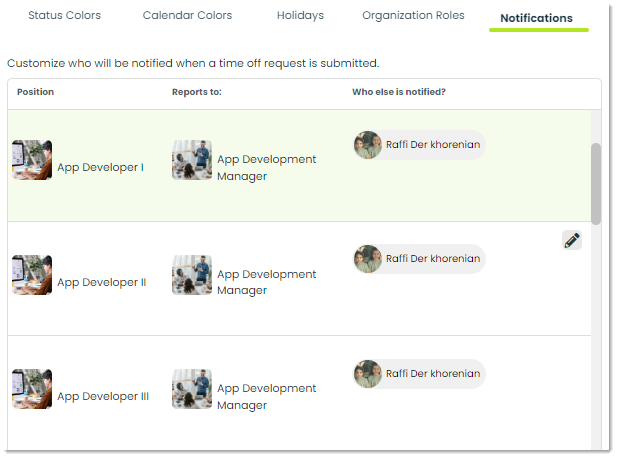
Notifications – By default, the person in charge of the team will be told when someone asks for time off. But if you want to let more people know, you can do that here. Just move your mouse over the job title you want to change, and click the pencil icon to add or remove people from the notification list.
How to approve a request
If you have administrative access, you can modify the contents of a request by clicking on it from the calendar or list views. This will bring up a screen with all the request’s details.
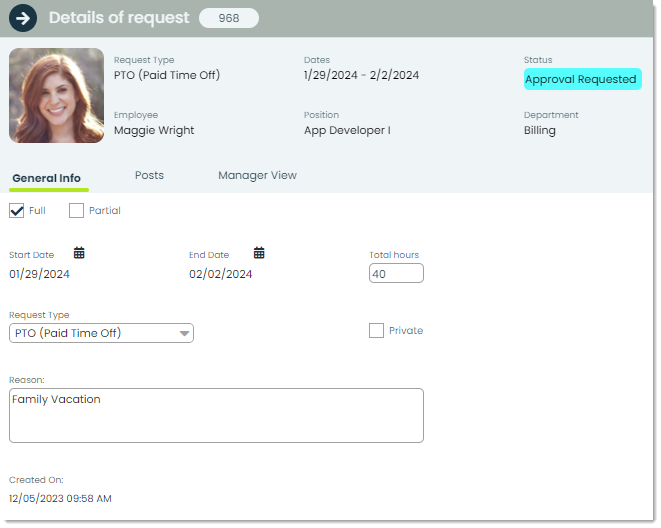
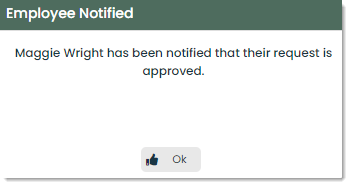
Looking at the example above, we can see that this is a PTO request for Maggie Wright for a total of 40 hours. If you are a manager, a Manager View tab will be present for you to click on.
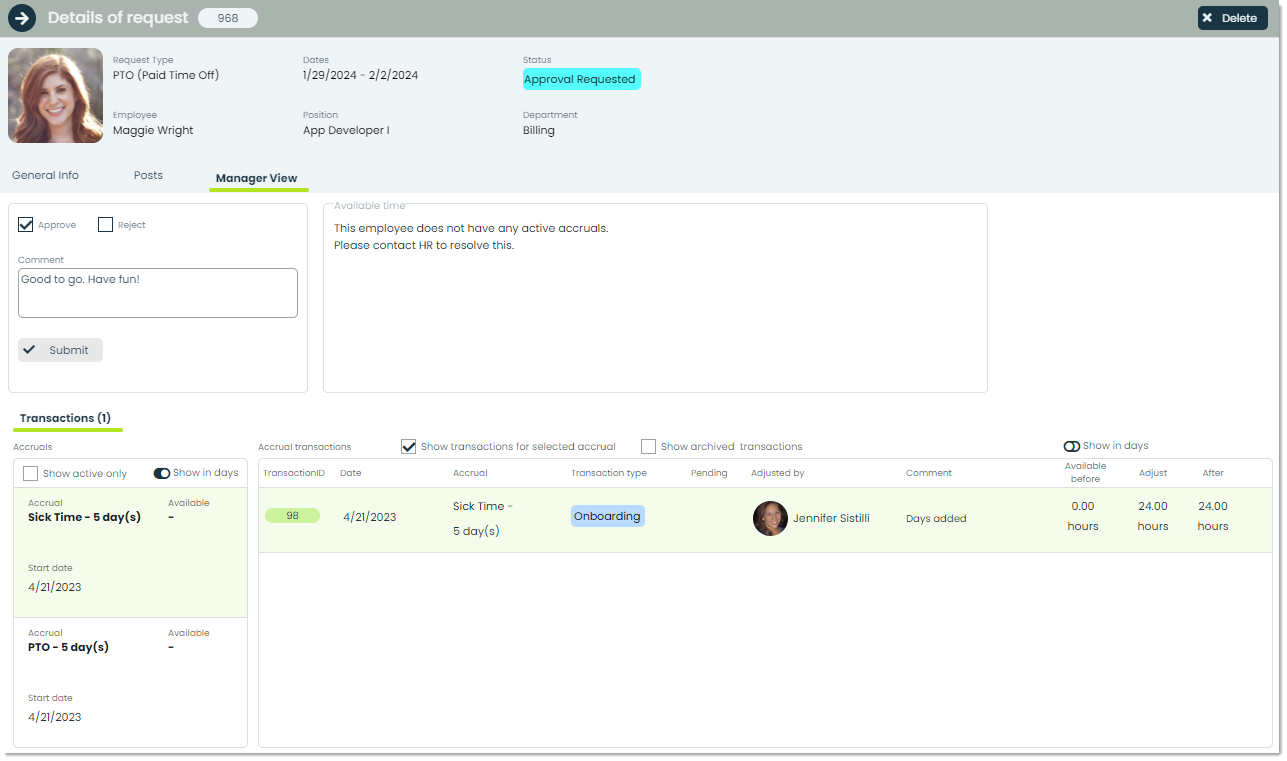
In the upper left corner of this tab, there is a section for the designated manager to approve or deny the request:
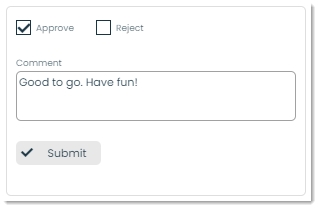
As a manager, you can check the box next to either Approve or Reject and provide a comment to the employee with the reasoning.
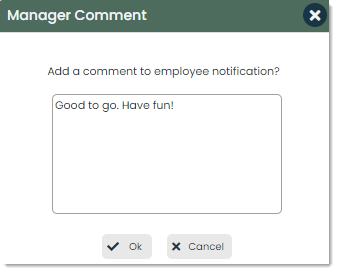
From here, everyone involved—employee, manager and anyone else you picked in the app settings—gets a heads-up about the approval or rejection.
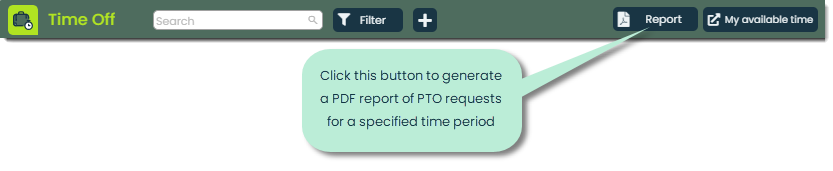
How to generate a report of time off requests
You can generate daily, weekly or monthly PDF reports for current or upcoming PTO requests by clicking the Report button at the top of the screen.
A screen will appear for generating a specific report for a specific department. To show the report for the time period and department, click Show Report.
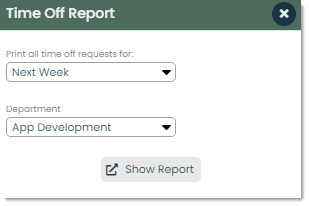
Here is an example of a report of all employees from the App Development team who are off next week:
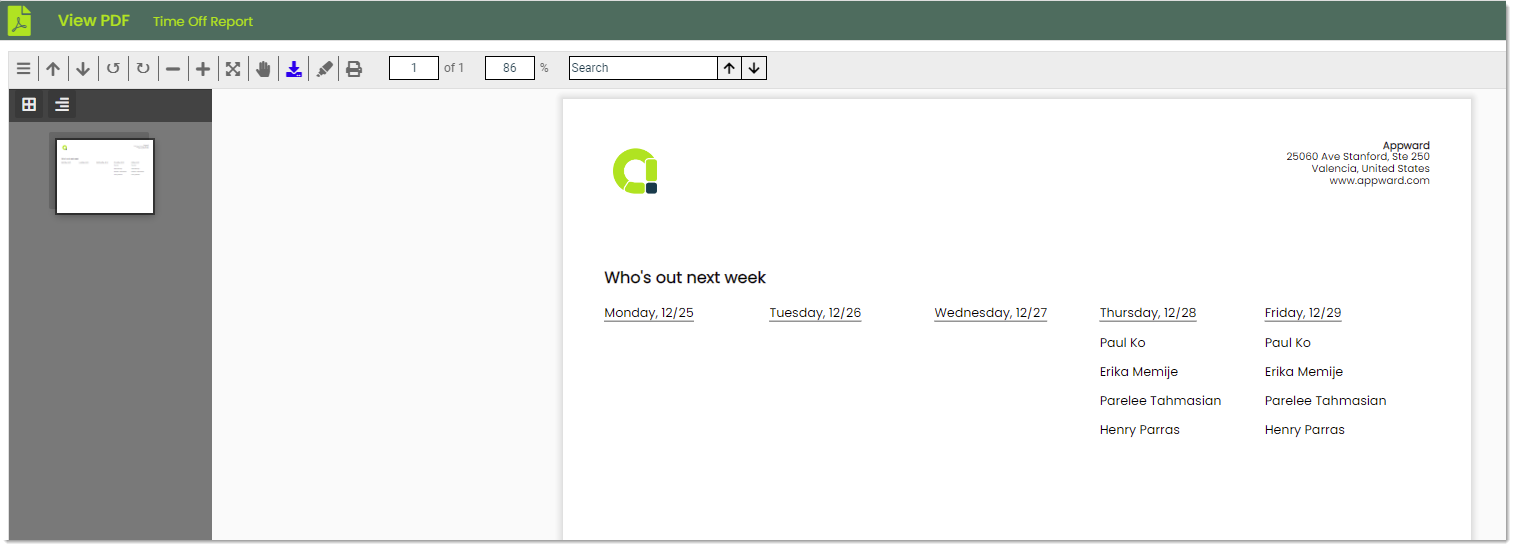
These reports facilitate seamless record-keeping, providing a standardized format for documenting employee absences and ensuring compliance with company policies and regulatory requirements. Managers can leverage the insights gained from these reports for effective workforce planning, identifying trends in employee availability and maintaining optimal staffing levels.