Table of contents
Getting Started with Wages
Monday February 5, 2024-15 min readInconsistent pay can harm a business, causing unhappy employees, high turnover, and financial losses. It’s crucial to address this to keep your team happy, stable, and make better financial choices. With Appward’s Wages app, you can customize base rates for company positions, aligning them with industry standards, internal equity, or performance metrics to match your organizational goals.
Let’s get started
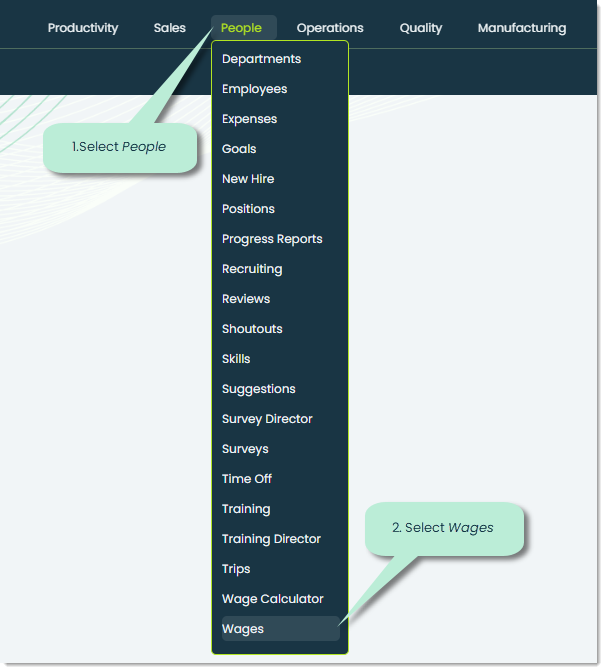
To open the Wages app, navigate to the People section in the main navigation bar and select Wages.
Upon entering the app, you’ll see the Calculators tab, where you can see your organization’s existing wage calculators. Let’s go over the different tabs available to you.
Note: If this is your organization’s first time accessing the app, these tabs will be empty.
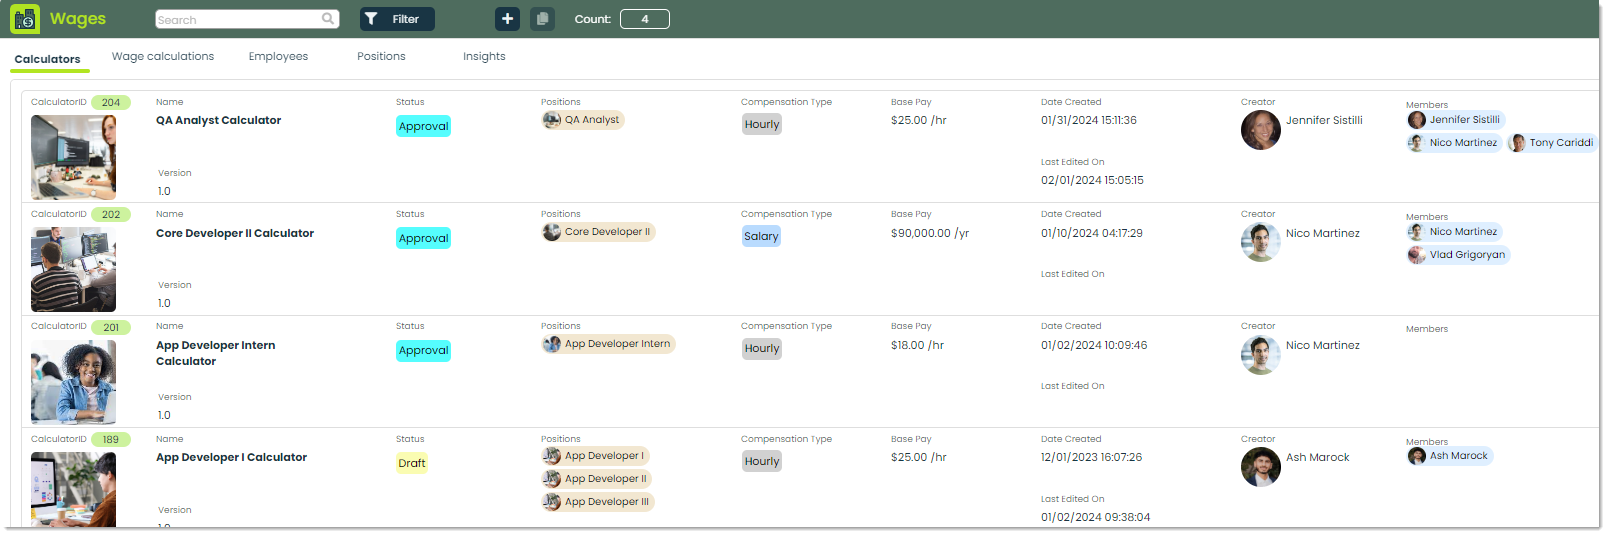
Wage Calculations – In the Wage Calculations tab, you can make and check calculators for different job roles in your company. Customize these calculators with your own data to ensure accurate pay for your employees.

Employees – In this tab you can view a list of your organization’s wage calculations categorized by employee name.

Positions – View a list of existing positions in your organization. This gives you a good representation of the information you would see within the main tab of the Positions app.

Insights – Utilize this tab to analyze data derived from your organization’s wage calculations. Insights, available within this feature, empower you to uncover valuable information regarding wage types, status, and positions. If you’d like to delve deeper into Insights, we recommend reading our Getting Started with Insights guide.

Creating a wage calculator
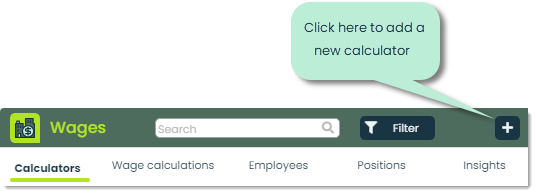
To create a new wage calculator, click the + icon.
You’ll then see a popup where you can enter details to start using your first calculator in Wages. Let’s go over what each field means.
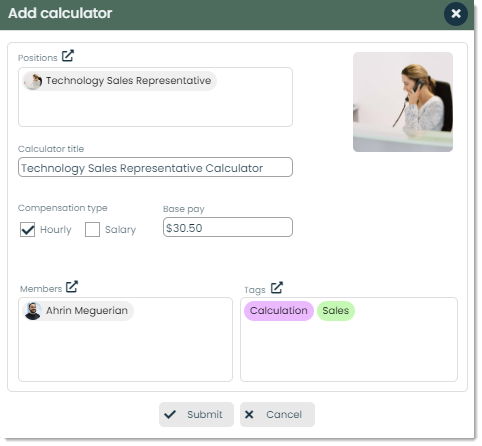
Positions – You can conveniently choose positions directly within the Wages app. Simply click on the external link icon and select from any of the positions originally created in the Positions app.
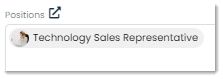
Image – This image serves as the front-facing representation for the wages record you are creating.

Calculator title – In the Calculator title field, you have the opportunity to provide your calculator with a descriptive title.

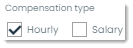
Compensation type – This field denotes how employees in specific positions are paid. There are two main categories.
Hourly: Employees are paid according to the hours they work.
Salary: Employees receive a fixed amount of compensation periodically, irrespective of the hours worked.
Base pay – This field refers to the base level of compensation provided to the employee based on the position they hold. You can define the start point for hourly or salary rates associated with the employment agreement by typing in the value in the provided text box.

Members – You can control the access level of your calculator using Members. Members are contacts from your organization who you give access to as administrators of the record.

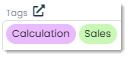
Tags – Tags are labels with key phrases and colors which are used to categorize wages. They provide better organization and searchability of your suggestions, as well as give some context into the content of each Wages record.
Submit – When you are ready to create the wages record, you can press submit.

Cancel – If you change your mind and wish to stop the creation process of a wages record, you can press cancel.

Viewing and editing a calculator
To view the details of a wages record, click on the record while in the Calculators tab.
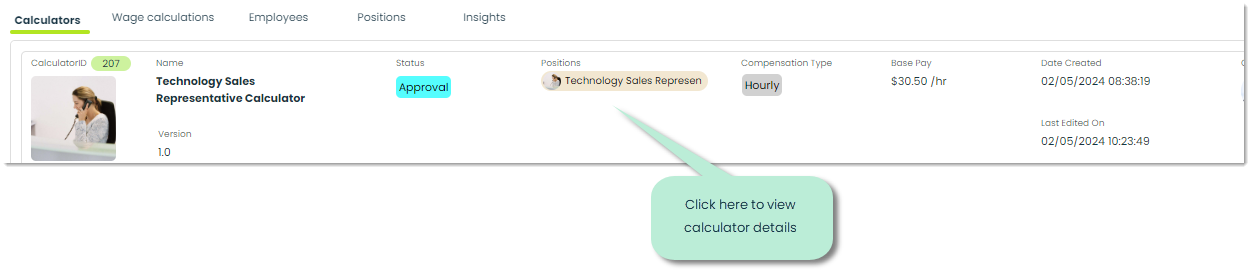
After clicking on a record, you’ll be shown a details flyout, giving you a more in depth view of the Wages calculator. Let’s cover the unfamiliar fields.
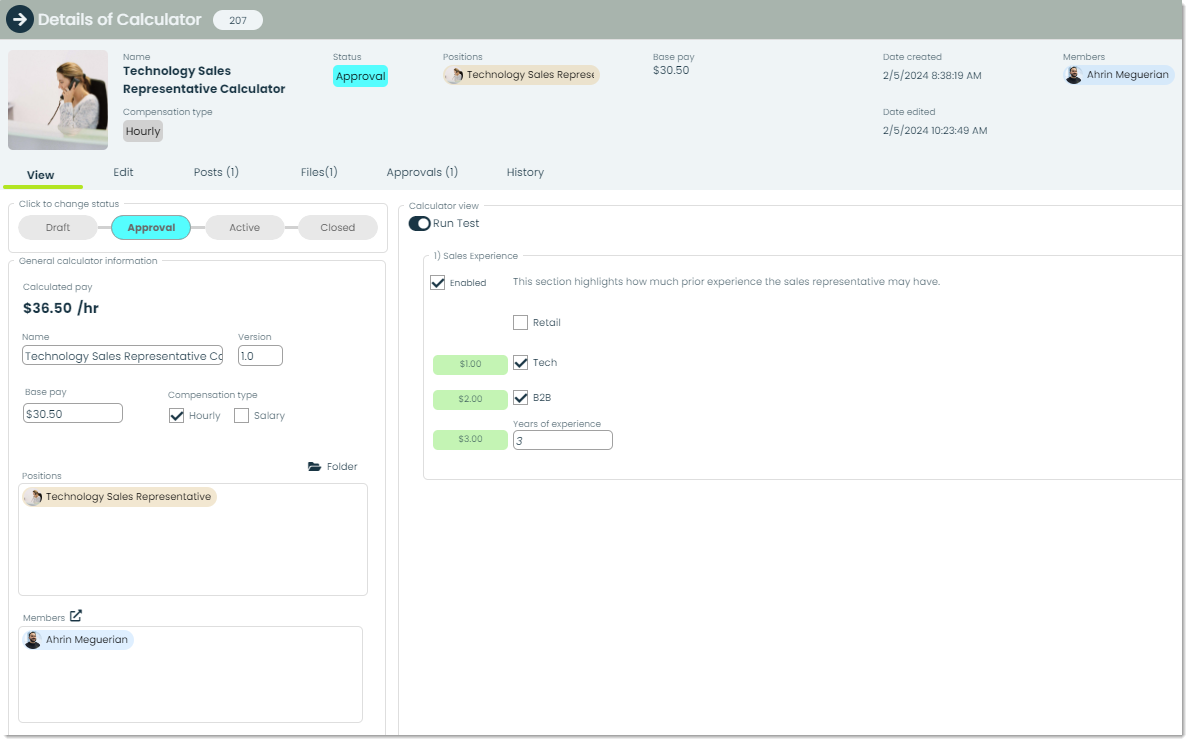
Status bar – In this field, you can use a status bar to select what the status of the record is.
Draft: The record is still in its planning stage, it has not been published publicly to your organization yet.
Approval: A request for approval has been submitted, the record is public and all parties with access can view and interact with it.
Active: The record is active and there are efforts being made to complete a related task.
Closed: All the necessary actions have been taken for the Wages record.

Calculated pay – You can see the total wage accumulation for an employee in that position, calculated based on your settings. These settings determine additional dollar amounts assigned to specific skills, which are then added to the base pay for the position.

Version – The current version of the wage calculator.

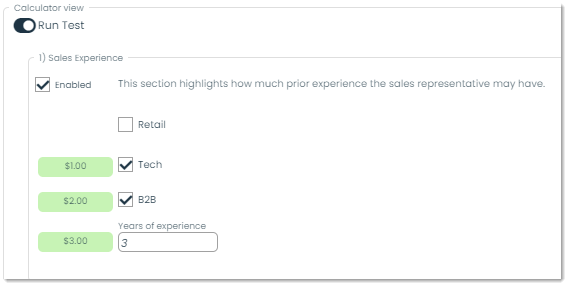
Calculator View – An overview of your calculator settings. To run a simulation of your calculator and see how it would impact the base pay of a position, you can enable the Run Test button, which will allow you to check or uncheck specific skills.
Throughout the process of determining wages, you may want to iterate over different version of your wage calculator. To edit your calculator, navigate to the Edit tab within the details flyout.
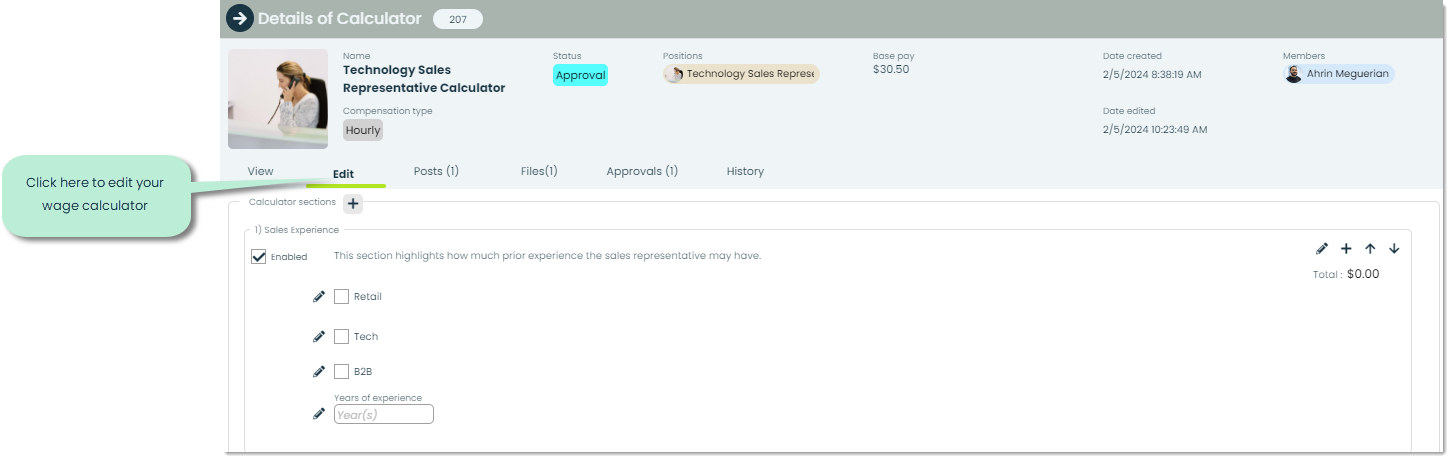
Within the edit screen, you can click on the + icon to add additional sections to your calculator.

Editing controls – While editing calculator sections, you’ll have access to some buttons. Let’s go over what each of them does.
Edit: Open up the Edit Section popup, where you can edit the title, description and size of the section.
Add: Add an element to the calculator section. Elements can be textboxes, checkboxes, or dropdown menus.
Move up: Shifts the element upward in the index.
Move down: Shifts the element downward in the index.

Adding a wage
To add a wage for an employee, navigate to the Wage calculations tab and click on the + icon.
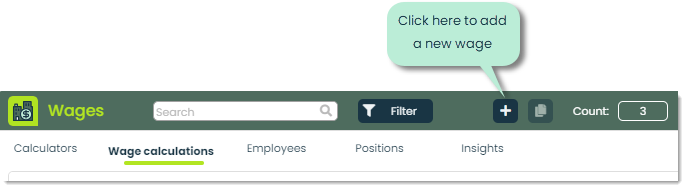
You’ll then be shown the Add Wage popup, where you can create a new wage record for a specific employee.
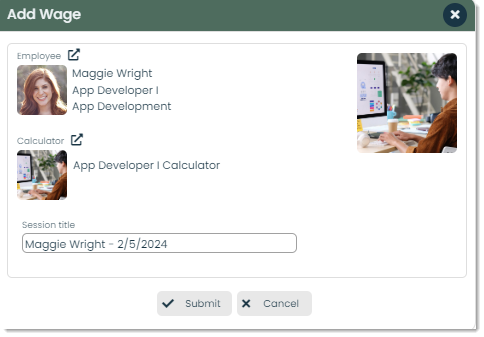
Employee – You can choose from a list of contacts within your organization categorized as employees. Information such as name, position and what department they currently work in will automatically be imported.

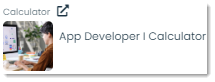
Calculator – This is where you can select the calculator that will do the heavy lifting when it comes to calculating the employee’s wage. Click the external link icon to bring up a list of existing wage calculators.
Session Title – Give your session a title or name by typing into the text box. The format ‘Employee Name – Date’ will be autopopulated, but free to modify it to suit your preferences.

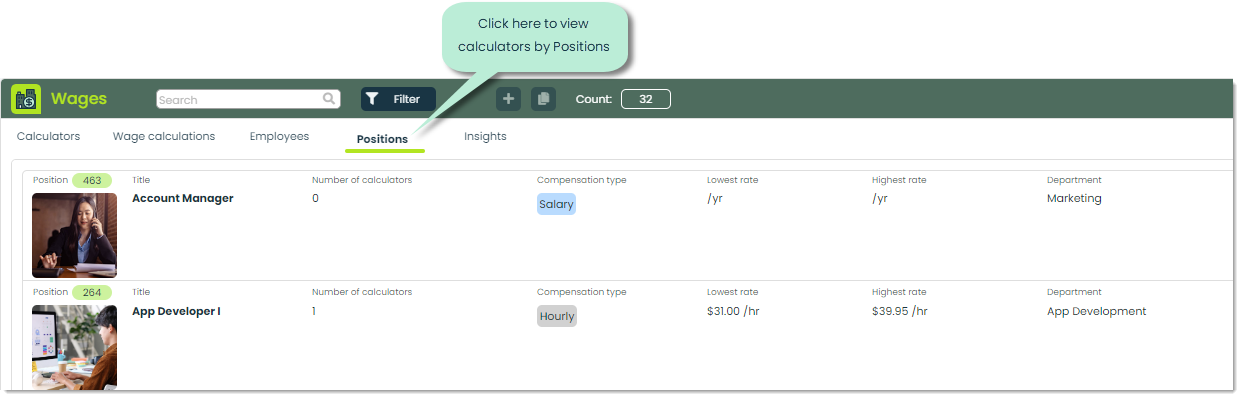
Viewing calculators by Positions
To view a list of your organization’s calculators organized by position, navigate to the Positions tab.
To get a view of which calculator belong to a specific position, simply click on the position to bring up its details flyout.
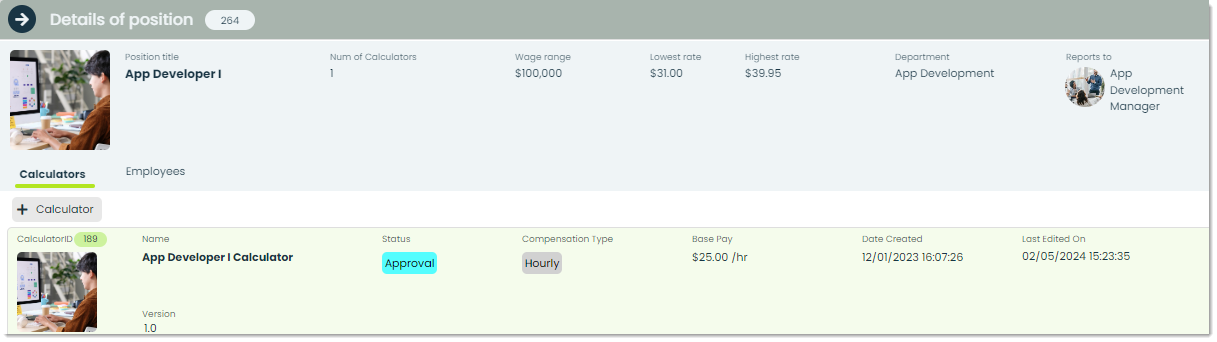
In this view you can see details such as the number of calculators, wage range, and department.
Frontline features of Wages
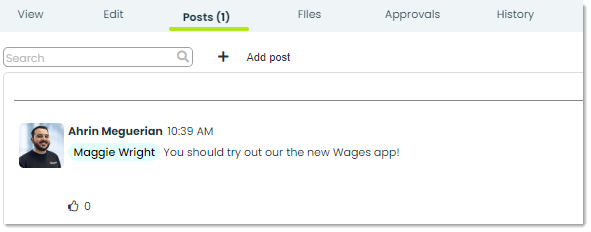
Posts – A post is a comment which can be replied and reacted to by other users in your organization. You can write a post to ask questions, make suggestions, or provide additional context about a wages record,
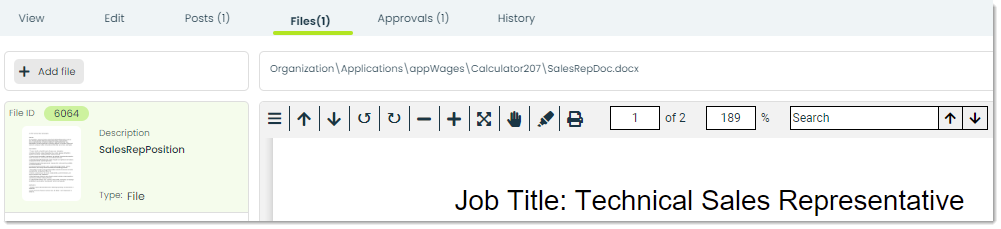
Files – Through the Files tab, you can attach essential documents to a Wages record. You can add files directly from your computer or from the Appward cloud. After adding a file, you can view it through an integrated document preview within the Files section. Individuals within your organization with access to the record can download the file to their personal computers.
Approvals – In Wages, approvals play an important role in ensuring that decisions made to positional wage changes are approved by management and other necessary parties. You can create approval requests that get directly sent to a manager or other contact who is responsible for approving the change. Ensure consensus is reached before making critical decisions, and track all the important details to prevent any potential oversight.

History – You can monitor changes and updates made to a wages record through the History tab. Within this tab you can track the changes made, date of change, and the individual responsible for making the change. Additional search filters can be applied to narrow down the displayed list of activities. You can sort by time of activity, name, and even search by specific keywords.

Additional features of Wages
Help – Look for the help button in most of the apps in Appward. This resource offers insightful tours and information collected specifically to guide you through the app’s functionalities. Interactive, step-by-step tours are designed to give you the foundation to start using all the robust features within Appward.

Archive – Archive can be found within the majority of the apps in Appward. You can use the archive tool when you need to remove a record from sight without permanently deleting it. Archived records are hidden, but can be found using specific filter settings while searching.

Delete – You can delete a Wages record by using the Delete button. This action removes the record from the application and places it in the Deletions app, where you have 5 days to recover it if needed.

Searching and Filtering – Built into every app within Appward is the ability to use advanced searching and filters to precisely locate and access the information you need. You can use the search bars found at the top of the app screen to conduct a general search of record, or click on the Filter button to perform an advanced search, helping you fine tune your search.
