Table of contents
Getting Started with Whiteboards
Wednesday January 10, 2024-17 min readIntroduction
Using a physical whiteboard is not always practical, and for that reason we’ve recreated one of the most popular tools for productivity and collaboration. The Whiteboards app introduces a digital platform that mirrors the functionality of traditional whiteboards. This app integrates with many of the apps in the Appward ecosystem, offering a versatile and dynamic space for brainstorming and teamwork. Easily switch between various tools, such as sketching, adding text, creating shapes, and adjusting elements, fostering a fluid and intuitive collaborative experience. Whether working remotely or in a physical space, the Whiteboards app facilitates efficient communication, idea visualization, and project management.
Let’s get started
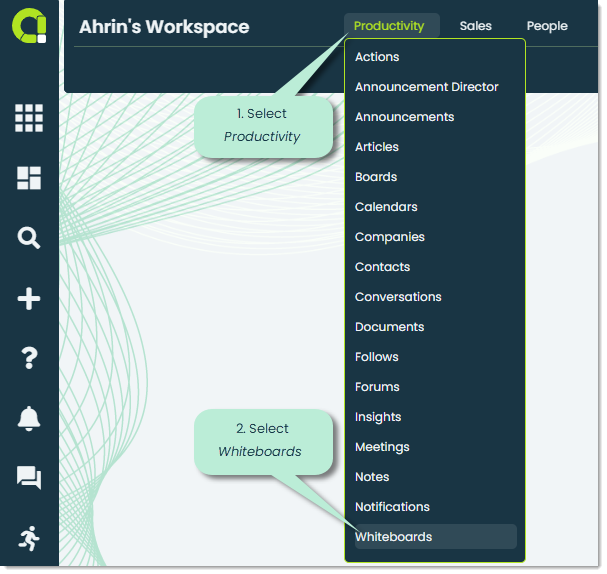
To open the Whiteboards app, go to the Productivity section in the main navigation bar and select Whiteboards.
When you first open the app, you’ll find a list of whiteboard records created by members of your organization. At the top of the screen, you’ll notice two tabs. We’ll cover their features in this guide.
Note: If this is your organization’s first time using this app, then this screen will be blank.
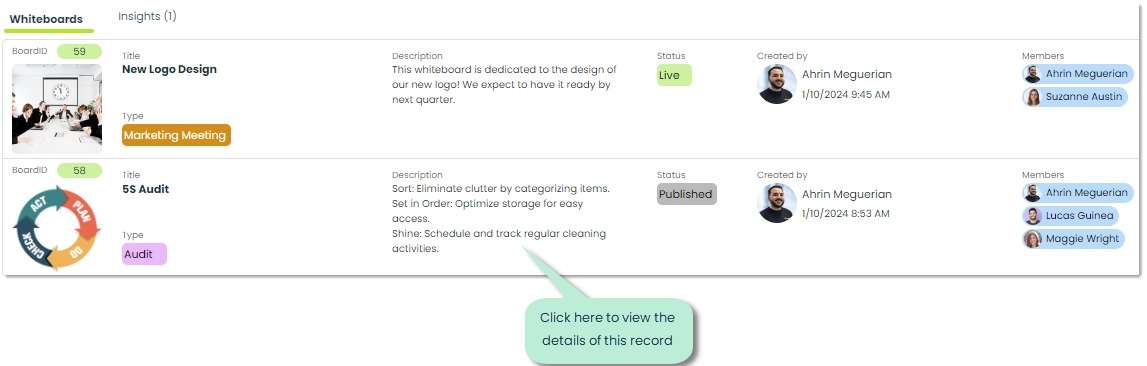
Whiteboards – In the Whiteboards tab, you’ll find a complete list of all the whiteboards linked to your organization. Each row represents a separate whiteboard record, providing important details for quick review. This setup makes it easy to identify and manage individual whiteboard records efficiently.

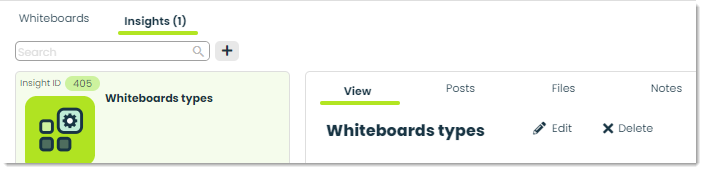
Insights – This tab is used to analyze data from your organization’s whiteboards. Using Insights, you have the opportunity to uncover and make use of valuable information related to whiteboard types, statuses, participants, and more. For more on Insights, please check out our Getting Started with Insights guide.
How to add a whiteboard
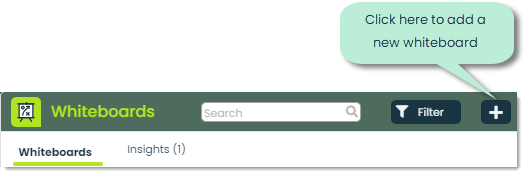
To add a new whiteboard, click the + icon at the top of the app screen.
Next, you’ll be shown the Add Whiteboard popup, where you can input the important information pertaining to your whiteboard. Let’s explore the available fields you can enter information into.
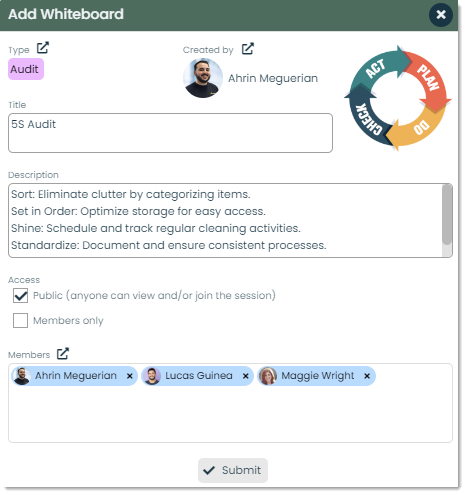
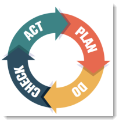
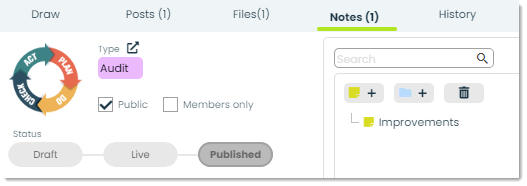
Type – You can categorize the whiteboards you create by the Type you assign to them. Types appear as labels with custom names, colors, and images that can be directly associated with records throughout all of Appward. You can organize your data in a fully flexible, customized way to suit your business. As an example, a whiteboard associated with an audit of something at your company, could be categorized by the type “Audit.” For more information on Types, please check out our article Using Types.

Title – Here is the place to specify the title for the whiteboard. You can make titles brief yet informative, providing readers with a clear idea of the content before they select the record.

Created by – This field represents the individual from your organization who is responsible for creating the Whiteboards record. You can define the individual displayed in the field by clicking the external link icon in the Created by field. This action will bring up a list of available contacts from your organization, allowing you to designate who is displayed in the Created by field.

Image – In Image, you can define the display image for the whiteboard record.
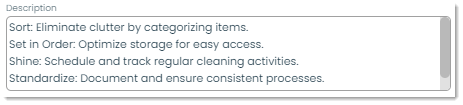
Description – In this field you can provide a description to provide context and information related to the whiteboard.
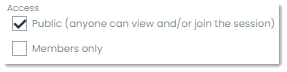
Access – In Access, you can define the privacy level of the record. By selecting the checkbox for Public, you are requesting this record to be available and accessible by everyone in your organization. Conversely, by selecting the checkbox for Members only, you can indicate that the record is only accessible by the defined members within the Members field.
Members – In the Members field, you can curate a list of contact from your organization who will have permission to edit and view a whiteboard. This field can be left blank if the Members only field checkbox is not going to be selected at the time of submission.

Submit – You can use the Submit button to create your record within Whiteboards.

Viewing and editing a whiteboard
To view a record within Whiteboards, click on the record you wish to access within the Whiteboards tab.
After selecting a record to view, you’ll be shown the details flyout displaying all the necessary information pertaining to the Whiteboards record. Let’s review the unfamiliar fields within this flyout.
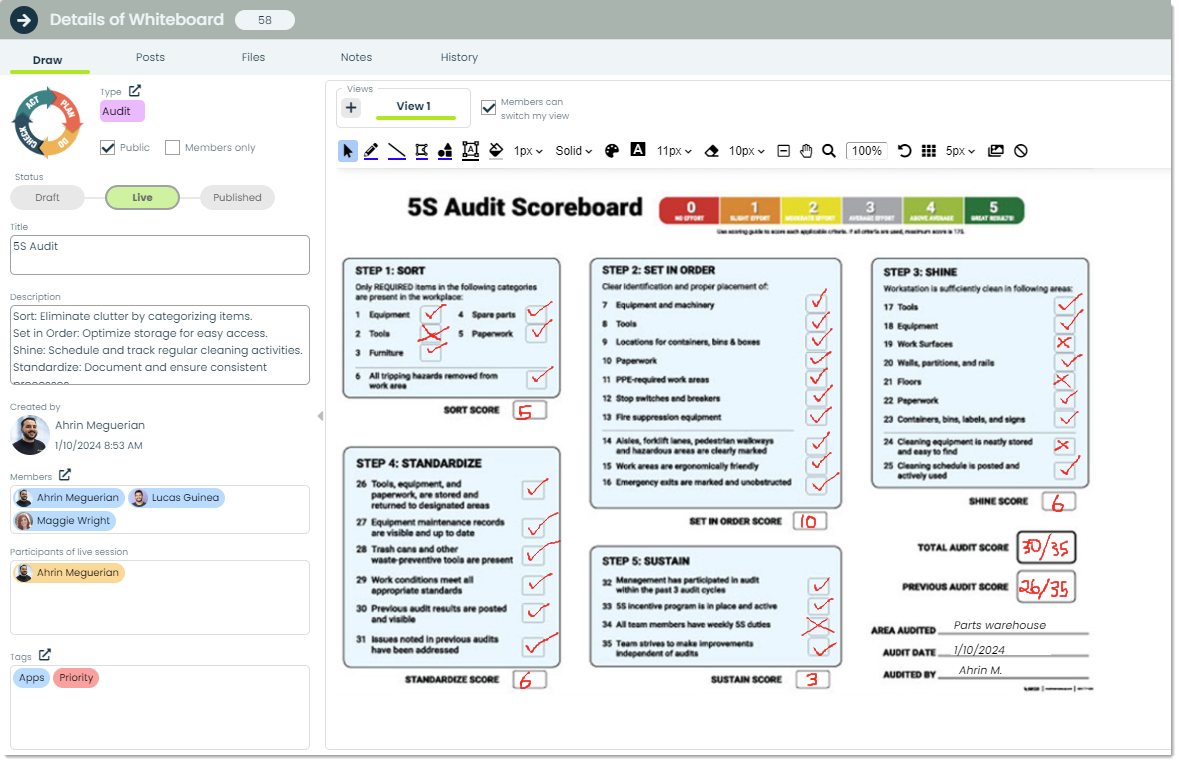
Status – In Status, you can track and manage the entire process of creating and editing a whiteboard from start to finish. This status can be determined by clicking on the button that most accurately represents the current stage. With this, you and your team can have a clear understanding of the current stage the whiteboard is in.
Draft: This is the initial stage where the whiteboard is created as a preliminary document or plan. It includes fundamental details about the whiteboard, but is not yet ready to be finalized.
Live: The whiteboard is live, meaning that people are currently interacting and working on the record.
Published: The whiteboard no longer has any live participants, and is published for others to see.

Tags – Visually, tags are labels with customized font and background colors. They are used throughout Appward to provide better organization and searchability of your organization’s whiteboards. Furthermore, tags offer additional context to individuals within your organization, enabling them to gain insights into the content of a record before they even access it. For more on Tags, please check out Using Tags.
Participants of Live Session – In Participants of live session, you’ll see a list of contacts from your organization who are currently or have previously been involved with the live edit session of the whiteboard you’re viewing.

Views – As you navigate through the development of a whiteboard, there might be occasions when you wish to alter the perspective that you or your colleagues are currently observing. Simply utilize the “+” icon to introduce an extra view. Consider it as incorporating an extra whiteboard page, providing you with a blank canvas to articulate your thoughts and ideas. To navigate through your existing views, you can click through the tabs.

As you work within a whiteboard, there are many tools you can use to express your ideas the way you need to. Let’s go over the available tools within the integrated editor.

Select/Adjust – This tool allows you to choose and manipulate objects or elements within the workspace. You can move, resize, or modify selected items using this tool.

Sketch – The sketch tool is used for freehand drawing or creating rough, hand-drawn elements on the canvas. This is especially helpful when writing over a document or marking up drawings.

Line – This tool enables the creation of straight lines between two points on the canvas.

Polyline – Similar to the line tool, the polyline tool lets you draw a series of connected straight line segments.

Shape – The shape tool allows you to create predefined geometric shapes, such as circles, rectangles, or triangles.

Text – This tool is used for adding text to the canvas. You can input and format text to convey information or labels.

Fill – The fill tool allows you to add color or shading to the interior of a shape or text, making your visuals pop when they need to.

Line width – This setting controls the thickness of lines you create with the drawing tools.

Line style – Line style determines the appearance of lines, such as solid, dashed, or dotted.

Select color – Select color enables you to choose the color for drawing, filling, or outlining objects on the canvas.

Text background – This feature lets you add a background color to the text, enhancing its visibility against the canvas or image.

Text size – This is where you can adjust the text size.

Erase – The erase tool removes drawn or sketched elements from the canvas. Simply click and drag your cursor over the fields you wish to erase.

Eraser width – These settings control the size of the eraser tool, affecting the area it covers when removing elements.

Delete selected – You can use the Delete selected tool to delete an element that you select. This can be used to delete individual elements such as text boxes, shapes, and more.

Pan – With the Pan tool, you can click and drag to view other areas of the canvas, without changing any of the existing content.

Zoom – The zoom tool lets you magnify or reduce the view of the canvas to focus on specific details.

Show/Hide grid -This toggle displays or hides a grid overlay on the canvas, aiding in alignment and precision.

Insert image – This tool allows you to import and place images onto the whiteboard.

Clear – The Clear tool removes all content from the canvas, providing a clean slate.
Frontline features of Whiteboards
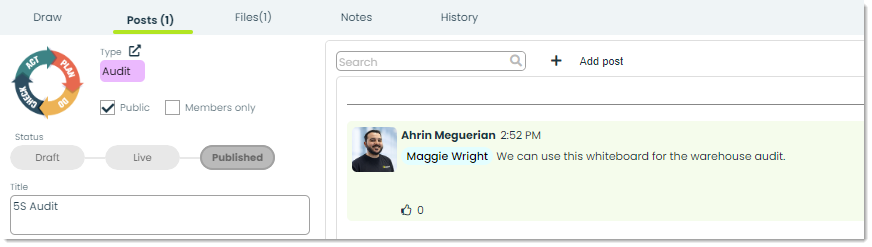
Posts – In Appward, a post is a comment that can be liked or replied to directly by other members of your organization.
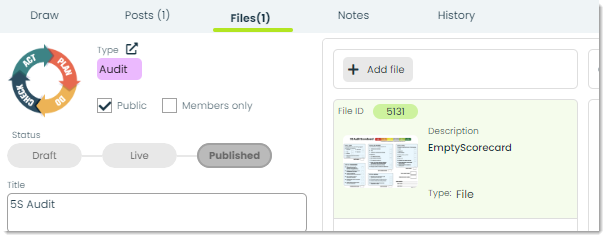
Files – Through the Files tab, you can attach essential documents to a Whiteboards record. You can add files directly from your computer or from the Appward cloud. After adding a file, you can view it through an integrated document preview within the Files tab. Individuals within your organization with access to the record can view and download the file to their personal computers.
Notes – Within the Notes tab you can write, save, and share written records that help capture and convey your thoughts. You’ll be able to stay organized, provide better context to whiteboards, and improve communication between you and your team.
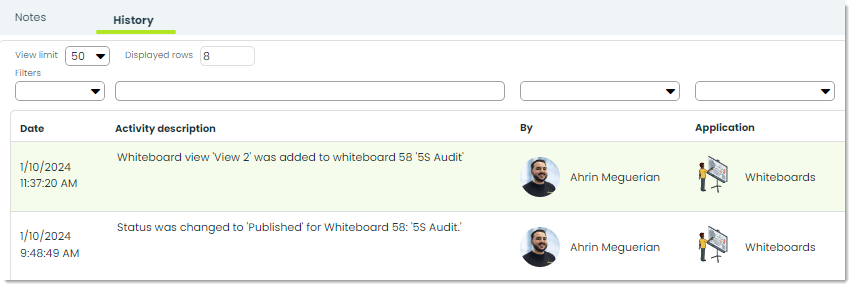
History – In History, you can view an activity log related to the Whiteboards record you are viewing. You will see a list displaying the modifications date, activity description, modification author, and the application in which it was made.
Additional features of Whiteboards
Help – Look for the help button in most of the apps in Appward. This resource offers insightful tours and information collected specifically to guide you through the app’s functionalities. Interactive, step-by-step tours are designed to give you the foundation to start using all the robust features within Appward.

Archive – Archiving is a common feature within the majority of apps in Appward. Archive
serves as an effective tool when you wish to remove a record from sight without permanently deleting it. Archived records are essentially concealed from the main screen but remain accessible through specific search filters.

Delete – To delete a Whiteboard records permanently, you can do so using the Delete button. These records will not be recoverable.
