Table of contents
Getting Started with Actions
Tuesday January 2, 2024-17 min readIntroduction
Appward’s Actions app makes it easy for teams to manage tasks smoothly, ensuring everyone stays on the same page, takes responsibility, and tracks progress effortlessly. It simplifies handling your daily tasks or intricate processes with clear visibility.
This guide will cover all the features of the actions app that you can take advantage of to promote seamless task management and completion.
Let’s get started
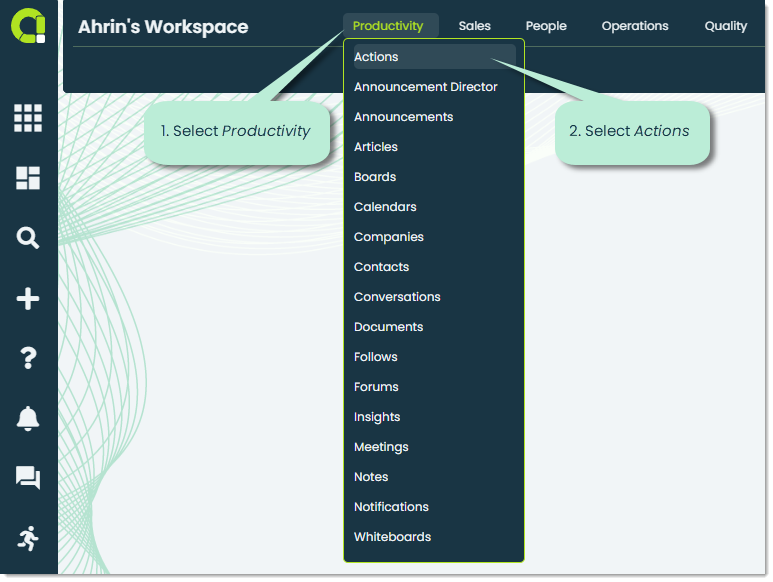
To open the Actions app, navigate to the Productivity category and select Actions.
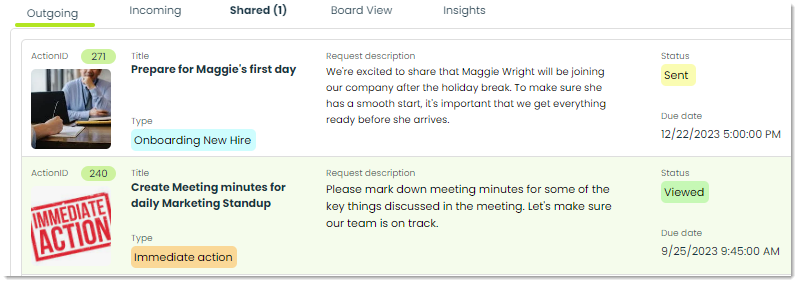
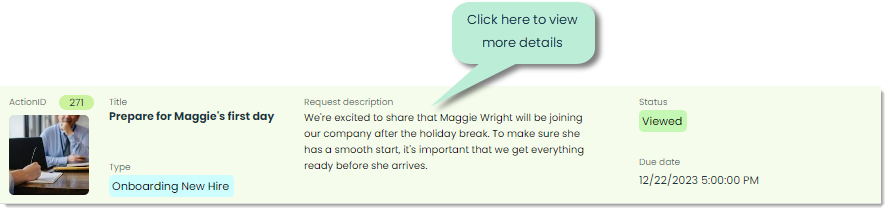
The first thing you’ll see when you open the app is a list of your outgoing Actions. Actions are defined routine duties or project-specific activities that are assigned to other individuals within your organization. Actions are usually required to be completed within a certain time frame and are often linked to events such as meetings or projects.
Note: If this is your organization’s first time using the app, this screen will be blank. We’ll go over how you can start adding and viewing actions later in this guide.
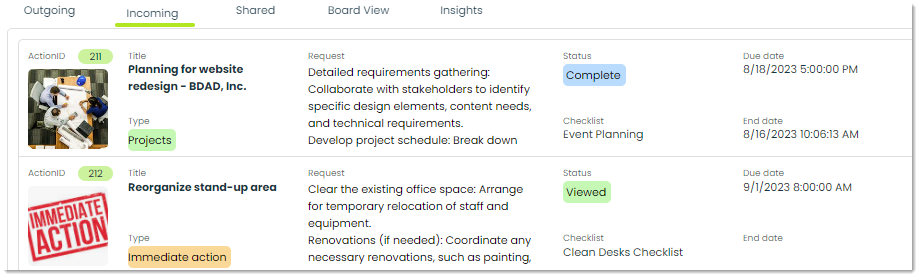
Incoming –This tab serves as a centralized location where you have the ability to view and manage all actions that have been directed to you by other members in your organization.
Shared – In Shared, you can view the actions in your organization that have been shared with you. Being designated as a member of the record means that you are involved in the planning and completion of the action, however you are not directly responsible for working on and completing it. This is great for observing or staying informed about actions in your organization that are related to your department, but not directly related to what you are responsible for.

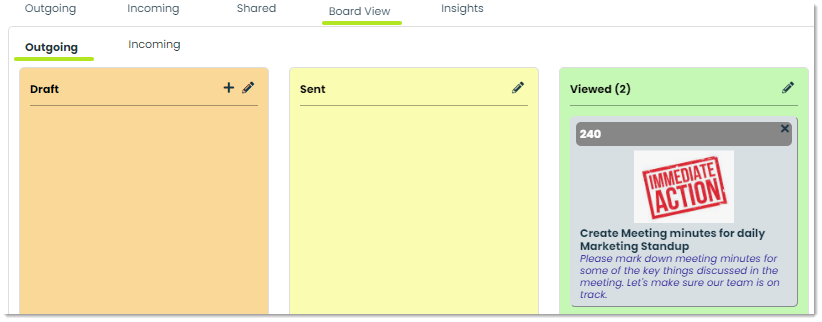
Board view – This tab shows a Kanban-style display of actions grouped by the stage they are in. For example a new action that was just sent out can be found in the Sent column, and will be moved to the Viewed column when viewed by the recipient. With the boards view, you can visualize the life cycle of actions within your organization and manage their stages by dragging and dropping cards into their appropriate columns.
Insights – In Insights you can analyze collected data from your organization’s actions. Valuable information related to completion status, time to complete, or type of action can be learned and uncovered using insights. For more on Insights, please check out our Getting Started with Insights Guide.
Creating and assigning an action
To create a new action, click on the + icon at the top of the app screen.
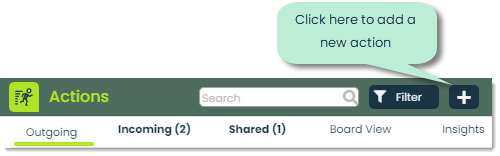
This will bring up the Add Action popup, where you can add all the necessary details for the action you are creating.
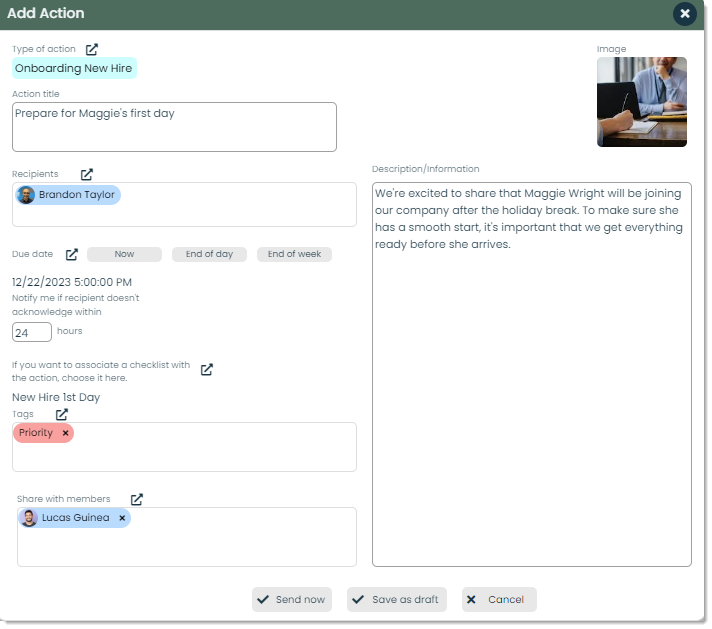
Type of action – Types are a way of classifying your companies’ actions into their own categories for better organization and searchability. You have the flexibility to establish and designate types that align with the specific needs of your business. For example, you can create a type called Onboarding New Hire to classify an action focused on ensuring that a new hire is onboarded properly.

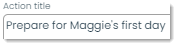
Action title – The name or label assigned to a specific action. It should serve as a brief summary that captures the main topic of the action, making it easier for individuals to recognize and understand what the action is about at a quick glance.
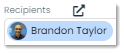
Recipients – Recipients are individuals from your organization who will be responsible for the completion of the action. You can select a single recipient, or multiple recipients according to your requirements.
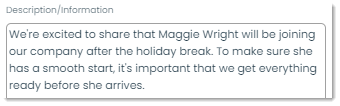
Description/Information – The Description/information field is where you can outline the details and specifications for an action. This section is important for clearly stating what needs to be done. You can include additional directions or guidance if required.
Due Date – This is where you can set the due date for the action. You have the flexibility to choose from preset options like Now, End of Day, or End of Week. Alternatively, if you need more customization, you can click on the external link icon and specify a particular date and time.

Associated checklist – You can import checklists that you’ve created in the Checklist Creator App directly into the actions app. Checklists can play an important role in ensuring clear and organized action directions are conveyed to the recipients. To add a checklist, simply click the external link icon and choose the relevant checklist from your organization’s options. For more on checklists, you can check out the article
Getting Started with Checklist Creator.
Tags – Tags and Types are similar in that they both serve as keywords to classify and categorize actions. However, there is a key difference between them. Types are singular categories that each action falls into, whereas tags offer more flexibility as they allow multiple keywords to be associated with a single action.

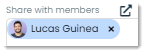
Share with members – Keeping the involved parties in the loop about an action is important. You can select from a list of contacts within your organization and assign them as members of the action record. This will notify them on action status, and keep them notified for every step throughout the completion process.
Finalize – You can finalize the process of creating your action in different ways. Let’s go over the options.
Send now: You can press Send now to send the created action to the assigned recipient. This will prompt a notification on their end, letting them know that they have a new action to complete.
Save as draft: If you’re not quite ready to send your action out yet, you can save it as a draft. This will create a record that only you can see as the creator, giving you as much time as you need to get the action ready for the recipient.
Cancel: You can stop the creation of the action and close the Add Action window by pressing Cancel.

Viewing and managing an outgoing action
To view an existing action, you can do so by clicking on the record of the action you wish to view.
This will prompt a details flyout, showcasing all the details of the action. Let’s go over the unfamiliar fields.

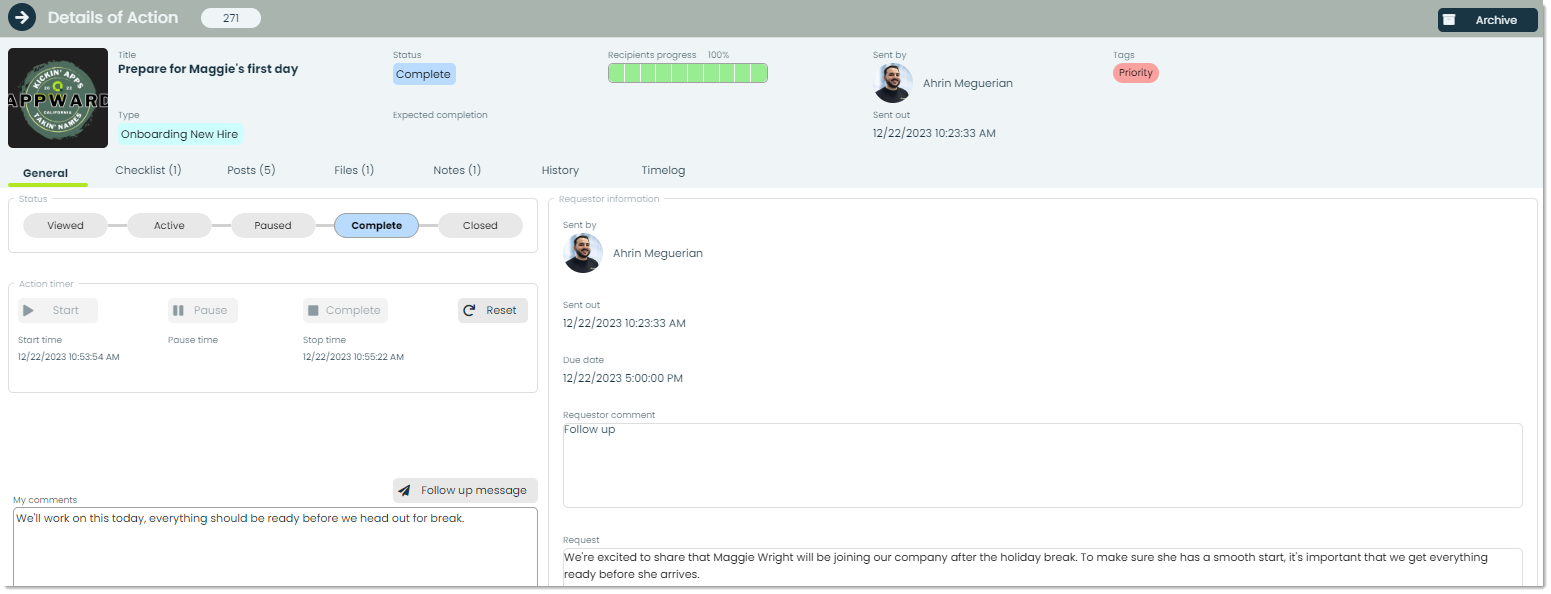
Action stages – Action Stages are the phases or statuses that an action may go through in its lifecycle. Action changes are automatically determined when particular tasks of an action are completed. You can also manually change action stages by clicking on the appropriate stage in the status bar.
Draft: The phase in which the action is still being planned and conceptualized.
Sent: Sent signifies that the action has been sent out to the relevant recipients.
Viewed: The assigned individuals have accesses and viewed the details of the action.
Active: The action is currently in progress.
Complete: The action has been reviewed by the necessary individuals and has been marked as completed, meaning that there is nothing left to do.
Closed: You can change the stage to Closed when the action has been completed and there is no reason to go back to the record.

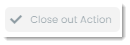
Close out action – You can close out an action when the recipient has completed their action by pressing the Close out action button. This button will be greyed out until the recipient is ready.
Within the details flyout, there are additional tabs displaying the recipients of the action as well as the checklists associated.
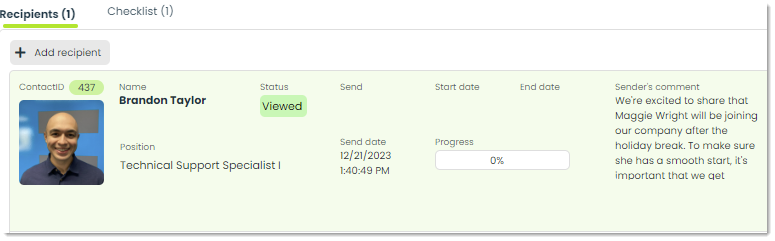
Recipients – You can check the designated recipients by navigating to the Recipients tab located in the details flyout of an Actions record. This tab provides information about the contact, including their name, image, position, and their current status regarding the action.
Checklists – In the Checklists tab, you can view the associated checklist or select a different one if you have the permission to do so.
Adding approvals to an action
During the course of an action’s life cycle, you can also add approvals. Approvals are special requests that require permission or approval from administrators or managers to complete.
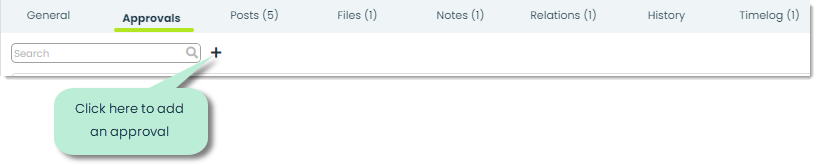
To add a new approval, click on the + icon within the Approvals tab of the details flyout.
You will then be presented with the Add approval popup, where you can add all the necessary details of an action.
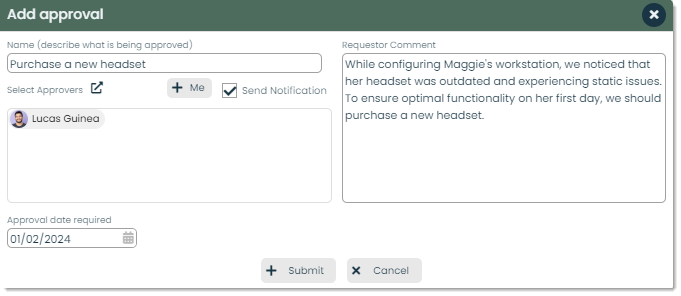
Upon pressing Submit, your new approval can be found within the Approvals tab of the action you added it for. This submission process will create a notification and deliver it to the workplace of the person responsibly for approving the request.

Notify – With the Notify button, you can send an additional notification to the approver involved with the approval request. This feature ensures that crucial information reaches the necessary parties, even if overlooked initially.

Reset – You can initiate a fresh start for a specific approval record with the Reset button.

Viewing and completing an incoming action
Similar to viewing actions that you send out to recipients, you can view and complete actions that have been sent to you specifically. To view actions that you are the recipient of, navigate to the Incoming tab at the top of the app screen.

You can select a record to open up its details flyout. This is where you can view all of the action’s details and begin working on your assigned task.
Here you can view the same details as the outgoing tab, however it’s from the perspective as a recipient. This means that you have the ability to modify and edit the required fields to complete your assigned action. Let’s go over the unfamiliar features in this tab.
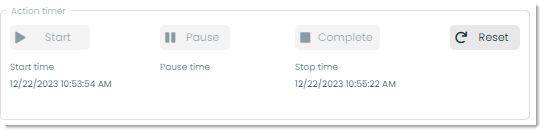
Action timer – Within the details flyout of an incoming task, there is a built in Action timer designed to keep you on track and give you precise time measurements of tasks completed within an action.
Start: After pressing Start, the timer will begin keeping track of the duration spent on your action.
Pause: You can temporarily stop the timer without resetting it to zero using the Pause button.
Complete: After completing all the necessary tasks within an action, you can press Complete to inform a mange or supervisor that the action has been completed.
Reset: The Reset button can be used to set the timer back to zero. This button clears the Start time, Pause time, and Stop time fields, giving you the opportunity to start a fresh timer. This is especially useful when an action is composed of multiple individual tasks each requiring their own time tracking.
Frontline features of Actions
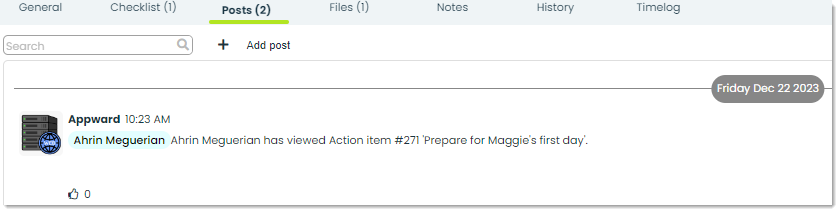
Posts – A post is a comment which can be replied and reacted to by other users in your organization. You can write a post to ask questions or remind a colleague about the details of an action that will be completed.
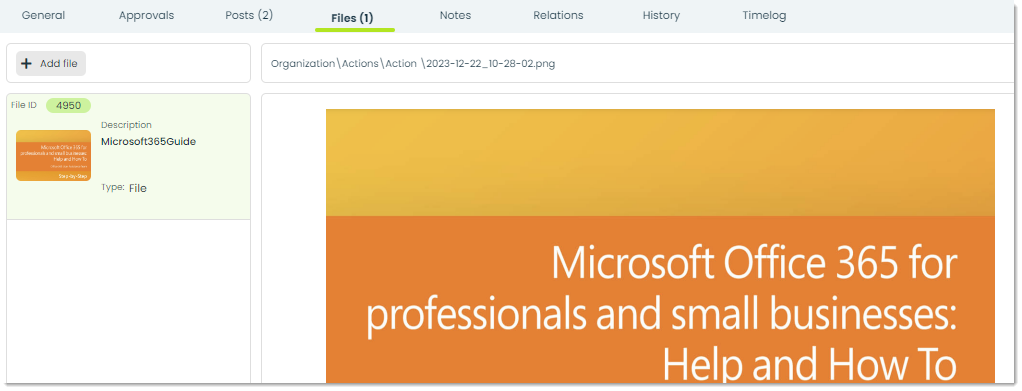
Files – Through the Files tab, you can attach essential documents to an Actions record. You can add files directly from your computer or from the Appward cloud. After adding a file, you can view it through an integrated document preview within the Files section. Individuals within your organization with access to the record can download the file to their personal computers.
Notes – Within the Notes tab you can write and store notes to help capture and convey your thoughts. You’ll be able to stay organized, provide better input to installations, and streamline communication with your team. The Notes tab serves as a centralized space where you can effortlessly jot down important information, ideas, or reminders related to your actions.

Relations – You can include related records from other apps within your organization in the Relations tab of an Actions record. This is a great way to centralize related records in one place.

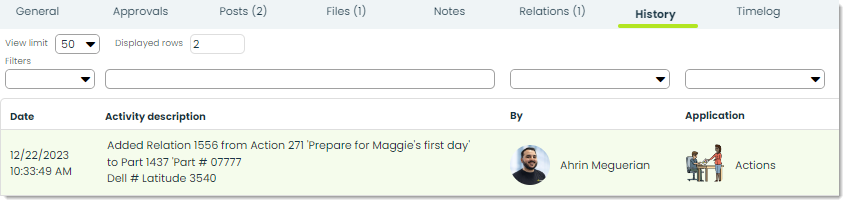
History – You can monitor changes and updates made to an action through the History tab. Within this tab you can track the changes made, date of change, and the individual responsible for making the change. Additional search filters can be applied to narrow down the displayed list of activities. You can sort by time of activity, name, and even search by specific keywords.
Timelog – Timelog is a valuable feature that enables you to monitor and record the time dedicated to each task as part of completing an action. This functionality is beneficial because it gives you a way to efficiently track time spent and improve future decision making.

Additional features of Actions
Help – Look for the help button in the majority of apps on Appward. This resource offers insightful tours and information collected specifically to guide you through the app’s functionalities. Interactive, step-by-step tours are designed to give you the foundation to start using all the robust features within Appward.

Archive – Archiving is a common feature within the majority of apps in Appward. Archive serves as an effective tool when you wish to remove a record from sight without permanently deleting it. Archived records are essentially concealed from the main screen but remain accessible through specific search filters.

Delete – To delete an Actions record permanently, you can do so using the Delete button and removing it permanently. You will be prompted with a popup for additional verification of the request to delete.
