Table of contents
Getting Started with Boards
Tuesday August 22, 2023-23 min readBefore we start, let’s go over some key terms
Kanban – Kanban is a popular methodology for managing projects that focuses on visualizing work tasks, limiting the amount of work in progress (WIP) and keeping your workflow organized. This is the methodology that Appward implements with the Boards app.
Board – When we talk about a board, we are referring to a Kanban board. Boards can be created for different reasons, but the general idea is that each board represents a project you want to complete. For example, you can have a board called Office Remodel which tracks every task or issue related to a remodeling of your office space. Additionally, you can have a board called Website Development which keeps track of any tasks or issues encountered while developing your website. The time and complexity for each board may be different, but the idea of visually organizing your projects is the common theme.
List – Boards typically consist of columns called lists that represent different stages or phases of the project, often aligned you and/or your team’s workflow. Each list represents a step in the process, such as To Do, In Progress, Testing and Done. Work items, often represented by cards, are placed in these columns to indicate the progress of particular tasks.
Card – Within each list are individual items called cards. These are the smallest units of the Kanban system and represent a task or bug that is to be completed. As you and your team make progress on individual cards, you move them from list to list to indicate that the status of the card has changed. For example, if a card originally in an In Progress list has been completed and is ready for testing, you can move that card to the Testing list, notify the appropriate parties and move onto the next steps. This promotes a streamlined workflow and ensures that each task is seen out to completion, literally.
Introduction
Boards is Appward’s central project management system. This guide will cover every aspect of Boards, from creating new boards to creating cards and transferring them from list to list for an organized workflow.
Let’s get started
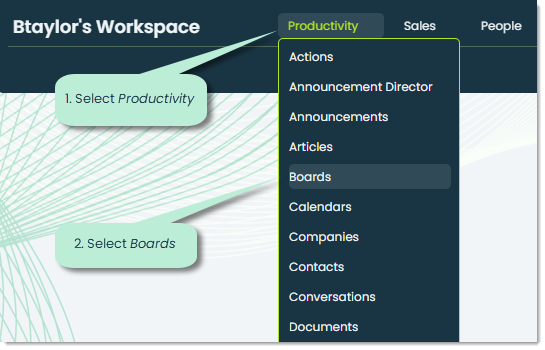
To open the Boards app, go to the Productivity category of the main navigation bar and select Boards.
When you open the app, you’ll see a screen that looks similar to this:
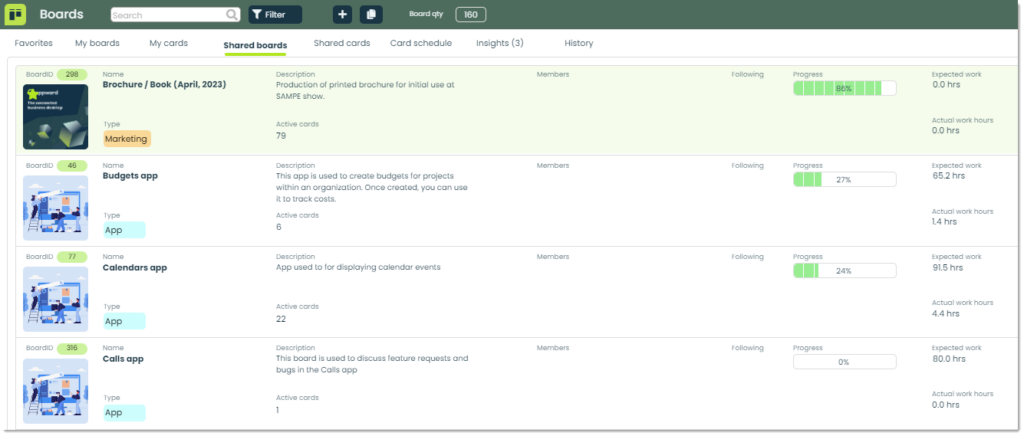
If no boards have been created, this section will appear blank. Let’s go over each tab from left to right.
Favorites – You can “favorite” specific boards to easily access them from this tab. All of your Favorites will show up here.
My boards – This tab is used for your personal boards. If you are the creator of a board, you have the option of moving your board from Shared boards to My boards from the Edit settings. We’ll go over this in a later section.
My cards – This tab displays all cards housed in your boards from the My boards tab.
Shared boards – Shared boards are all of the boards shared across your organization. This is the default tab upon opening the app and can be used to access different tasks from different projects.
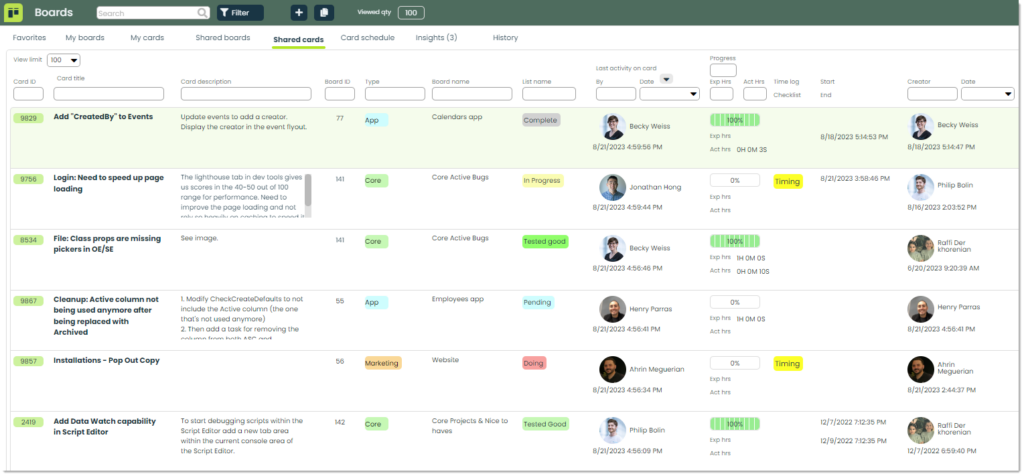
Shared cards – Shared cards are all of the cards that are shared across your organization. Here, you can get an idea of the different tasks that each person is making progress on as well as use various filters to find any tasks by card ID, title, description, board ID, type, board name, list name, last active person, progress or creator.
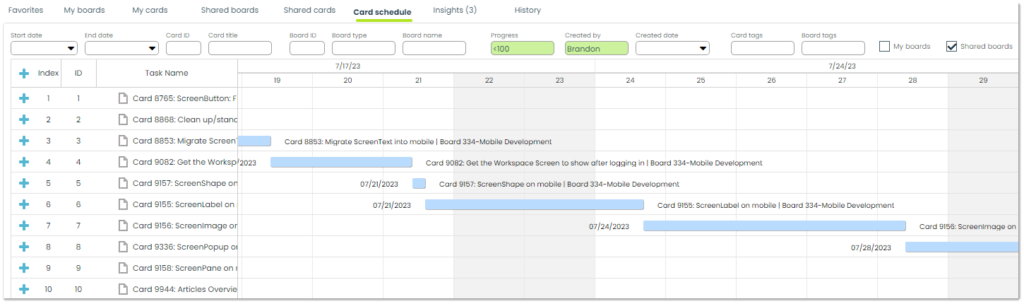
Card schedule – The card schedule displays a Gantt chart of board activity. Each activity is represented by a bar; the position and length of the bar reflects the start date, duration and end date of the activity.
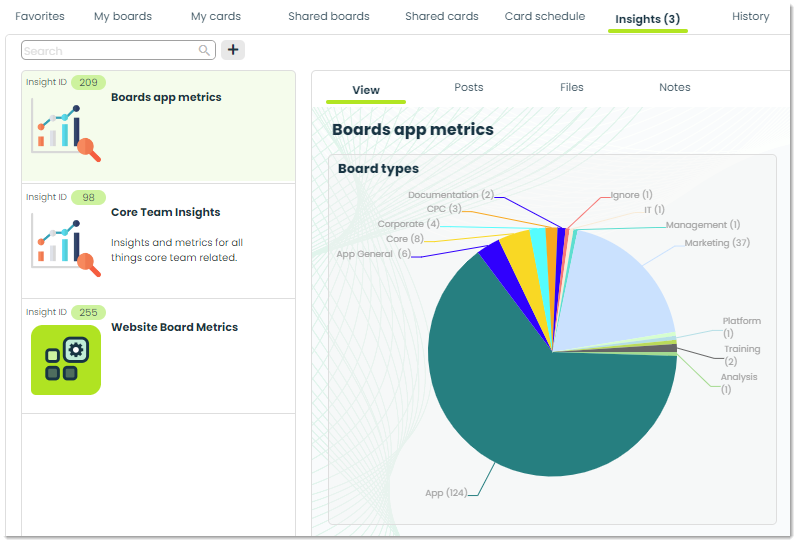
Insights – This tab is used to analyze data of your board data. You can configure highly-customizable queries for gaining valuable, measurable components of your boards such as cards per board, . For more on Insights, refer to our Getting Started with Insights guide.
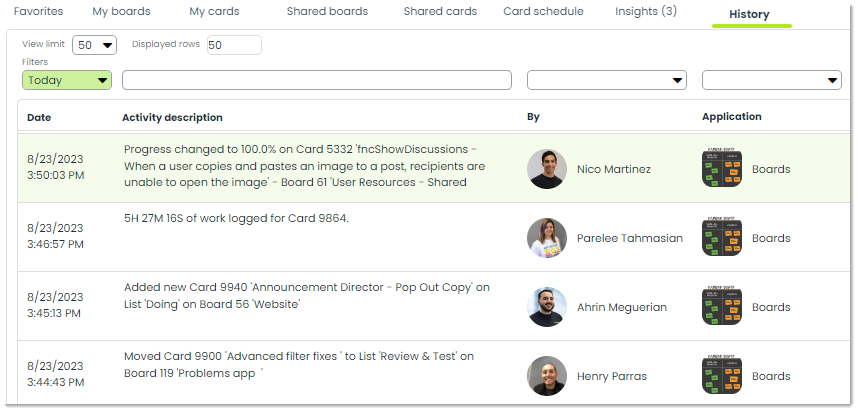
History – The history tab provides a detailed log of board activity. You can see when the action was taken, what the action was, who took the action and for what application the action was taken.
How to add a new board
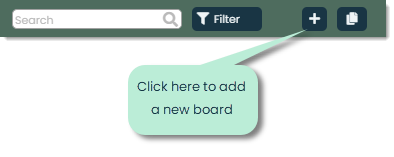
To add a new board, click the + button at the top of the screen.
This will open a popup for entering the board’s information.

Let’s go over the different fields of this popup.
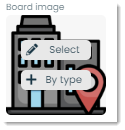
Board image – This is the image that will appear in the main list of boards. You can select any image for the board or use the image related type of board.
Colors – You can customize the colors of the board to whatever you’d like.

Board type – You can classify your boards by types which are categories created by you. For this example, we are using the Office type to indicate this is an office-related project. Each type consists of a name, background color, text color and optional type image (this is the image used when selecting a board image by type).

Board name – This is the name of the board. It should identify the project and be distinguishable from your other boards.

Board description – This is a description of the board. It should give a clear explanation of the purpose of the board and what is to be accomplished.

Tags – Appward implements a tag system for categorizing records. Tags are keywords which incredibly useful for finding and filtering for specific items. How is this any different from types? You can only have one type per record, but you can have multiple tags. Because we’ve tagged this board with Appward, Branding and Office, we can use the search or filter features with those tags to locate this record faster.

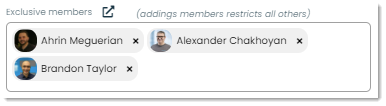
Exclusive members – Optionally, you can make a board private to specific people called members. These people will be the only ones with access to the board.
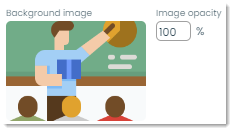
Background image – For more customization, you can add a background image to your board. You can control the opacity for a more transparent image.
Lists for board – Here is where you would add the different columns of your board. Click the + button and a new list will appear for you to customize. You can add as many lists as you’d like. Let’s take a closer look at each section.
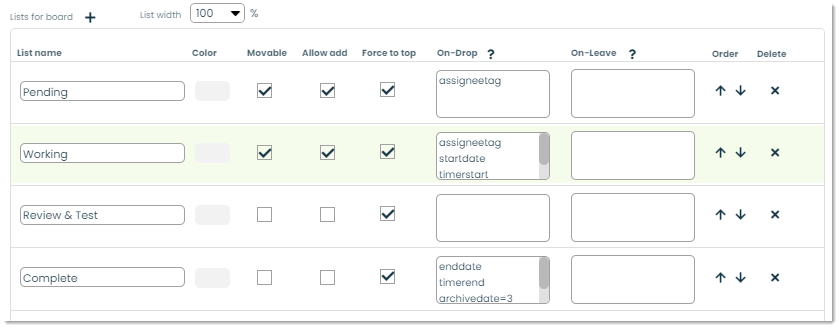
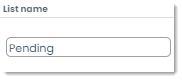
List name – This is the name of the individual list. It typically refers to the current status of a particular work task. Some good examples of possible list names include Pending, Working and Complete, but you may use whatever names fit your workflow.
Color – You can modify the color of each list by clicking on the rectangle. This is visually helpful for differentiating work tasks.

Movable – If the box is checked for this setting, you can move the list around. Say, for example, you want to modify the order of steps to be taken for a project. You can do this by moving the list around.

Allow add – If this box is checked, you can add new cards to that list. Sometimes you’ll want to limit which lists you’re able to add cards to. You’ll want to add new cards to say, a Pending Tasks list, but you might not want your team to add cards to a Review & Test list.

Force to top – This setting indicates whether or not a newly-added card will be added to the top of the list. Depending on your workflow, you can check this box to feed new cards to the top for extra visibility or add them to the bottom until prior cards are handled.

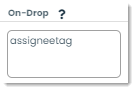
On-Drop – You can have certain actions take place when a card is dropped into the list. For example, you can add Progress=30 and this will set the progress of any card dropped in to 30%. Place separate actions on separate lines. For a list of all commands, click the ? button next to On-Drop.
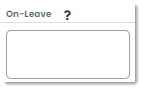
On-Leave – You can have actions take place when a card leaves a list. Once the card is dragged out of that list, those actions will take place. The same list of actions for On-Drop apply to On-Leave.
Order – You can adjust the order of your list with these arrow buttons. Up will bring the list farther left and down will bring the list farther right.

Delete – You can delete a list entirely by clicking the x icon next to it.

Once you have configured all of the settings for your board, click Submit at the bottom and the list will be created. By default, new boards are added to the Shared boards tab.
Let’s go over the layout of a board
To view a board, you can click on it from the Shared boards, My boards, or Favorites tab. This will open up the board’s details, which includes every list and the cards within those lists. Let’s take a look at Appward’s Video Topics board and get an idea of how we use it to streamline our workflow.
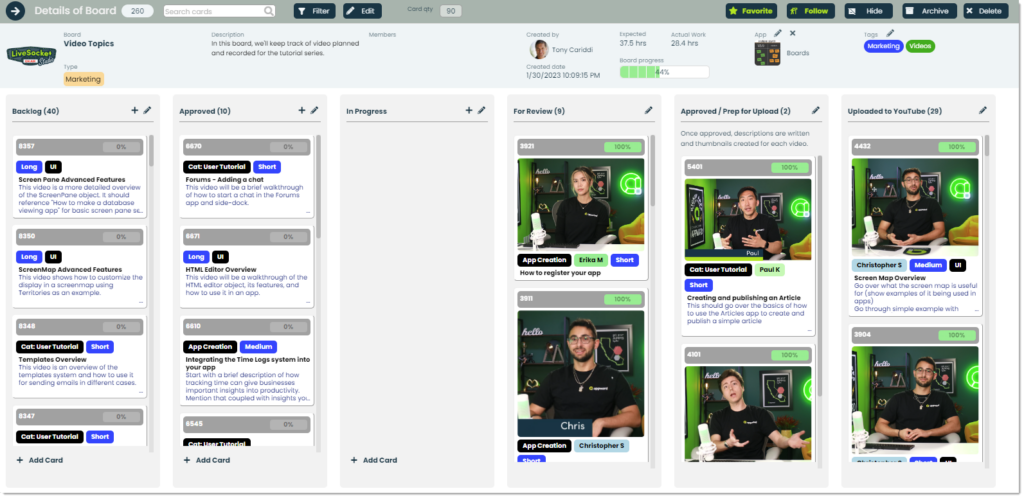
Let’s dissect this piece by piece, starting with the top section.

From this section, we can see that this board is called Video Topics, is has 90 cards, it is a Marketing board as indicated by the type, it is used to track the production of Appward’s tutorial videos, there are no exclusive members, the board was created by Tony Cariddi on 1/30/2023, the total progress of this project is 44%, this board is linked to the Boards app and it has two tags for Marketing and Videos.
We can also see that this board consists of six lists: Backlog, Approved, In Progress, For Review, Approved/Prep for Upload and Uploaded to YouTube.

This means that for this project, there are six different phases of the life cycle of each task:
- Backlog represents video ideas that have been proposed but not yet approved.
- Approved refers to video ideas that have been approved by management.
- In Progress represents videos that are currently being worked on, whether that is recording or editing.
- For Review means that a video has been recorded, edited and is waiting for review from a supervisor.
- Approved/Prep for Upload means that the video has been approved for upload and that it is being prepared with a thumbnail and description by someone from the marketing team.
- Uploaded to YouTube means that the final, edited video with thumbnail and description has been uploaded to Appward’s YouTube channel.
This is just one example of a workflow for your work tasks. Each project is different, and it is up to you to determine what best suits your wants and needs.
Let’s go over the layout of a list
The number next to each list represents the quantity of cards in that list. You’ll notice that some lists have a + button while others do not. That’s because the Allow add feature has only been checked for the first three lists. The pencil icon is for editing the settings of a list. We’ll go over these buttons and other editing features in a later section.
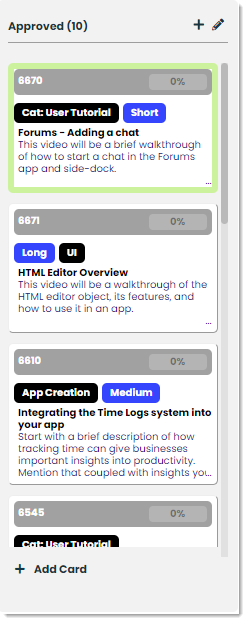
Finally, let’s go over the layout of a card
Each card represents its own distinct work item. In the case of the Video Topic board, each card represents a video idea which may or may not ultimately turn into a video for the Appward YouTube channel. Let’s go over the different aspects of a card.
Card ID – Each card has an ID which acts as a unique identifier.

Progress – This number signifies the percentage of progress toward completion of the task.

Tags – Similar to how a board can have tags, cards can have tags for categorizing and easily identifying specific records.

Title and description – This information indicates what the work item is and a brief description. These should be descriptive and to the point for whoever is reading the cards.

How to add a new card to a list
Now that we’ve gone over the architecture of a board, let’s try adding a card to a list. We’ll continue using the Video Topics board for this example. To add a new card, click on the + button for any list that allows addition of cards.
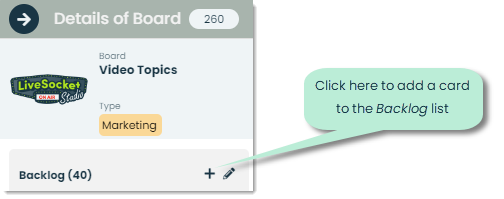
Doing so will bring up a popup for adding the card information.
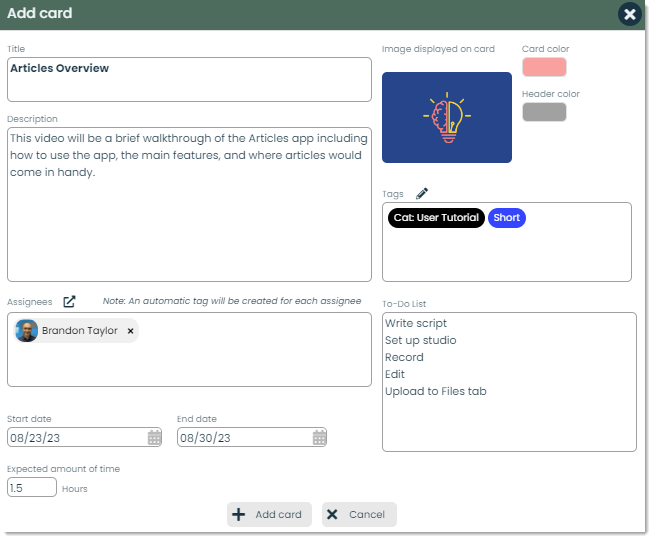
Let’s go over the different fields you can fill out for a card.
Title – This field serves as the name of the card. It should be clear, concise and indicate the main objective of the card.
Description – The description should be a helpful text which gives any additional details required for whoever will be handling the card.
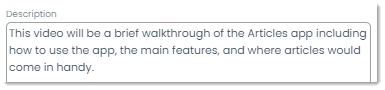
Image displayed on card – Optionally, you can display an image for the card which can be inserted from your computer, the Appward cloud or from pexels.com.
Card and header colors – You can adjust the colors of the card to visually differentiate it from other cards.

Tags – Tags are key terms you can assign to cards to categorize and better organize them. For example, because the card is being tagged Cat: User Tutorial and Short, you can search and filter using those tags to more quickly find this card.

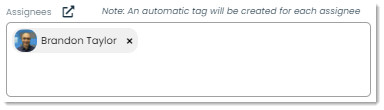
Assignees – Assignees are used to identify the participating members of a task. When you assign new people, they are notified and a tag will automatically be generated for them.
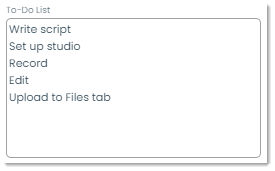
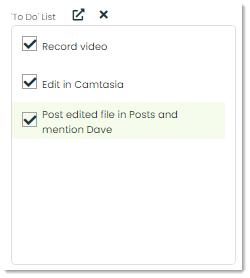
To-Do List – Optionally, you can add a line-separated to-do list of sub-tasks. This will generate a checklist in the details screen of the card, and checking off various tasks moves the progress bar of the card forward relative to the number of total tasks. If there are five tasks and one task is checked off, the progress bar will automatically move to 20%. If there are three tasks and two of them are checked off, the progress bar will move to 66%.
Start and end dates – You can set a timeline for the life span of a task from beginning to end.

Expected amount of time – This is the amount of time actually spent working on a task.

When you’ve added all the desired card information, your new card will be added to the respective list.

Depending on how you’ve set up your list, the card will either go to the bottom or top of the list. All assignees and followers who have chosen to be notified for card additions will get a notification about this.
How to view and edit a card’s details
After creating a card, you can view and edit its details by clicking on it from its respective list.

Most of the details on this screen are values that were covered during the add processes. You can edit the values of any field and Appward’s intuitive autosave feature will do the rest of the work. Let’s go over the additional fields of this page.
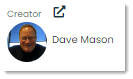
Creator – This field displays who created the card. You can modify this person by clicking the external link icon and selecting a new person.
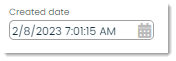
Creator date – You can modify when the card was created by clicking the calendar icon and selecting a new date and time.
Date to auto-archive card – Archiving a record will store it away from its list without deleting it. This is useful for clearing out your lists with cards that are not currently needed. This field is used to automatically archive a card by a certain date. If this value is set and that date is reached, the card will automatically be archived and can only be accessed via a filter for archived records.

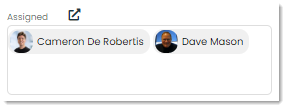
Assigned – You can modify the assigned members of a card by clicking the external link icon. Members are used to indicate the involved parties of a particular card and are helpful for anyone to determine who to reach out to regarding that work item.
To Do List – You can modify your list of sub-tasks by clicking the external link icon and adding or removing tasks, or check your tasks off which will move the progress bar accordingly.
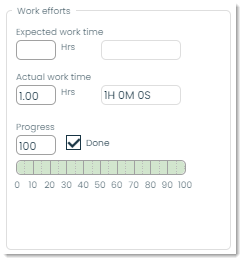
Work efforts – This section is used to display the expected time for a task, the time that has been spent on a work task and the total progress on the task. You can modify any of these values