Table of contents
Getting Started with Conversations
Thursday February 8, 2024-33 min readIntroduction
Welcome to Conversations – a tool for conducting and maintaining records of interactions with your team, partners, customers and vendors. In this guide, we’ll walk you through each style of Conversation, how to use and track each style and go over how Conversations is used across numerous Appward apps.
Let’s get started
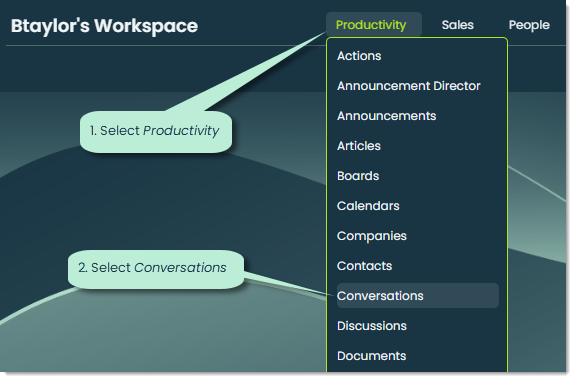
To open the Conversations app, go to the Productivity section of the main navigation bar and select Conversations.
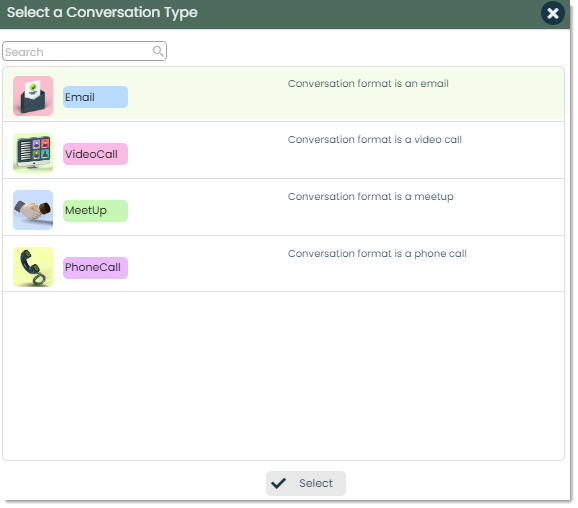
When you open the app, you’ll see a list of all your most recent Conversations. A Conversation can be one of four styles which is essentially the method of communication:
- Email – Track and send any digital mail from any of your mailboxes.
- Video call – Host video chats with the members of your organization and get full traceability of what took place.
- Phone call – Conduct actual phone calls with your customers, vendors, partners and more and record-keep the details.
- Meet up – This feature is for tracking in-person discussion, making it ideal for any important interactions, presentations or networking opportunities.
If you haven’t had any Conversations in any app, this list will be empty.
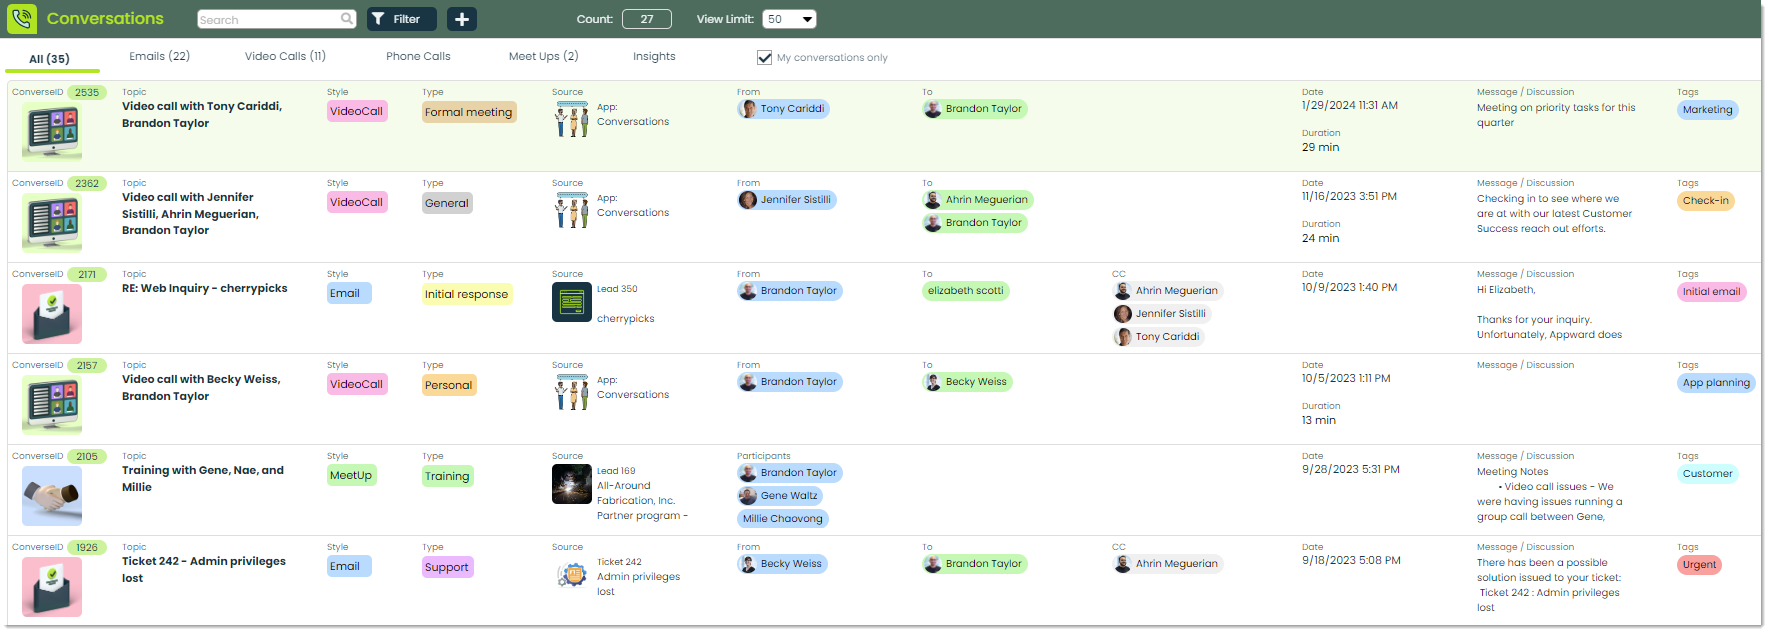
First of all, you’ll see that there are six tabs at the top of the screen.

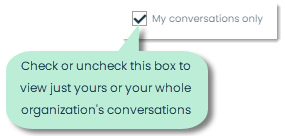
The All tab is a combination of all your Conversations, regardless of the style. The four middle tabs contain Conversations of that respective style. For any of these tabs, you can check or uncheck the My conversations only checkbox to view either your or your entire organization’s Conversation records.
We’ll cover each of these tabs in-depth in the next sections.
The Insights tab allows you to create and view different insights related to Conversations. Insights are analyses of your organization’s data. They are incredibly helpful in uncovering patterns, trends, correlations and other valuable information for your organization to make informed decisions, improve its processes and gain competitive advantages. For Conversations, you could analyze information on communication patterns, response time metrics or popular conversation topics. While Appward provides a default Insight for most apps, you can create your own custom insights for whatever your business wants to track. For a deeper look on using Insights, check out our article on Getting Started with Insights.
How to add a new Conversation
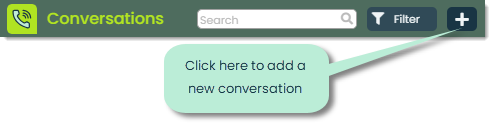
From any tab, click the + button at the top of the app to add a new Conversation.
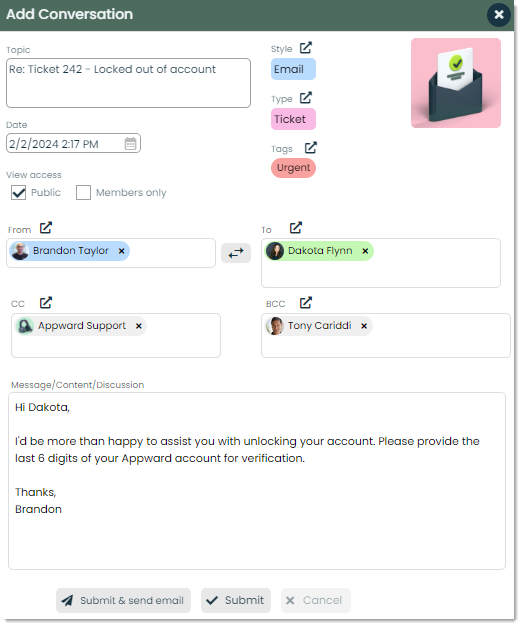
The following popup will appear for adding in the Conversation details.
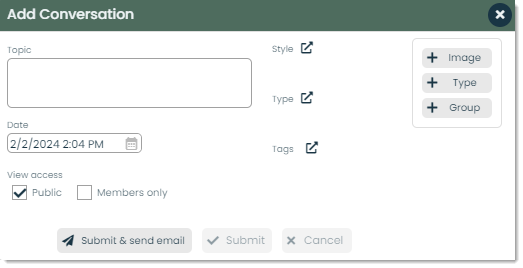
This popup will change depending on the Style that you choose, but the fields that appear here (besides the Submit & send email button) are the same for every style. Let’s cover those first.
Style – As mentioned before, this is the method of communication. Your selection here will affect how the popup looks, so it’s recommended you select that first. Next to Style, you can click the link icon to select what type of Conversation you are adding.

We’ll cover the fields specific to each Style in the upcoming sections.
Topic – Here, you can enter the title or subject of the conversation. If it’s an email, you can enter the subject of the email. If it’s a phone/video call or meetup, you could include the main point of the conversation and/or who is included.
Note: If you are adding a phone/video call or meetup, a Topic is automatically generated for you based on the members of the Conversation. For example, “Video call with Jennifer Sistilli, Ahrin Meguerian, Brandon Taylor” will automatically be generated for a video call between Jenn, Ahrin and Brandon.
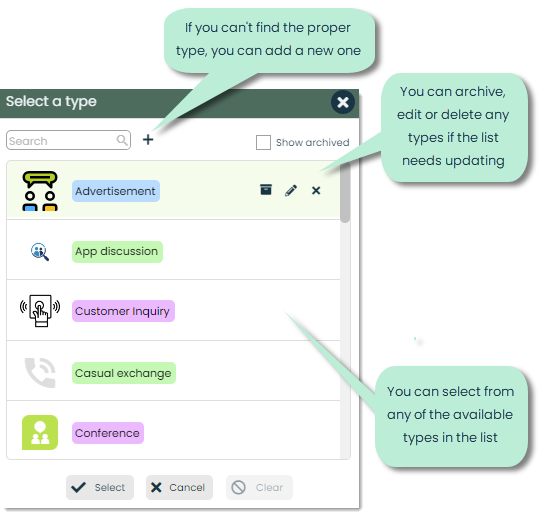
Type – You can add a primary category, defined by you or your organization, that this Conversation falls under. This is a great way to organize your Conversations into singular, distinct categories.
Click the link icon to select a new or existing type. Each type consists of a name, color and optional image.
For more on Types, check out our article on Using Types.
Tags – Tags can be used as a secondary level of categorization for the Conversation.
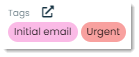
Click the link icon to select a new or existing tag. Tags consist of a name and color.
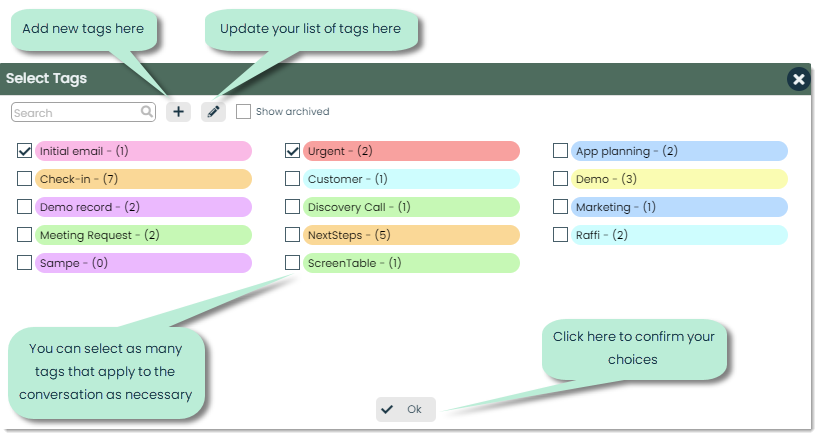
The biggest difference between types and tags is that Conversations can have at most one type, but they can have multiple tags. Tags serve three main purposes:
- Searchability – Tags make it easier for users to find the data they are looking for. Using the filter search, you can view results which contain a specific tag or set of tags.
- Context – Tags help users understand the context and content of a record. Because you can add as many tags as you want for any given record, you can provide users a general idea of what to expect before opening it.
- Organization – Tags help you organize your content. By using consistent and relevant tags across app records, you can make it easier for yourself and other users to explore and find similar data.
For more on Tags, check out our article on Using Tags.
Image – You can add a visual element to the Conversation record with an image. There are three options for you to select an image.
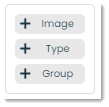
1. Image – Clicking on this button, you can select an image from the following sources.
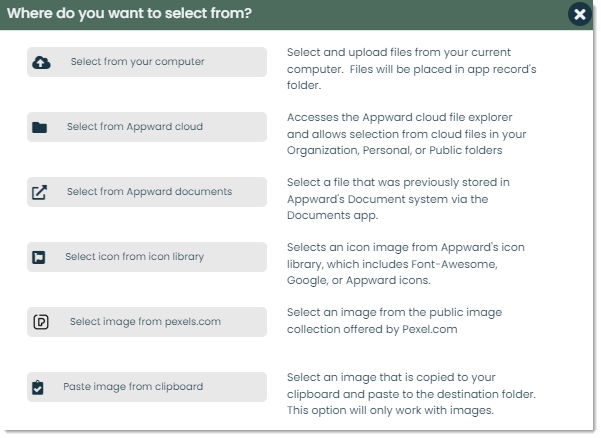
2. Type – If you click this button, the image associated with the Conversation type will be used.
3. Group – If you click this button, the image associated with the Conversation style will be used.
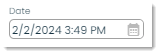
Date – This is the date of the Conversation. This will default to the current date and time. You can adjust it by clicking the calendar icon.
View access – You can control who can view the Conversation. Public means anyone in your organization can see the Conversation and its details, and Members only means only the people included in the Conversation will be able to see the record.

The next sections will cover adding each distinct style.
Adding and sending an email
Appward integrates with Postmark, Gmail and Outlook/Office 365, enabling you to send and receive emails directly within Conversations. This section will cover how to add, submit and send an email right from the app.
The following fields will appear for email:
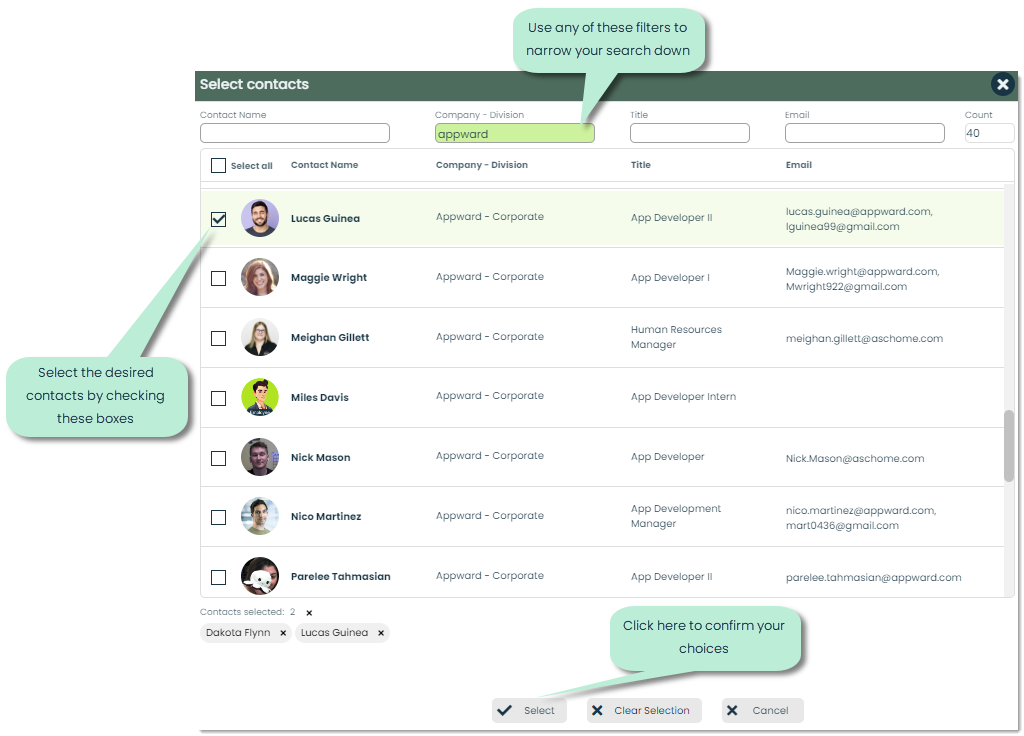
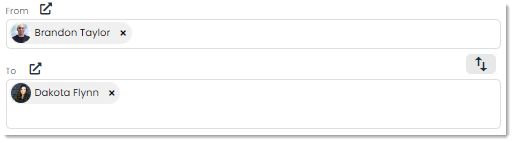
From/To – Here, you can indicate who sent the message and any recipients. The selection options are the contacts from your Contacts app. For each contact, their primary email on file will be used for the Conversation.
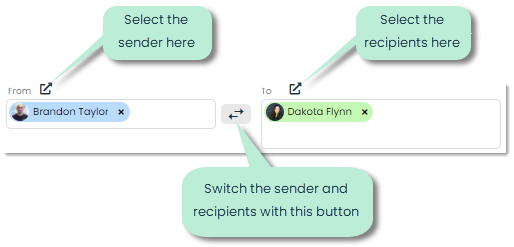
Click on the icons next to From and To bring up the following popup for selecting the sender and recipients.
CC/BCC – You can carbon copy (CC) and blind carbon copy (BCC) contacts your Contacts app. Similar to the From and To fields, their primary email address will be used. When you CC someone on an email, their email address is visible to all other recipients. The CC field is typically used when you want to keep others in the loop but the primary recipients are the main addressees. BCC is used when you want to send a copy of the email to someone without the other recipients knowing. The recipients in the BCC field are not visible to each other or to the main recipients.

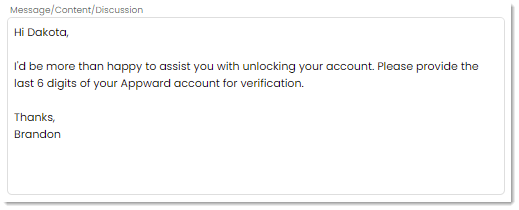
Message/Content/Discussion – This is where the content of the email would go. If you plan on sending , you can write out the email message.
Once you’ve added all the information, you have three different options.

- Submit & send email – With this choice, you are both creating a Conversation record AND sending an actual email. If you choose to send an email and it’s your first time doing so, you will be asked to authenticate whichever email is in the From field. We’ll cover how to authenticate your email in the next section.
- Submit – By submitting, you are creating a record of the email Conversation. No email will be sent.
- Cancel – You can cancel the creation of the Conversation completely.
How to authenticate your email
Email authentication is a set of techniques and protocols used to verify the legitimacy of an email message. Its primary purpose is to prevent email fraud and phishing attacks by confirming that the sender is who they claim to be. To send emails from a specific email address, verifying your login credentials through authentication is a mandatory step. Take the example from the previous section.

When sending an email through Appward, you’ll need to authenticate yourself as the person with access to the Sender email. This means providing the correct password for that email account. Depending on your email service (Gmail, Outlook, etc.), a verification popup will appear after clicking Submit & send email. In this example, the sender has an Outlook email, so the following popup appears.
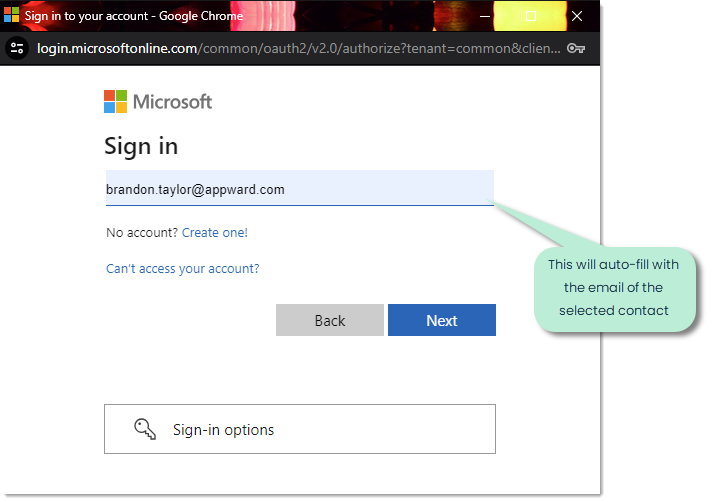
The email field will auto-fill with the email on file for the sender. Click Next to enter the password.

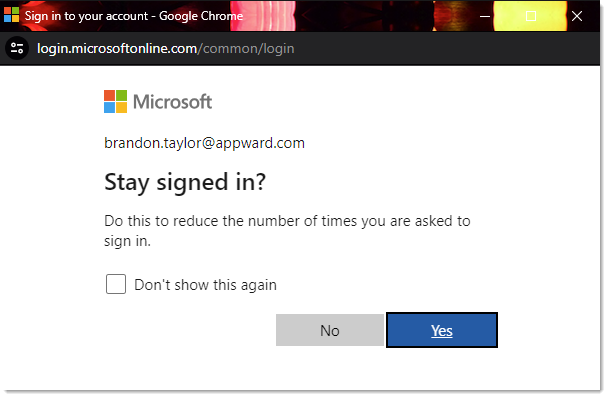
Optionally, you can stay signed in to the account, meaning that you don’t have to type in login credentials any time you decide to send an email.
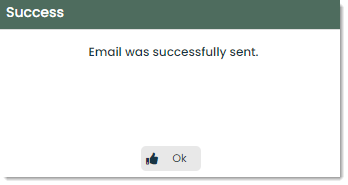
If you’ve entered the correct information, the window should close and the following popup should appear, indicating that your email has successfully sent.
Adding and conducting a video call
If you add a video call Conversation (select VideoCall as the style), the following popup will appear. You’ll see a list of video call groups which are essentially your chat groups from the Forums app.
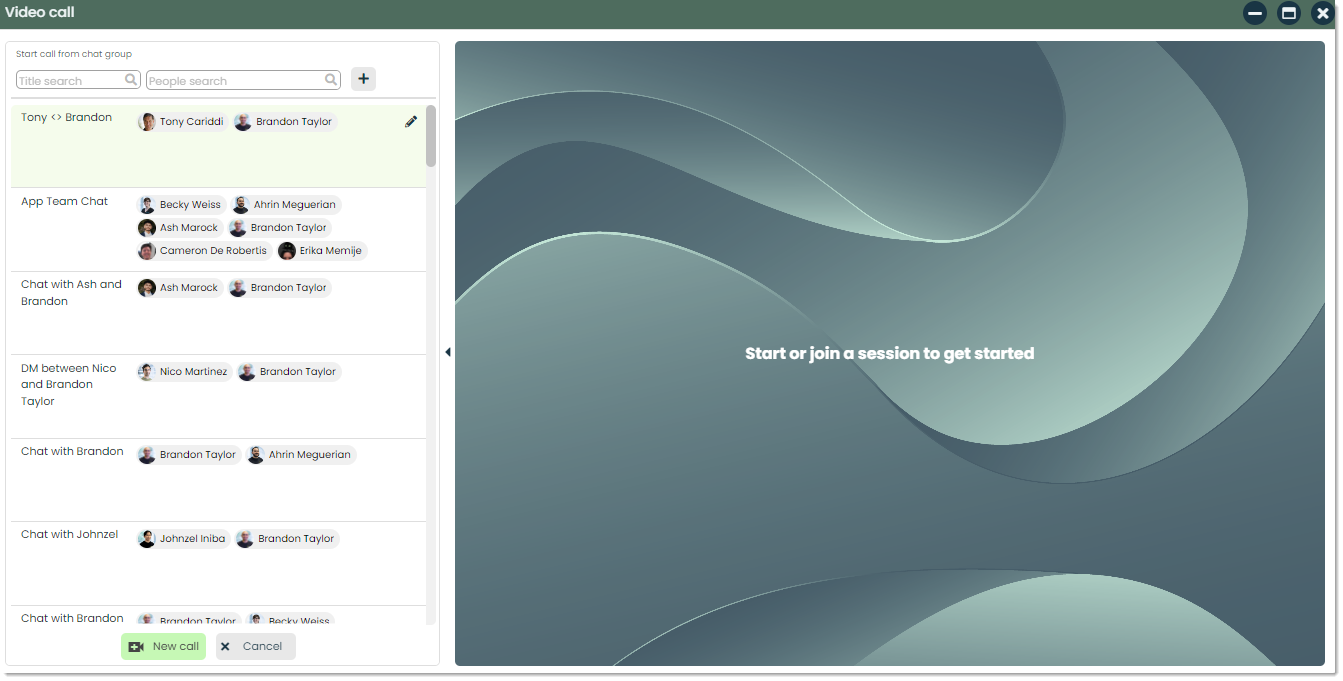
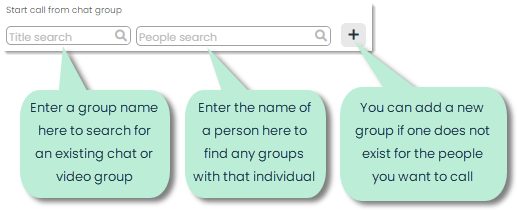
From here, you can search for an existing chat group using the following filters. If you can’t find the group you’re looking for, you can click the + button to add a new group.
Whenever you make a new video call group, what you’re really doing is creating a Forums chat group. This will be used as the video call group. Choose the group of people by clicking the link icon next to Who are you chatting with.
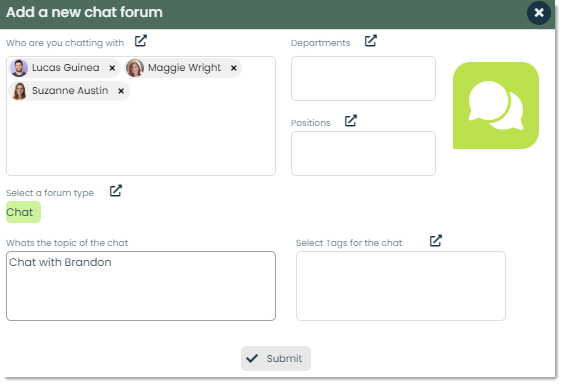
Note: For video calls, you will only be selecting individual contacts in the Who are you chatting with section. The Departments and Positions sections are used exclusively in the Forums app, so adding these will not do anything.
Once you submit the new chat forum, the following popup will appear for adding the details of the video call. You’ll notice it looks similar to the initial Add Conversation screen.
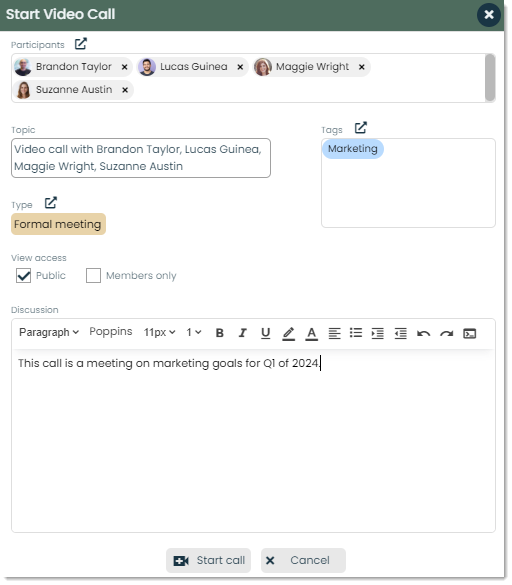
Here are the additional fields specific to video calls:
Participants – You can pick who from your contacts should be included in the video call. Click the link icon to adjust the group of participants.

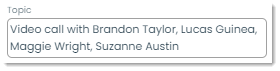
Topic – A default topic is given to all video calls. It will say “Video call with” and the names of all participants. You can change this as desired.
Discussion – Here, you can provide context on the purpose of the call.
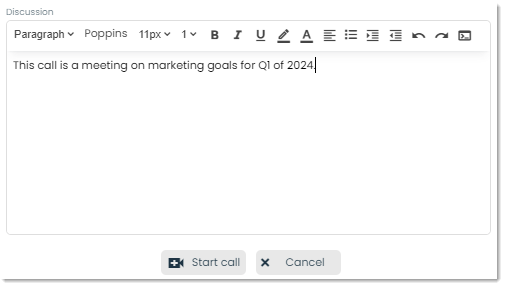
Once you’ve added in all the details, click Start call at the bottom to send out an alert to all participants. Each participant (aside from you) will receive a notification like the following image.
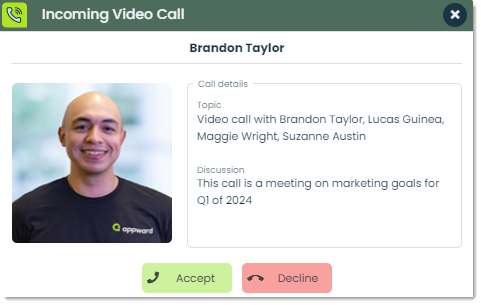
Participants can either accept or reject the call with the Accept and Decline buttons. You and any people who accept the call will see the following screen.
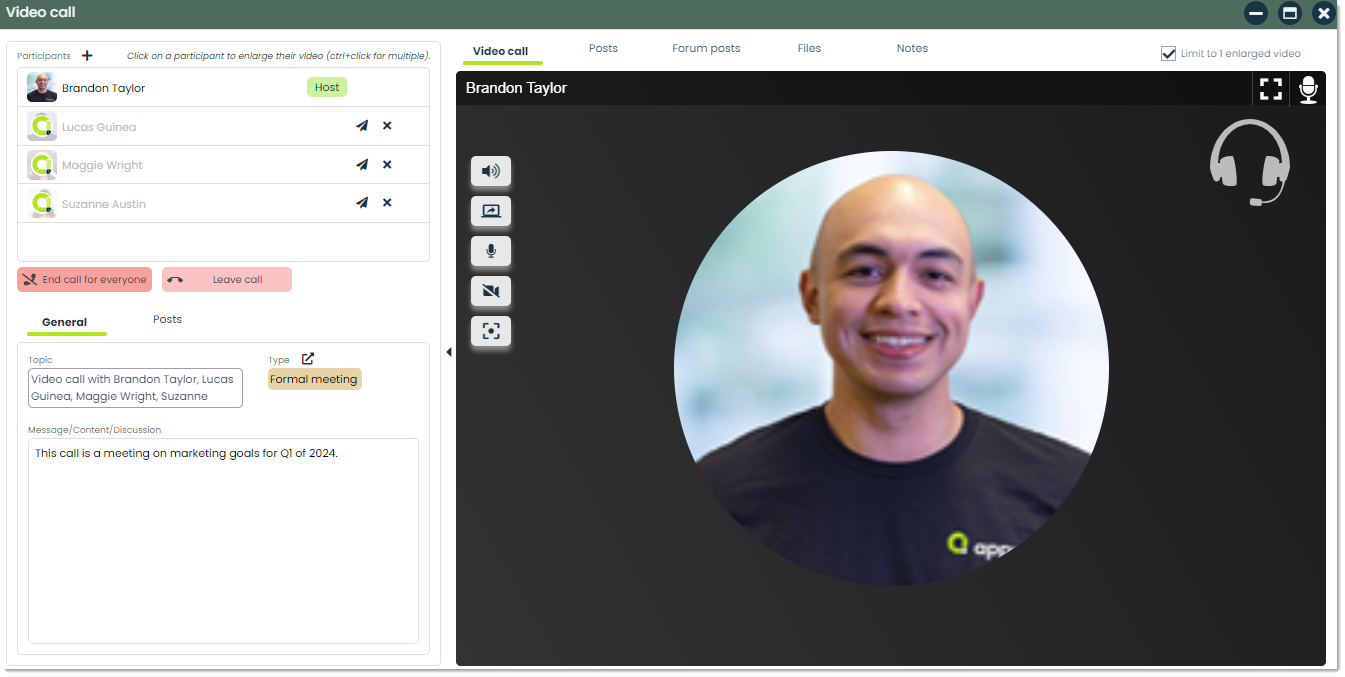
Let’s dissect this screen.
Participants – This is the list of people you’ve invited to the call. The Appward loading animation will appear next to each participant until they either accept or reject the call.

End call for everyone/Leave call – As the host, you are able to end a call completely by clicking End call for everyone. To leave a call without ending it for everyone else, you can simply leave by clicking Leave call.

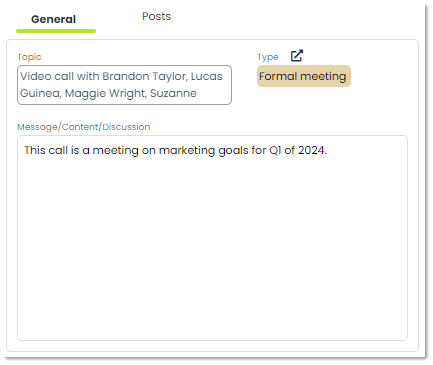
General tab – Here, you can see the general information of the video call.
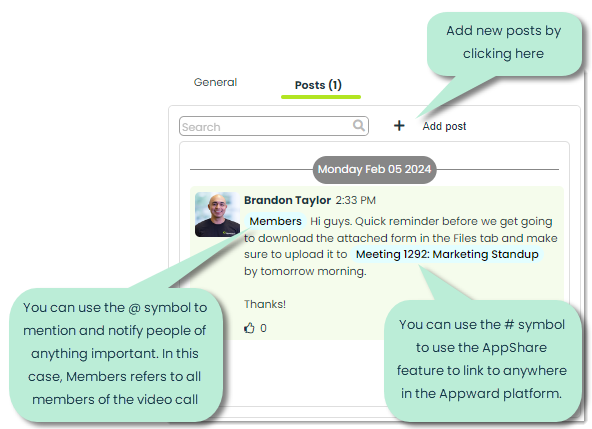
Posts tab – You can write out any message to everyone involved in the call here. Here’s an example of a message using a mention (@ symbol followed by a specific person or group) and an AppShare™ link.
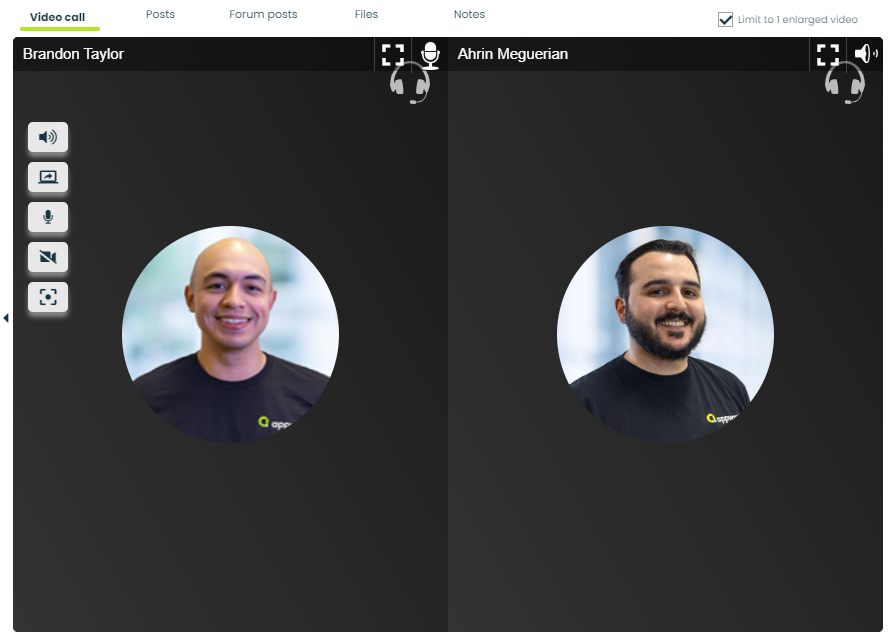
Video call tab – This is the main tab of the video call popup. Here, you can see all the people who have joined and control all of your call settings. In the image below, Brandon is the host and is the only person currently in the call.
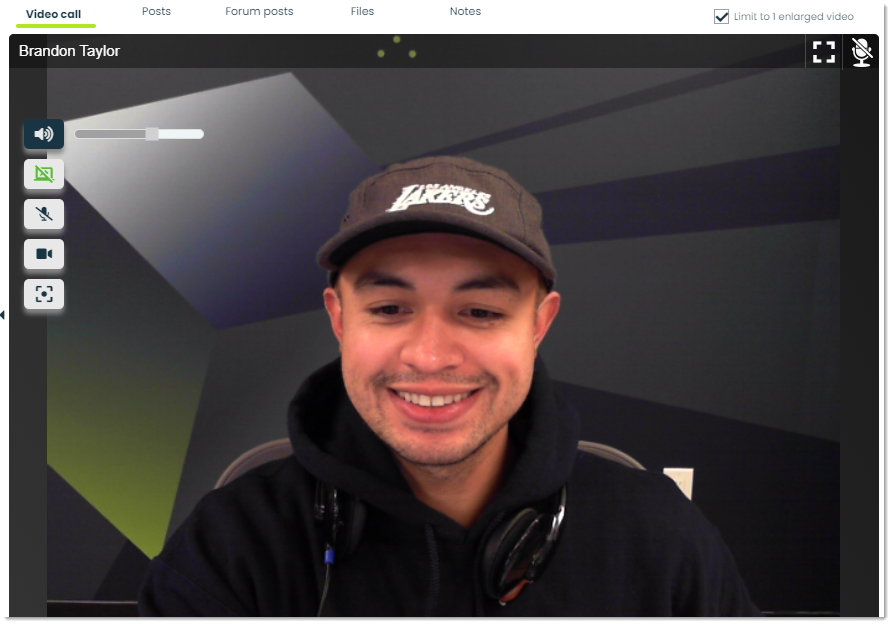
Here’s what it looks like when someone else joins the call. If you choose not to use your camera, your contact photo will be used to identify you.
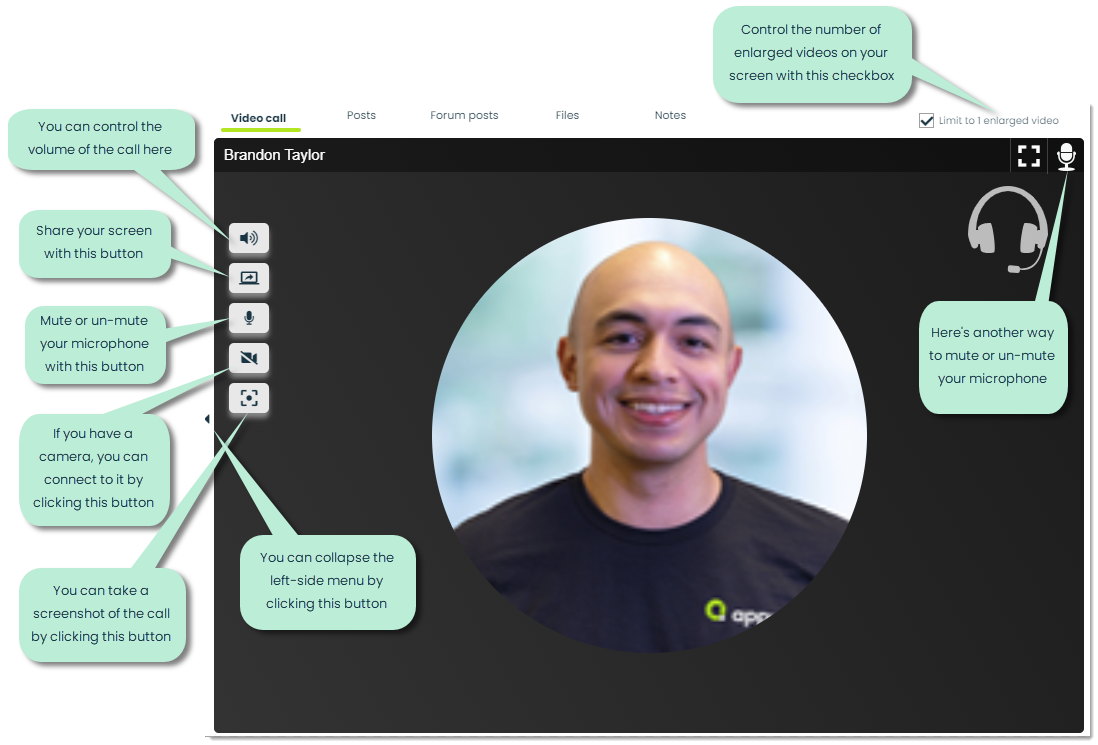
Here are what the left-side buttons control.
Call volume – You can control the incoming volume from everyone in the call (for you).


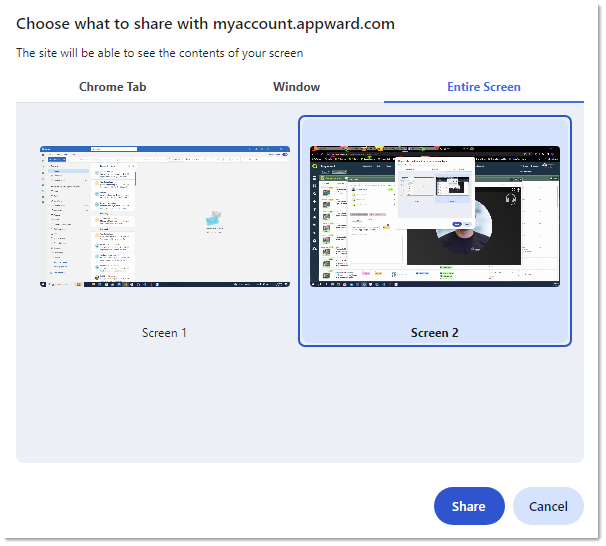
Screen sharing – With this feature, you can share a portion or your entire screen with the other participants.

Mute/un-mute – You can mute or un-mute your microphone with this feature.


Camera – If you have a camera, you can toggle it on or off with this feature.

Note: If it’s your first time doing this, your browser might request access to your camera in order for it to work.
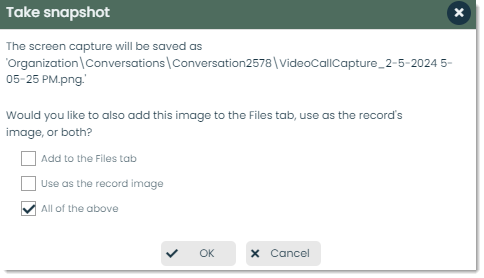
Snapshot – You can capture the entire screen under the Video call tab with this feature. When you click the button, you’ll be asked if you want to add the snapshot to the Files tab where any participant will have access to it. This is very useful for capturing any important information from your call and having it available for everyone involved. Additionally, you can use the snapshot as the record’s image, meaning that the file’s thumbnail will be that screen capture itself.

Let’s cover the other tabs found on the right side of the video call screen.

Posts – This is a secondary location for the same posts of the Posts section on the left.
Forum posts – As previously mentioned, a video call group comes from a Forum chat group. For a little extra traceability, automated messages related to that call will get displayed in the Forum chat. For example, This tab displays all the messages that will appear in the Forum chat, not in the video call chat. This information will typically include automated messages regarding when a call was made, how long it lasted, etc.
Files – You can share any valuable documents with the rest of the people in the call here. Additionally, any time you capture a screenshot of the call, you have the option of adding that file to the this tab.
Notes – Any important notes or thoughts that you want to document and share with the people in the call can be added here. For more on the features of Notes, make sure to check out our guide on Getting Started with Notes.
Adding a meetup
If you add a meetup (select MeetUp as the style), a popup like the following will appear.
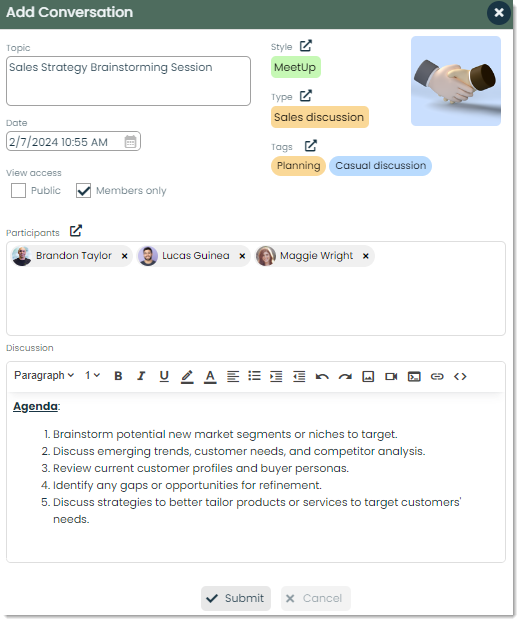
In addition to the generic Conversation fields, here are the other fields for meetups.
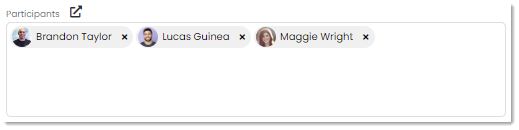
Participants – Similar to video calls, you can add the participants of the meetup here.
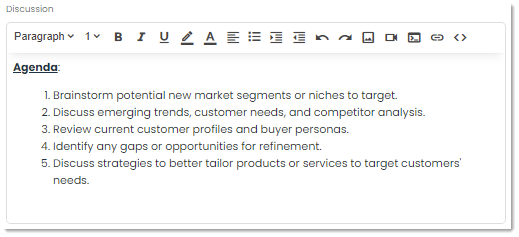
Discussion – Here, you can provide more context of the meetup. Depending on when you make the Conversation record, it can include what happens or happened before, during and after the meetup, giving a complete picture of the event.
Click Submit at the bottom to create a record of the exchange.
Adding and conducting a phone call
Note: Appward phone calls are coming soon. For now, you are able to log phone call records.
If you are adding a phone call (select the PhoneCall style), a popup like the following will appear.
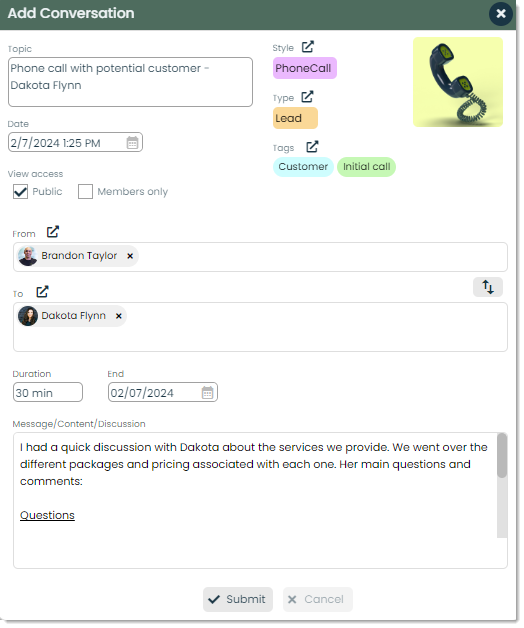
In addition to the generic Conversation fields, here are the other fields for phone calls.
From/To – Indicate who made the call and who received it with these fields. Similar to emails, you can switch the people in the fields by clicking the switch button on the right side.
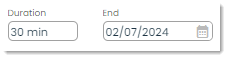
Duration/End – You can input the length of the call and when it ended with these fields.
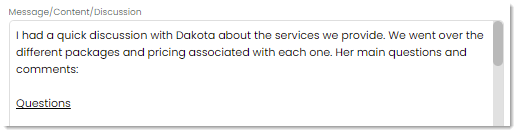
Message/Content/Discussion – For more context on the call, you can add the discussion details here.
Click Submit at the bottom to create a record of the phone call.
How to find, view and edit the details of your conversations
Finding
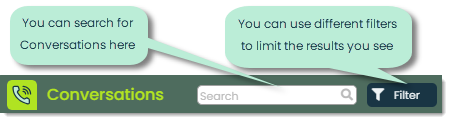
To make finding records easier, Appward provides searching and filtering options to find what you need quickly. These features can be found at the top of the app.
For Conversations, you can search by any of the following criteria:
- Conversation ID
- Topic
- Style
- Type
- Conversation members (anyone involved in the Conversation)
After you type something in the search bar, press Enter to search.
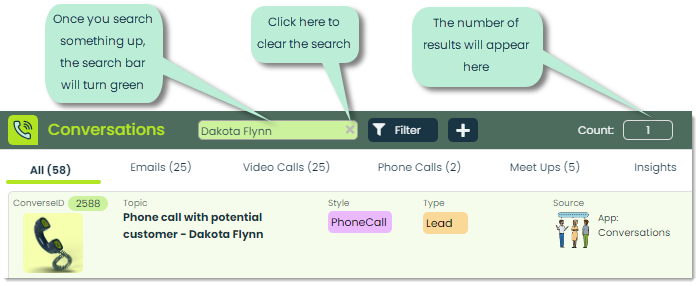
Additionally, you can use advanced searches, another powerful feature for finding exactly what you need. Advanced searches use a format of “Field=Value” like the following example.

With Conversations, you can use the following keywords for your advanced searches. We’ve provided some examples as well. For the searches with commas, those fields can accept multiple values.
- ConversationID or ID (conversationid=356)
- Topic (topic=locked out of account)
- Style (style=email)
- Type or T (type=follow up)
- Message or Discussion (message=thank you for reaching out)
- App (app=tickets)
- Participants, Members or People (members=brandon taylor,jenn,tony cariddi)
- From (from=ralph emmer,diane sawyer)
- To (to=ralph,linda,edward im)
- CC (cc=brandon taylor,ahrin)
- BCC (bcc=tony cariddi,jenn)
Note: Searches are NOT case sensitive, so no need to worry about capital letters.
In addition to searches, you can choose from the following filters to narrow down results by clicking the Filter button.
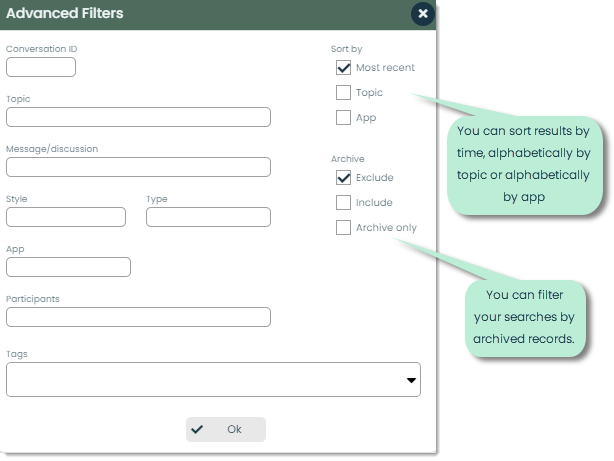
You can use a combination of searching and filters to get the exact results you’re looking for.
Viewing and editing
Once a Conversation has been added, you can view and/or modify the details of that conversation by clicking on it from one of the main lists. In this example, inside the Emails tab, find the email from the list and click its row.
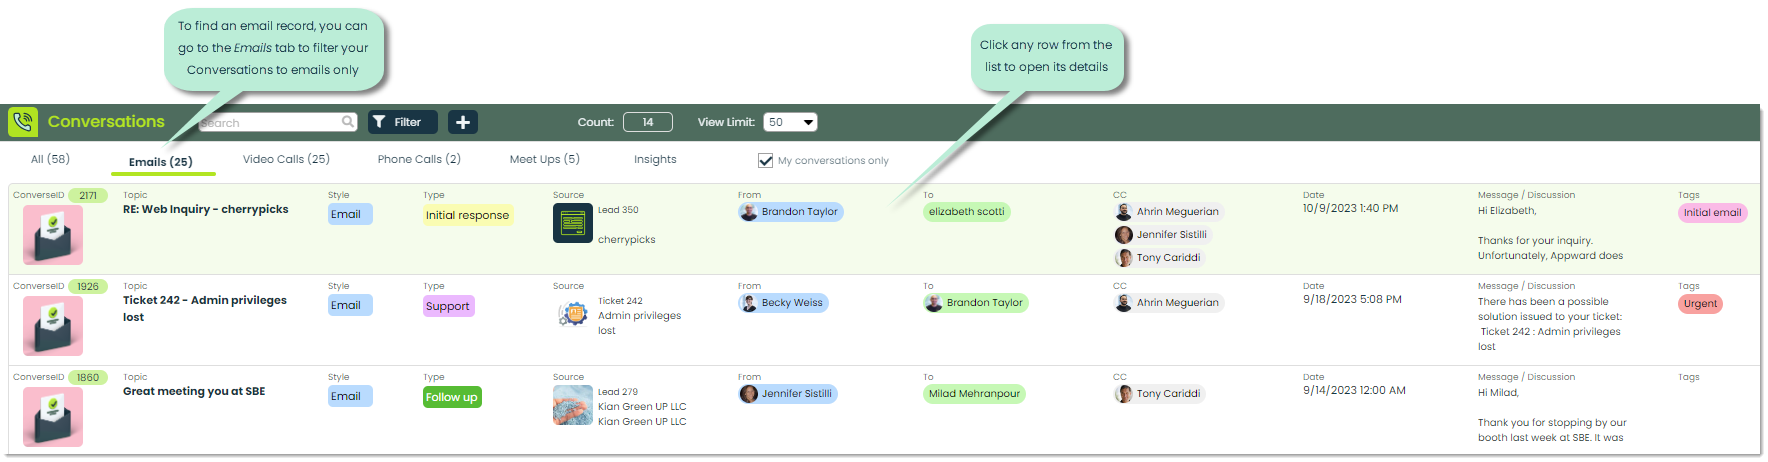
Doing so will open a separate window which looks similar to the image below.
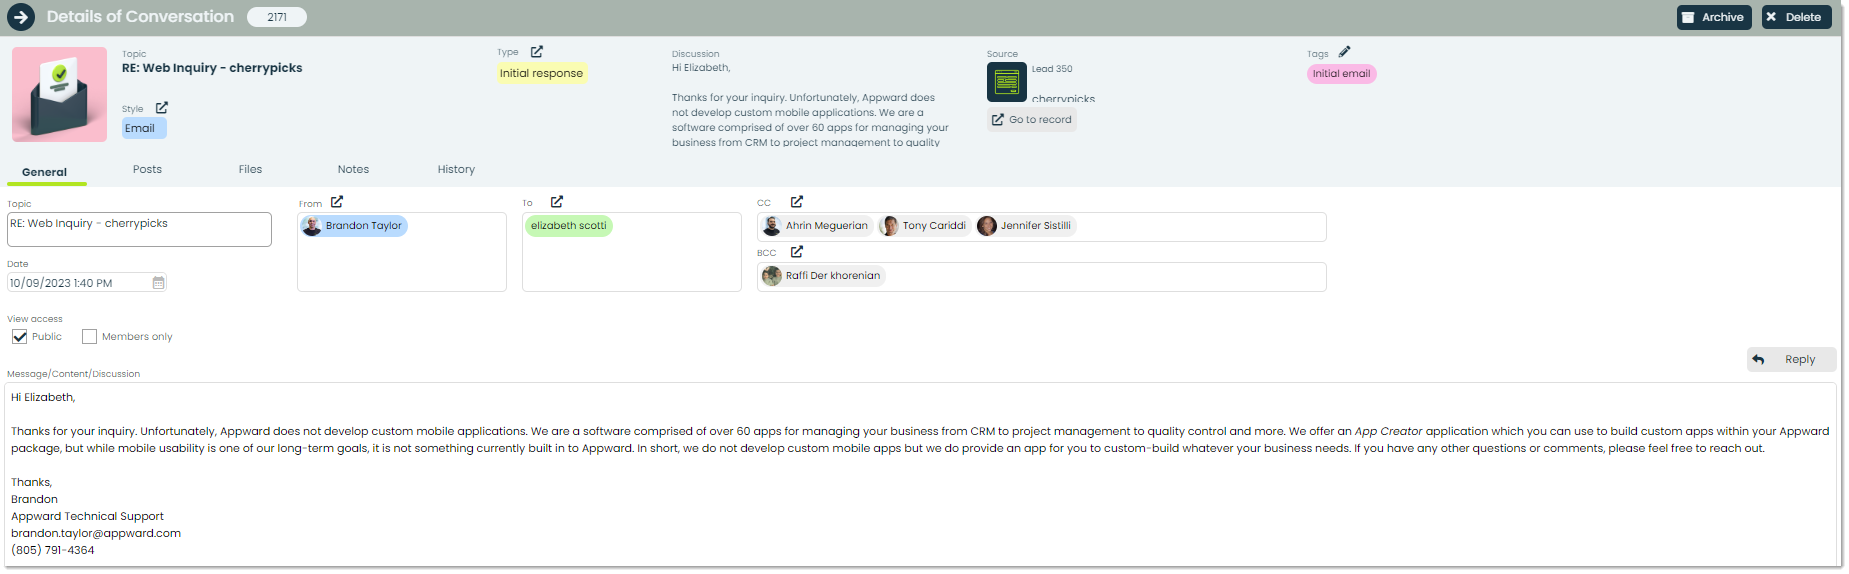
From this screen, you are able to view all of the details of the Conversation, as well as make any edits to any of the existing information. Any changes will get automatically saved.
Here are some additional features of the details screen.
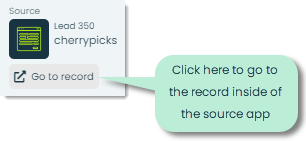
Go to record – If the Conversation record was initially added in another app, you can launch that app and jump straight to it. For example, if a Conversation was had in the Leads app, clicking Go to record would open Leads to that correct record. This is to give you full context and information for all conversations.
We’ll cover how to add Conversations to other apps in the next section.
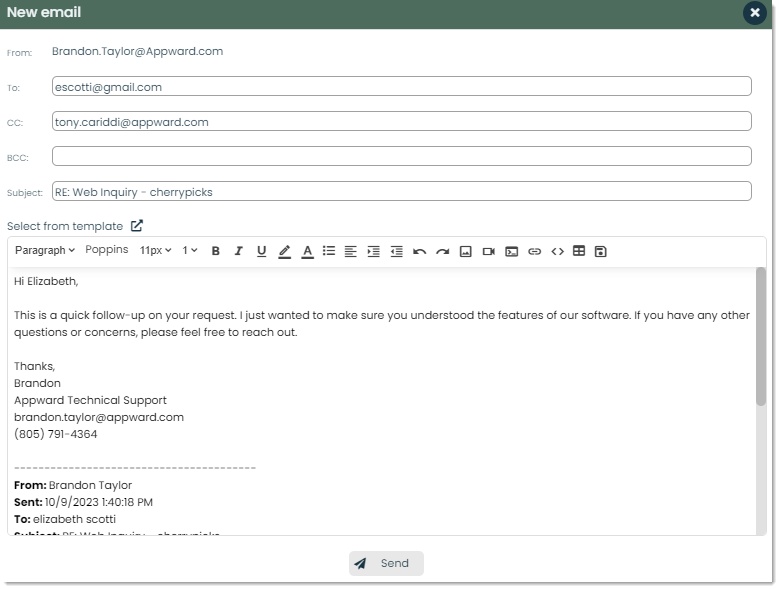
Reply (for emails) – If it is an email record, you can reply directly from here. Clicking on the Reply button will open the following popup for you to draft and send an email. The message will include the original email at the bottom, and you can make adjustments to any recipients, CC’s, BCC’s and the subject.
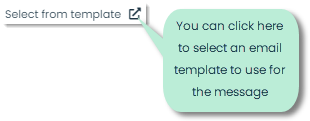
One useful feature of this popup is the ability to select an email template using the Select from template button. With templates, you can use predefined formats and content structures to quickly create professional-looking emails without having to start from scratch. This saves time and ensures consistency in your communication. Additionally, templates can include placeholders for dynamic content such as recipient names or personalized greetings, making your emails more engaging and relevant to your audience.
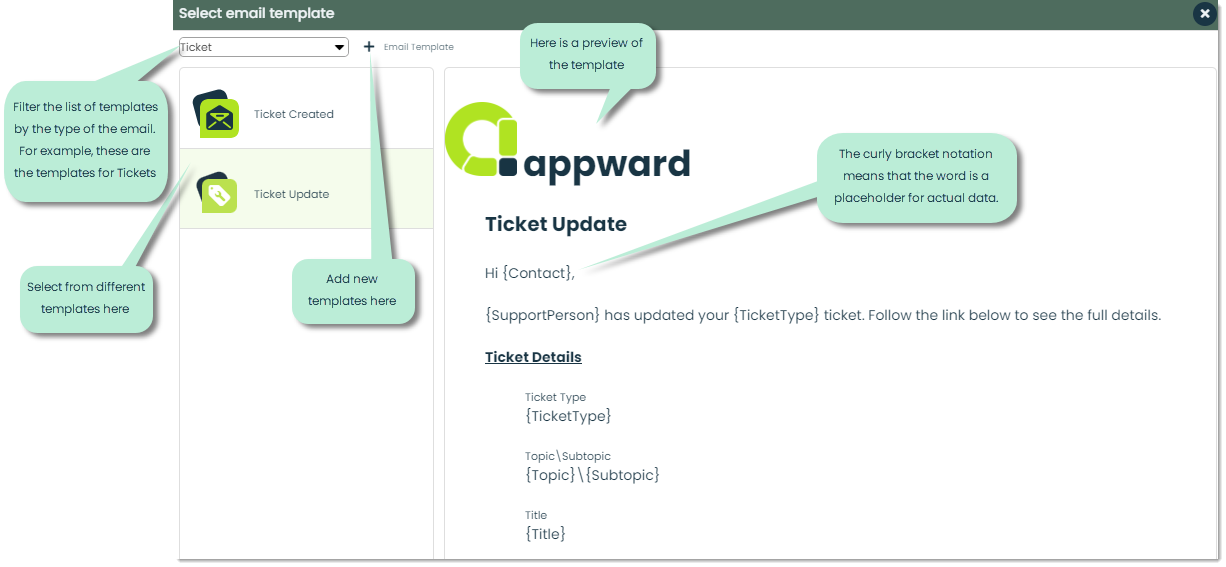
For an in-depth look at email templates, check out our article on Using Email Templates.
Archiving/deleting – To remove records from your view or delete them entirely, you can use these two features.

Archiving is a common feature within the majority of apps in Appward. If you want to remove a record from sight without permanently deleting it, you can archive it. Archived records are essentially concealed from the main screen but remain accessible through filters.
When you try to delete a Conversation, you will see a message similar to the following.
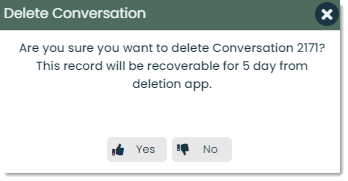
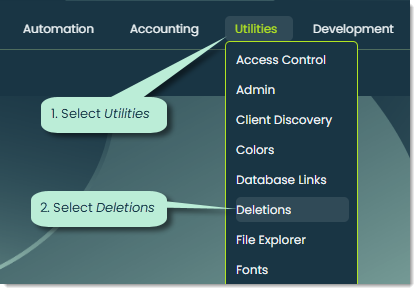
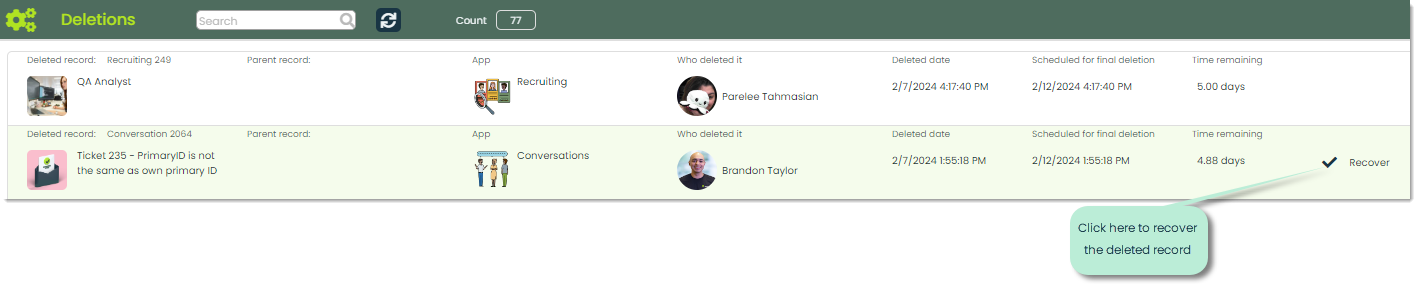
Appward uses a recovery system in the case you delete something and want to restore it. If you confirm Yes, you will have five days to recover the record from the Deletions app. This can be found under the Utilities category of the top navigation bar.
How to use Conversations in other apps
Conversations are not only used in the Conversations app, but in other apps as well. Let’s look at an app where Conversations are commonly used: Leads.
Leads
In the process of converting sales, keeping track of the conversations had is very important. Appward makes sure that you have full traceability of the exchanges you have with your potential customers. When you click on a lead record, you can view and/or add new Conversation records in the Conversations tab.
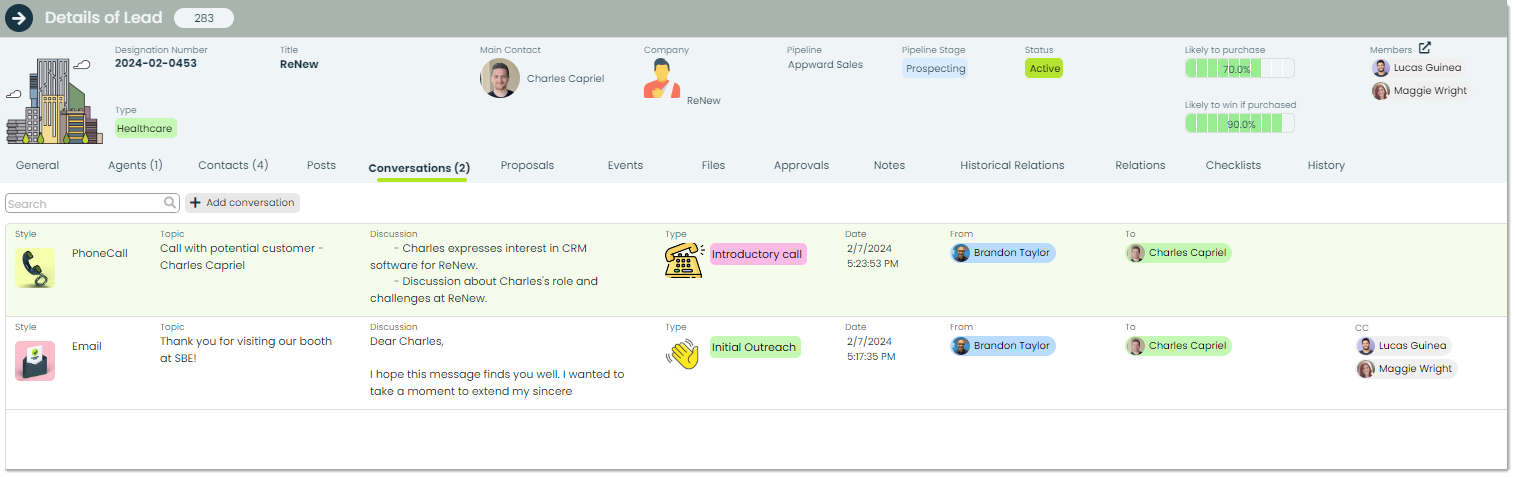
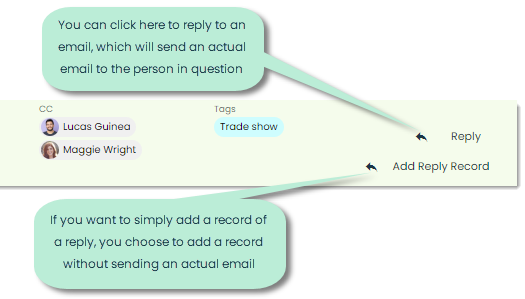
For any app that has a Conversations tab, the functionality is almost entirely the same as the Conversations app. You can view all of the different Conversations in order of most recent Conversations and see all of the details that you would normally see in the Conversations app. If you hover over an email record, you have the options of replying to an email or adding a reply record.
You can add new Conversations by clicking the Add conversation button. Here, you can add Conversations in the same fashion as the app, aside from one cool feature for emails.
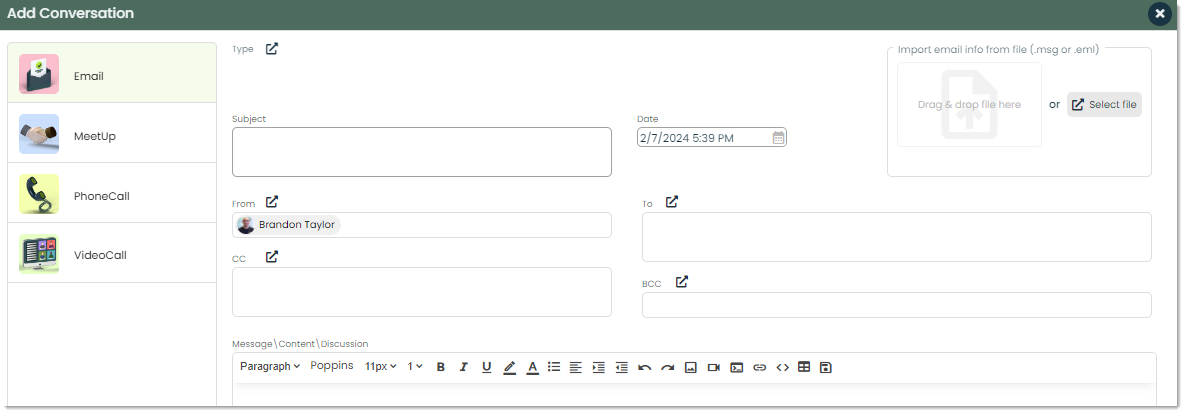
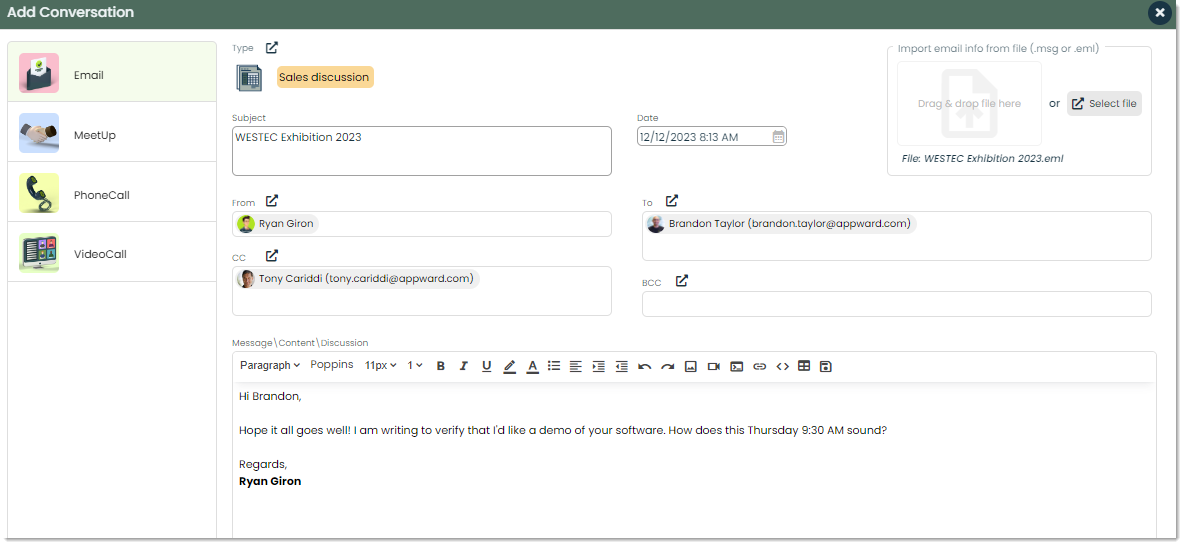
In the top-right corner for adding an email, you are able to import email files directly from your mailbox.
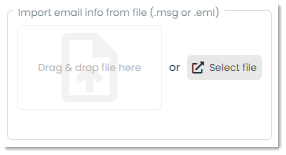
This saves you the time of having to type out every detail of every email Conversation. To do this, find the email you’d like to import and download it as a .msg or .eml file. Then, simply drag that file into the importing space or select it from your computer. Below is an example of a downloaded email imported with this feature.
Using the side dock to create a Conversation
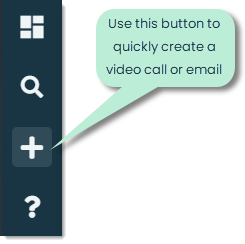
Save some time in creating Conversations by using your side dock. With your left-side menu, click the + button to quickly add a video call or email.
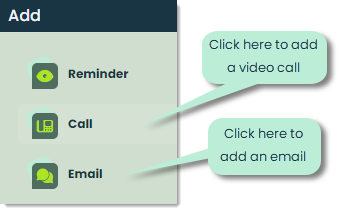
With this process, you can add and send out calls and emails just like you would in the Conversations app.