Table of contents
Getting Started with Territories
Monday November 27, 2023-7 min readIntroduction
A territory typically refers to a specific geographic area or region assigned to a salesperson, team or organization for the purpose of managing and conducting business activities. The Territories app is a user-friendly tool that provides you with a straightforward and comprehensive view of your business activities in different locations. You can gain location-based insights into aspects such as customers, sales opportunities, product distribution, installations, field operations, vendors and resource allocation.
This guide will cover everything you need to know about the Territories app including where territory records come from, how to navigate the app and how to configure your default app settings to suit your preferences.
Let’s get started
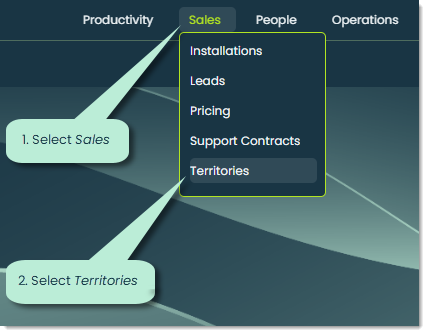
To open Territories, go to the Sales category of the main navigation bar and select Territories.
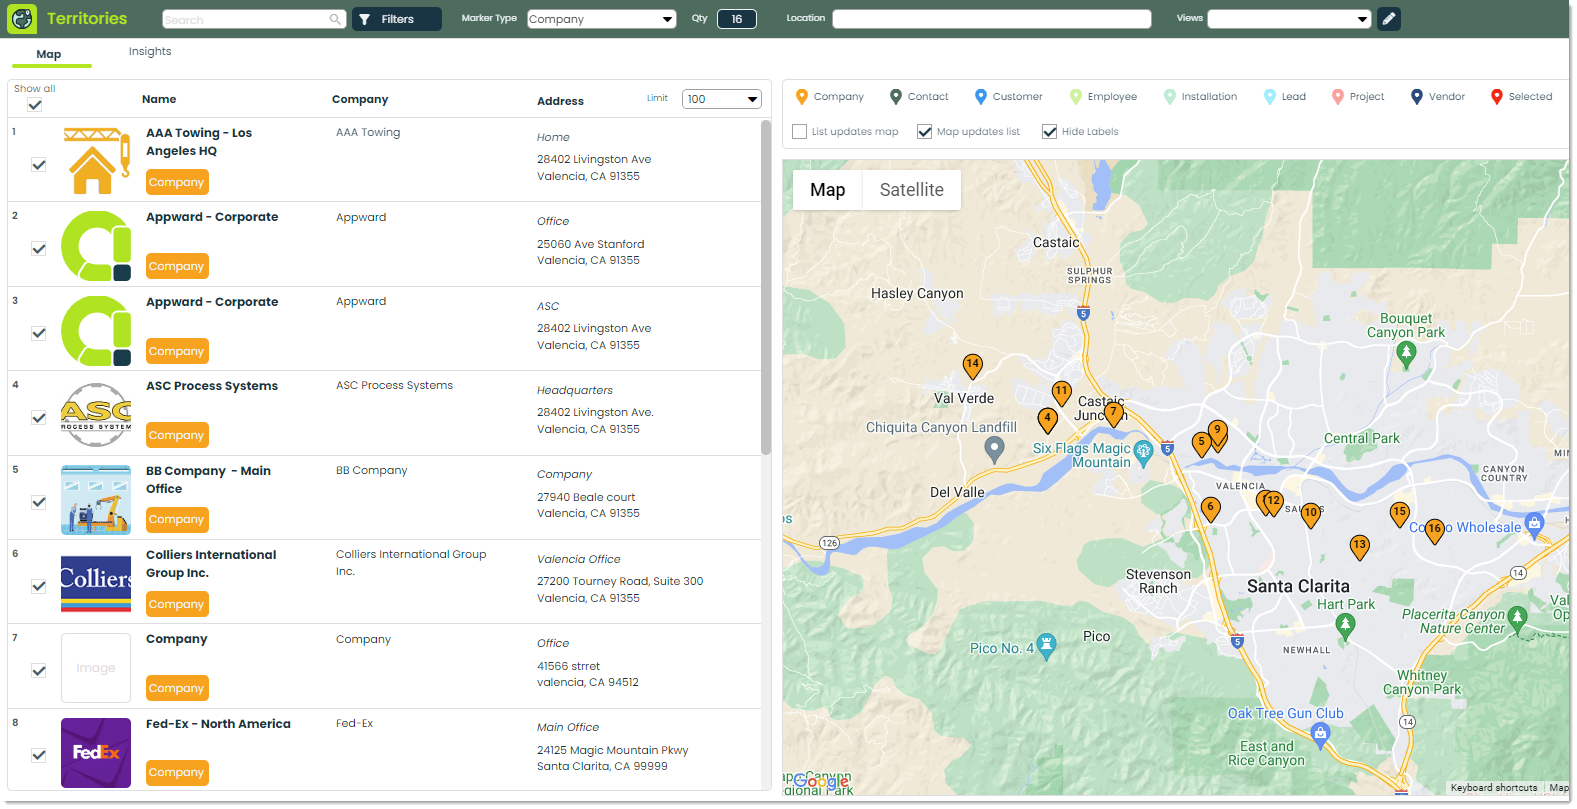
When you open the app, you’ll see a list of territories on the right and a Google Map view of those territories on the left.
We’ll go over where these territories come from in a bit. For now, let’s define the two tabs of the top-left corner and what they display.
1. Map – This tab contains the list of territories and map view that comprise the majority of the app.
2. Insights – Insights give you a visual way to analyze data related to territories. You can make your own insights with custom SQL queries and use charts or tables to display the data. Some useful insights for Territories might include information about key performance metrics, sales trends or customer demographics. Tailor your insights to get the information that matters most for effective decision-making and understanding your territories better.
Where do my territories come from?
One important thing to know about this app is that territory records are not added directly from Territories. Instead, territory records are fetched from different applications whenever a location is provided in information within those apps. Territory records are pulled from the following apps:
1. Companies – Territory records are derived from information associated with companies. This could include the geographic location of a company’s headquarters or its primary operational areas.
2. Contacts – Territories can be linked to specific contacts within the Contacts app. This could be based on the location of key contacts or the regions where your contacts are located.
3. Employees – We get territory information from your employee records. This tells you where your team members are located, giving you a quick overview of where they operate.
4. Installations – Territory information can be extracted from installation records. This could involve the geographical areas where your products or services have been installed.
5. Leads – Territories may be associated with leads, focusing on the potential customer locations or the regions where leads are generated.
6. Projects – The app pulls territory data from project-related information. This might involve the geographic scope of ongoing projects or the areas where your projects are concentrated.
How to use Territories
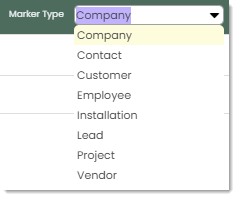
To choose a specific type of marker to display in your map, you can use the Marker Type dropdown and select from the following options:
This will filter the map to display only markers of that specific type. For example, this is what it looks like when the Company marker type is selected:

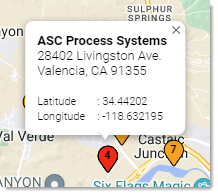
You can click on any marker and details of that specific record will appear, along with map coordinates.
The left-side list will display all records of that given type, and the right-side map will display the marker locations. You can refer to the top legend to know which kind of markers you are looking at:

The three checkboxes underneath the legend can be used to display territories in different ways.

Here’s what each checkbox means:
1. List updates map – This means that every item in the list appears on the map.
2. Map updates list – This means that the list changes to match what’s on the map.
3. Hide labels – Check this to just see markers without names.
You can search by a specific location with the location filter. You can enter any location here, and the map will take you there:

You can save the map view you are currently on and come back to it later with the Views feature.
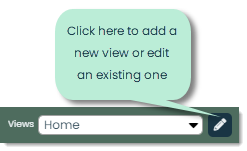
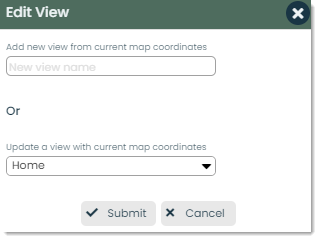
Clicking on the pencil icon will open the following popup where you can save the view as new or edit an existing view:
How to configure your default app settings
To control your default Territories app settings, click the Configure button in the top-right corner.

Let’s cover the different types of settings you can modify:
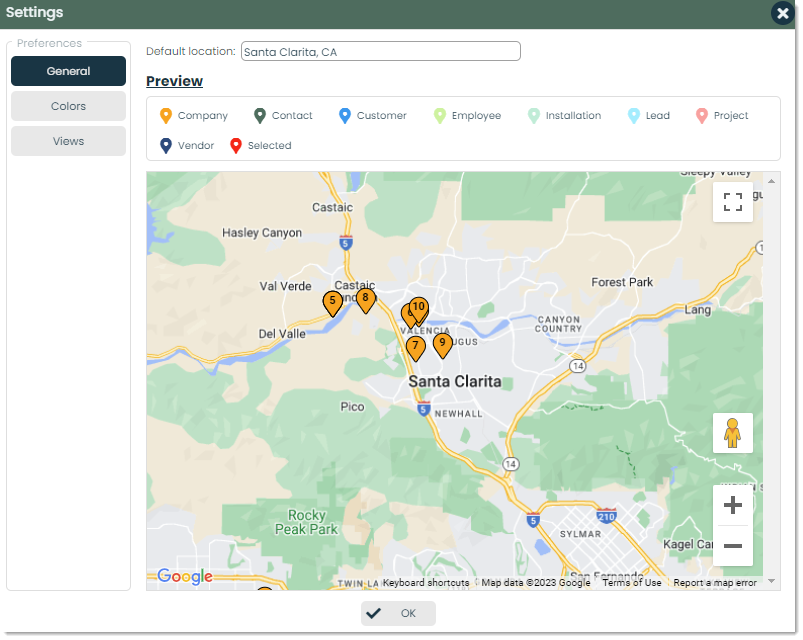
General – Here, you can control the default location that the map displays when opening the app. You also get a preview of what your map looks like with all your configured settings.
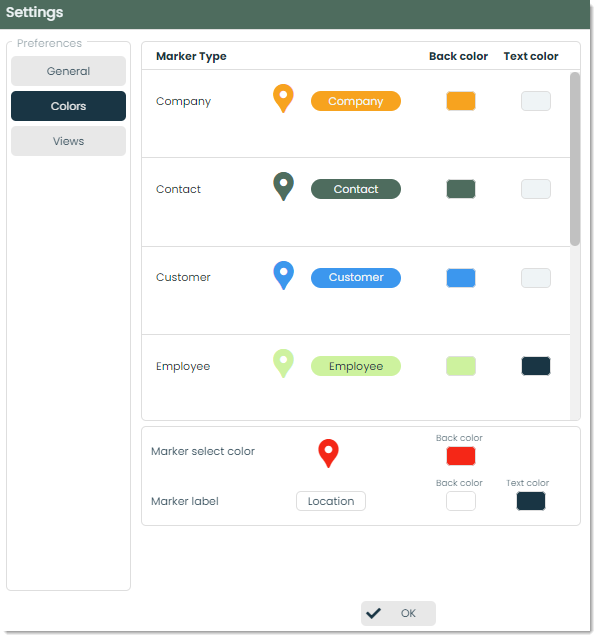
Colors – In this section, you can control the colors of each marker type. Simply click the colored shapes under the Back color and Text color sections to modify the marker and label colors, respectively.
Views – In this section, you can manage your views. You can use the location filter to search for a location, and from there you can add that as a new view or update a selected view from the Choose a view to edit dropdown.
