Table of contents
Getting Started with Tours
Friday February 16, 2024-18 min readIntroduction
In Appward, tours are interactive, step-by-step guides used for familiarizing users with different applications. This guide will teach you everything you need to know about the Tours app and how to start making your own tours.
Let’s get started
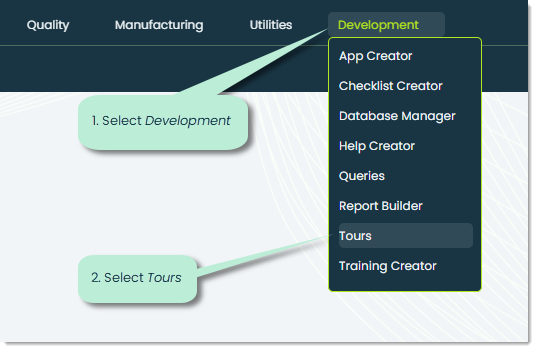
To open the Tours app, click on Development from the main navigation bar and select Tours.
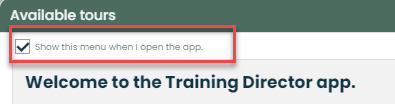
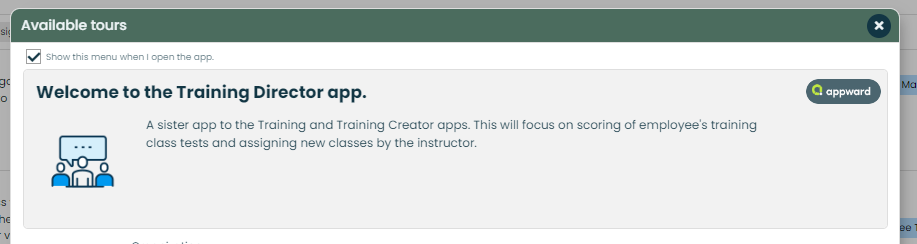
When you first open the app, you’ll see a popup with a list of available tours. You can choose to hide this screen when you open the app by un-checking the box next to “Show this menu when I open the app”.
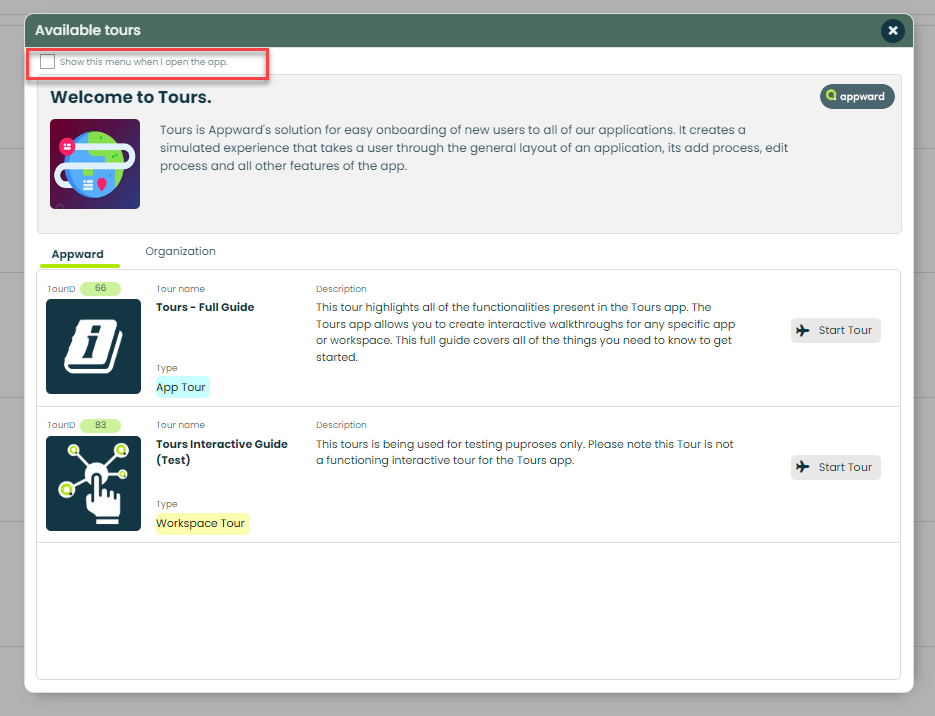
Tour Menu Popup
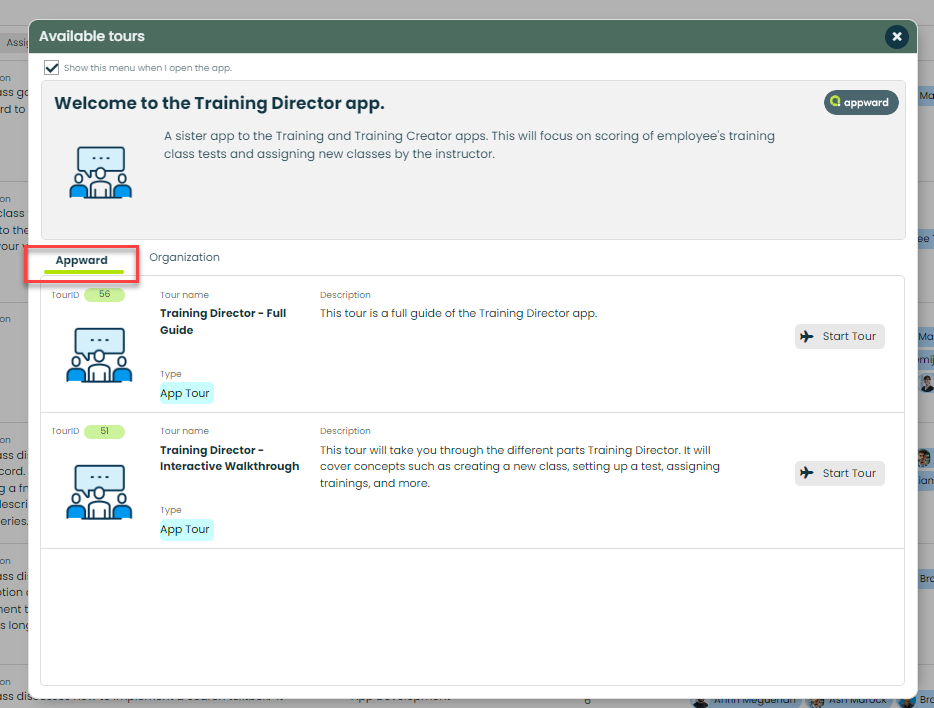
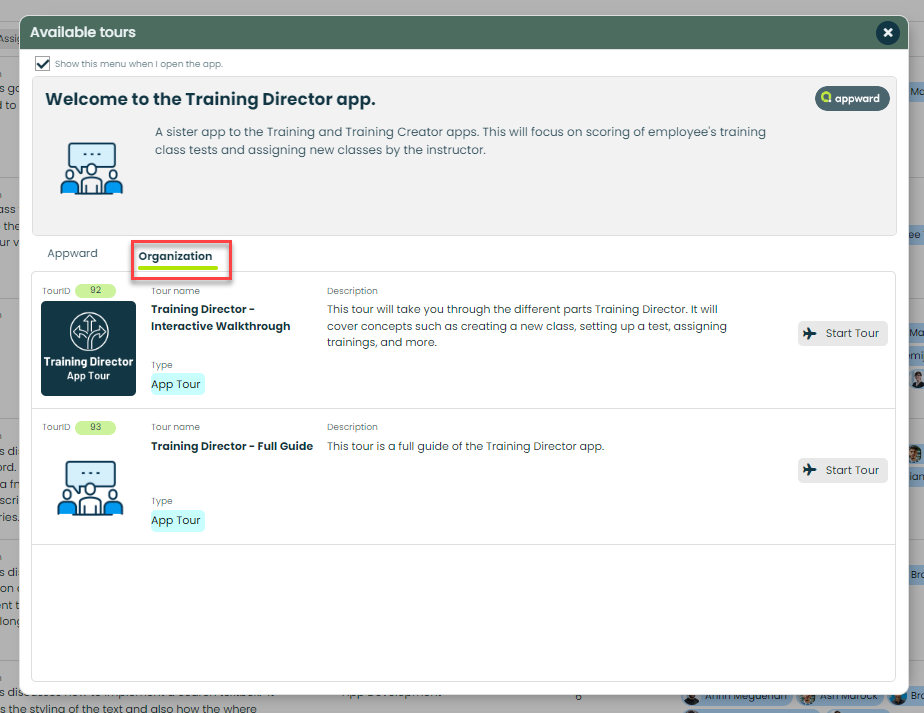
The Tour Menu Popup is displayed by either clicking the “Tour” button located in the top-right corner of all apps, or is displayed automatically if you have not deselected the checkbox.
App Header – This section highlights a short description of the App you are currently viewing Tours for
Appward tab – This section shows all the Tours that Appward made and stored for everyone to see and use.
Organization tab – This tab displays all of the Tours that are created by your Organization.
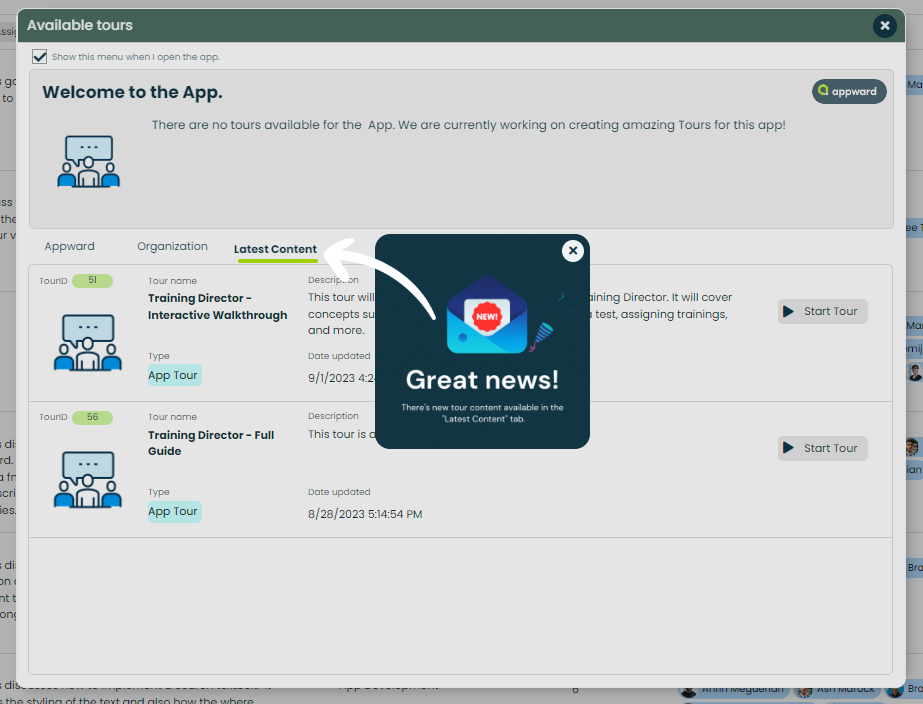
New Content notification – This notification is displayed and automatically brings up the Tour menu when a user has set a new content date to a Tour. This button is located inside of the details flyout for a Tour. The latest tour will be displayed at the top.
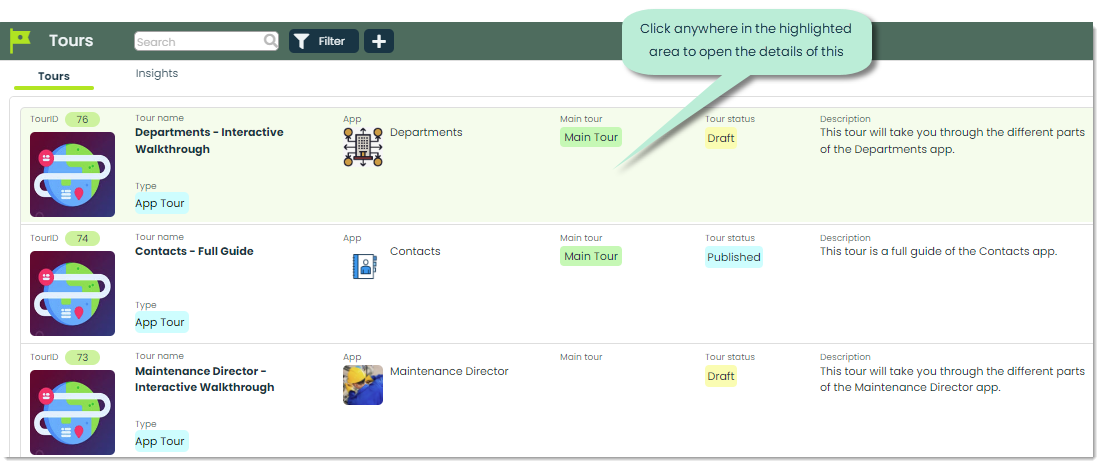
Tour Main Screen
Exit out of this Tour Menu and you’ll see a screen similar to this:
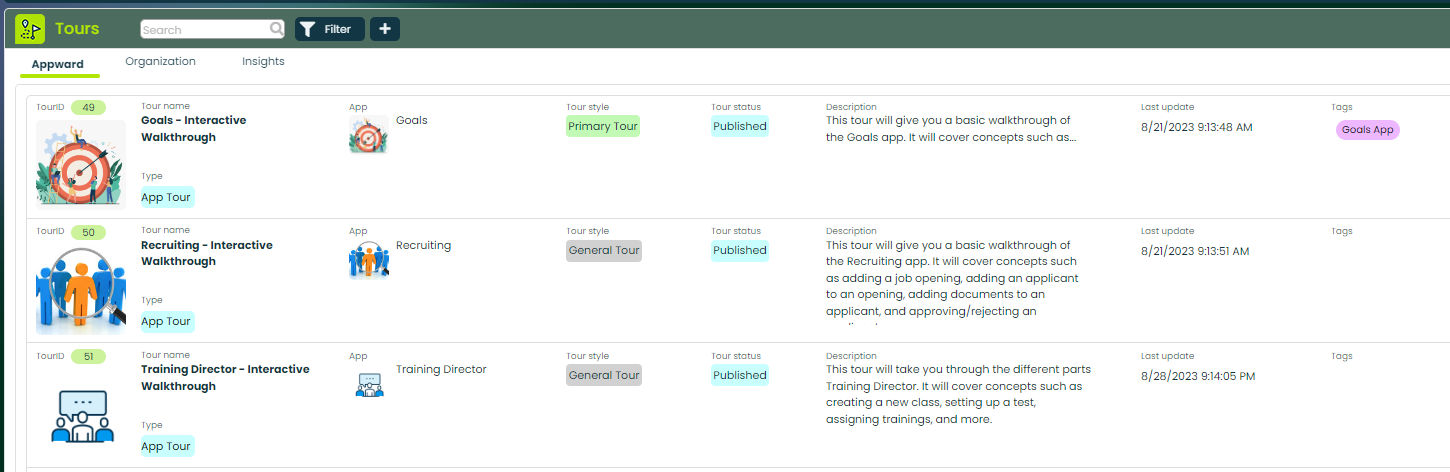
Let’s go over the two tabs at the top of the screen.
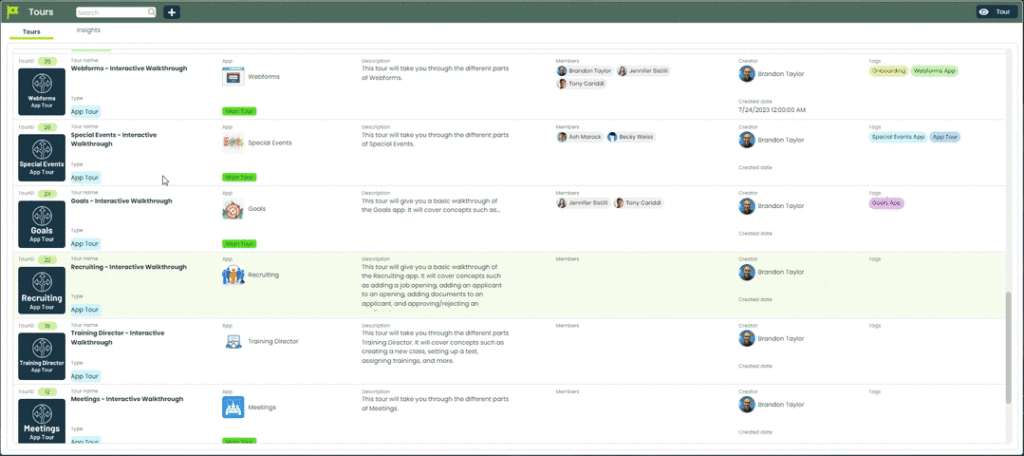
Appward – This tab contains a list of tours made by the Appward team. These tours are finalized versions of in-depth interactive app tours.
Organization – This tab contains a list of Tours made by your organization. You can create any types of tours for apps and the Appward workspace!
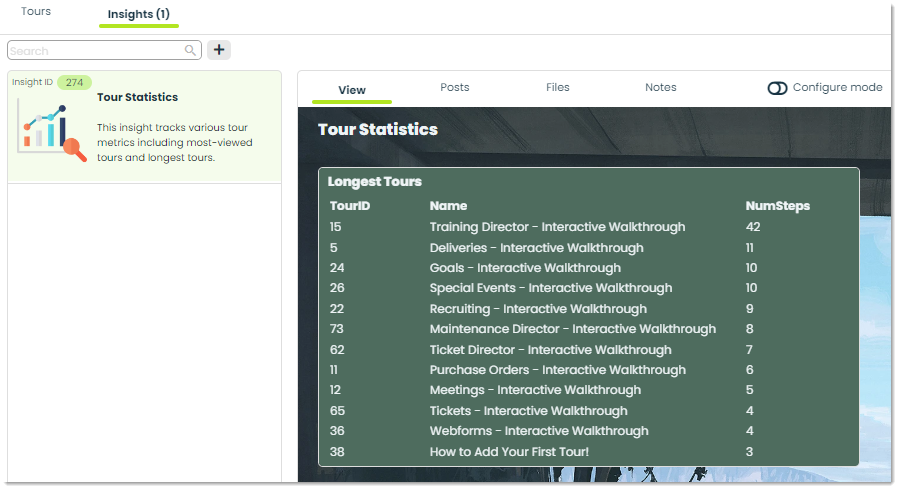
Insights – This tab is used to analyze tour data. You can configure highly-customizable SQL queries for gaining valuable, measurable components of your tours such as average tour length, most-viewed tours and whatever additional statistics you’d like to monitor. For more on Insights, check out the Getting Started with Insights guide.
How to add a new tour (Non-Appward Org)
To add a new tour, click the + button at the top of the screen.

This will open a screen for adding in tour information, which looks like this:
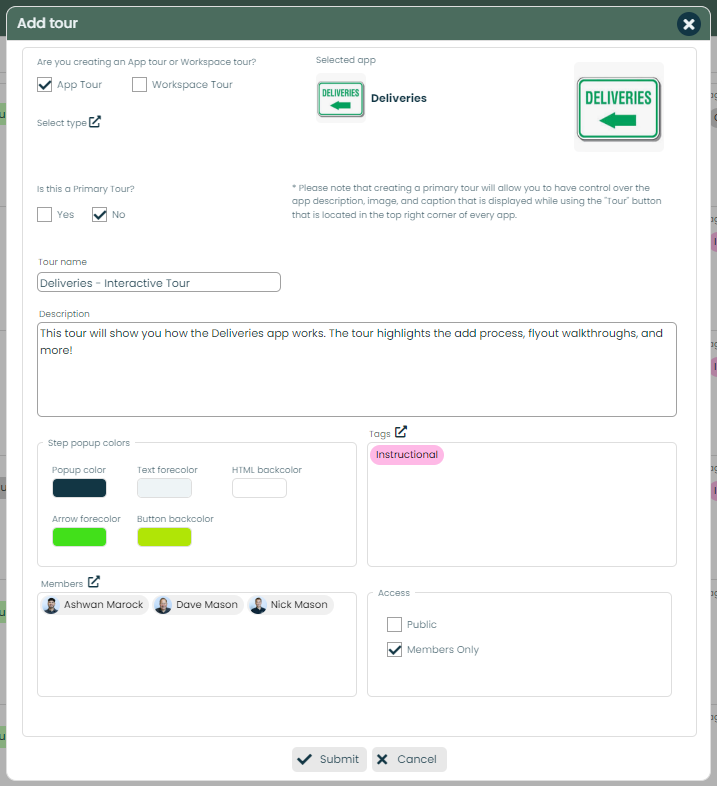
Let’s go over the various fields of this popup.
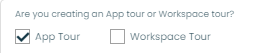
Tour Type – You have the option to design an App Tour or a Worspace Tour. App Tours will launch the selected app. Workspace Tours do not involve an app and simply tour the Appward workspace. Selecting the “App Tour” checkbox will bring up a list of available apps for you to select.
Tour type – Tours can be categorized into types defined by you, resulting in more organized and searchable records. For example, a type could be App Tour or Onboarding. When you create a type, you provide a name, image, forecolor and backcolor.

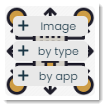
Image – You can select an image for the tour with this field. The image will appear in the main list of tours. You can add a new image or, if available, use the Type or App image.
General or Primary tour – This field indicates whether a tour is a General or Primary tour. The Primary tour of an app is used to provide information about the app when using the Tour button found in the top-right corner of each application.

Selecting a Primary Tour will present you with the following add screen: The red highlighted section is the normal tour information. The green highlighted section contains the proper fields for the Tour Menu that is displayed when a user clicks the “Tour” button that is located in the top right corner of every app.
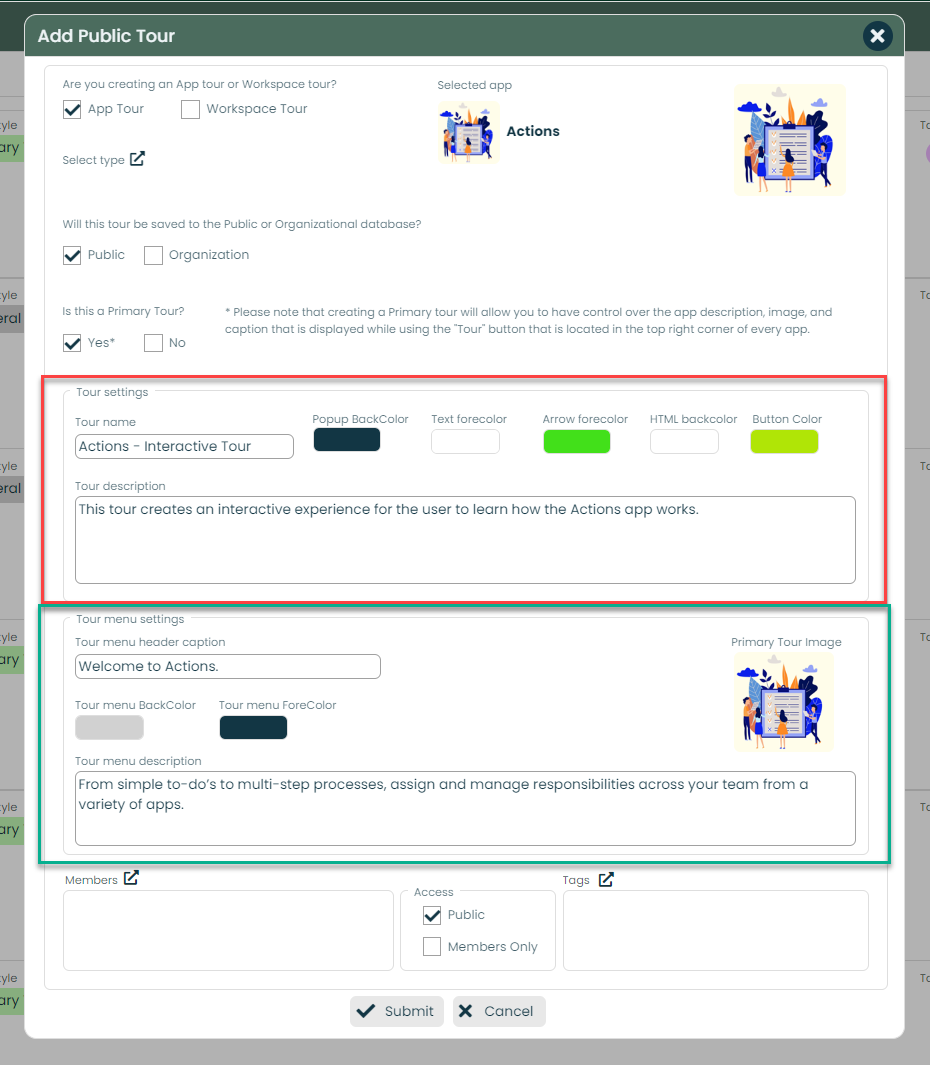
Name – You can indicate the name of the tour with this field.
Description – This is a description of the tour.

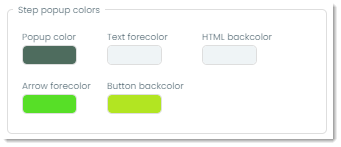
Step popup colors – This section is for controlling the colors of the popups for each tour step. A step is what it sounds like – a step of the tour. We’ll show you what this looks like in the next section.
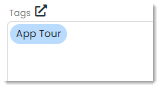
Tags – Appward uses a tag system which is another method of categorizing records. They are keywords which are useful for searching and filtering for specific tours as well as for tracking analytics in Insights.
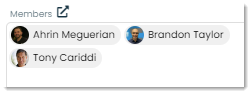
Members – Appward employs a system across many apps which limits access to private records to specific people known as members. You can select the members of a tour with this field, and only those selected people will be able to see the tour.
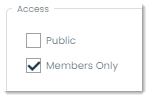
Access – This field goes hand-in-hand with the Members field. If this field is set to Public, everyone will be able to see the tour. However, if Members Only is selected, only the members from the Members field will be able to see the tour.
When you have added all the desired fields, click Submit and the tour will open up the selected app with a preview of the first step.
How to add a new tour (Appward Org)
If you are part of the Appward organization, the add process will be different.
Save the Tour to the Public or Organizational database – Appward users have the ability to create Public or Organizational Tours. Creating a Public Tour will save the Tour to the Public database and you can view it inside the “Appward” tab. Organizational tours will be saved in the “Organizational” tab.

The rest of the add process is the same as above.
How to view and edit a tour’s details
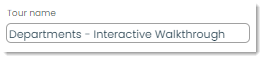
Once a tour has been created, you can view its details by clicking on it from the main list of tours. Let’s take the Departments – Interactive Walkthrough as an example. From the main list, click on the row for Departments – Interactive Walkthrough.
Selecting this record will open a screen with details of that tour:
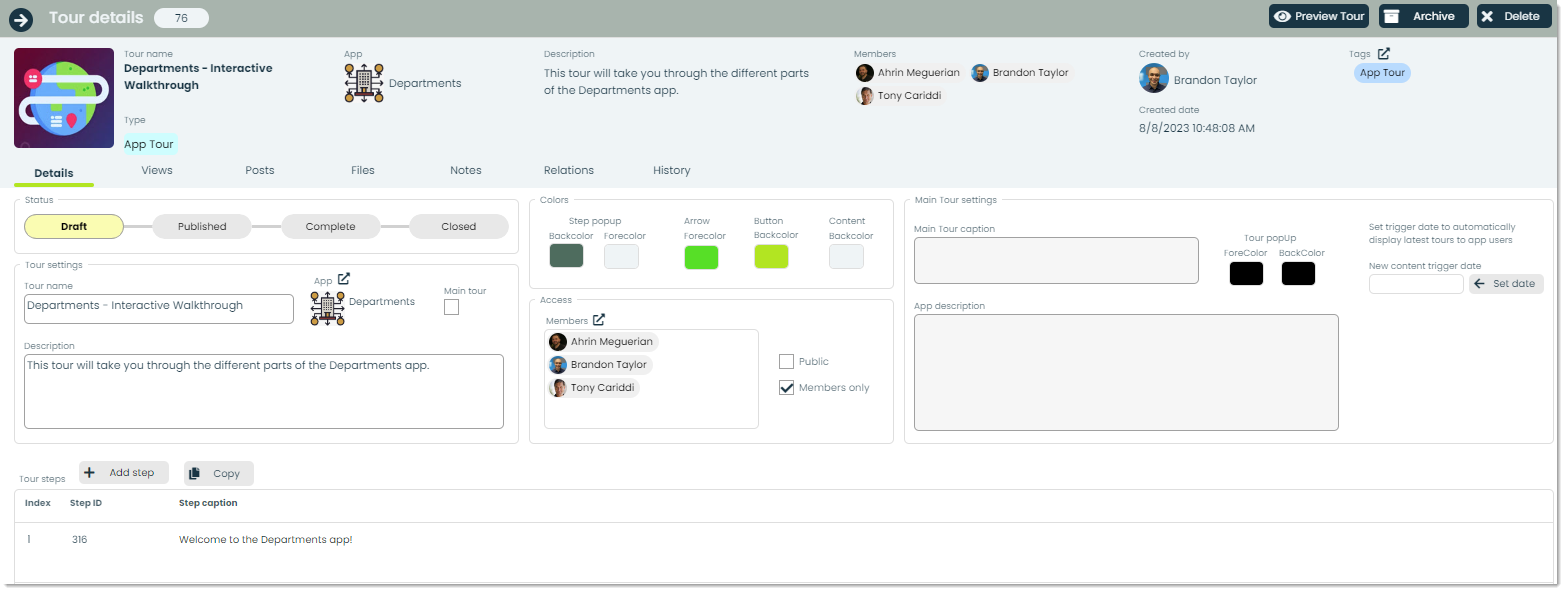
If you have member or public access, you can make changes to the tour and Appward will auto-save any updates. Let’s go over the additional fields within the tour details.
Status – Status is used to indicate the current state of a tour. Each newly-created tour will default to Draft.

Draft: Tours with the “Draft” status will only be shown to the creator of the Tour and the selected members. These Tours are also not visible in the Tour Menu.
Published: Tours with the “Published” status are visible to the Public. They also appear in the Tour Menu in apps.
Blocked: Tours with the “Blocked” status are not visible inside of the Tour Menu. When you select the “Blocked” status, you will be warned with popup asking for confirmation to block the selected Tour.
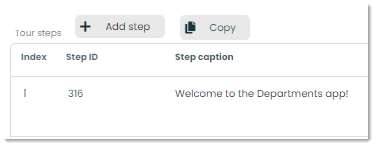
Steps – Steps are what your tours consist of. These are popups that appear on the app screen with guiding information for your tour. This section is where you can view and manage your different tour steps.
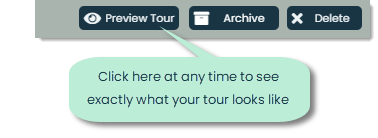
At any time, you can preview exactly what your tour will look like by clicking the Preview Tour button in the top-right corner of the screen.
How to add steps to a tour
Now that we’ve made a tour record, let’s start creating some tour steps! There are a couple ways to do this:
1. You can go into the details of the tour you’d like to add steps to and click Add step from the bottom section.

Doing so will show a popup for adding in the new step’s information.
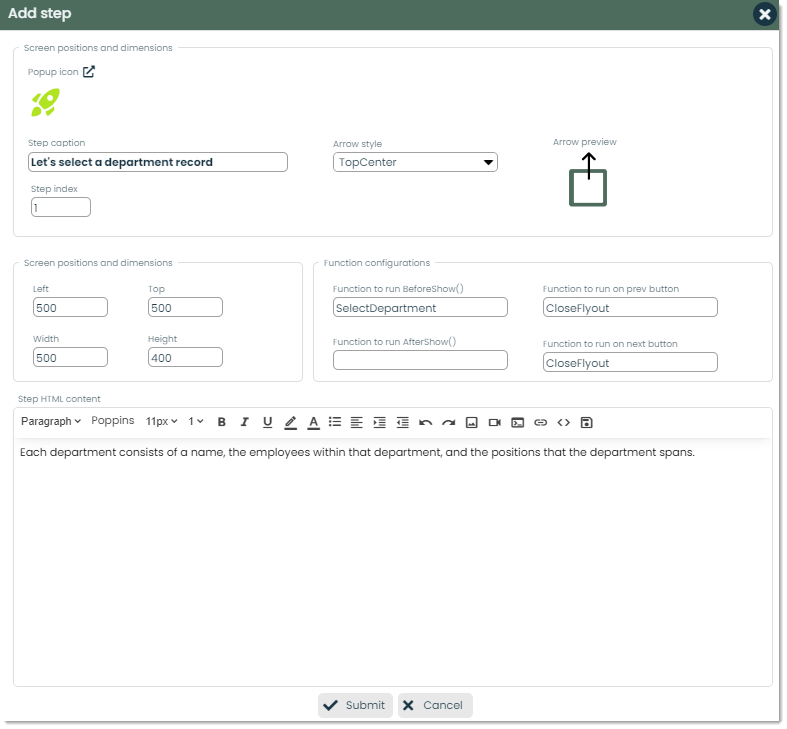
Here are the different fields of this screen and what they do:
Popup icon – This is the icon that will be present in the top-left corner of the step. You can customize this to be any icon you want!
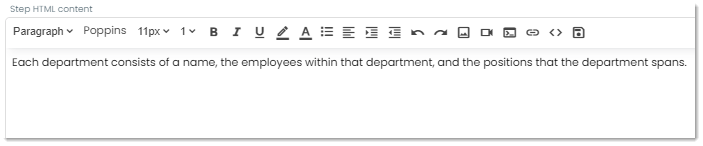
Step caption – This is the caption that will appear in the header of the step. You can think of this like the title of the step.

Step index – This is a number which determines the relative order of your tour steps. Say that you have three tour steps with indexes of 1, 3 and 2 respectively. This sequence indicates that the step with index 1 comes first, the step with index 2 comes second and the step with index 3 comes last.

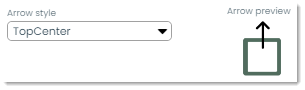
Arrow style – You can add an optional arrow to your steps in case you want to point to something in the app. This could be a specific feature such as a tab, popup, button or more.
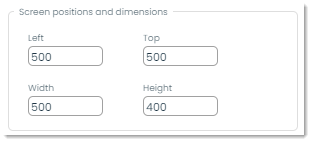
Screen positions and dimensions – These values indicate the size and position of the step. While you can indicate values here, a more intuitive way of handling these values is through the step preview mode in the second option.
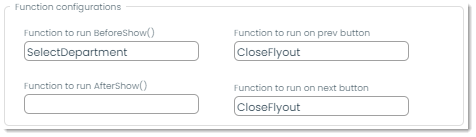
Functions – One cool feature of Tours is the ability to make the associated app perform actions based on certain events! For example, when you get to a certain step, you can program the tour to open a specific window or tab. For more in-depth knowledge on how to create functions for your tour, check out our developer article How to Script Functions for Tours.
When you have filled out all the desired step fields, click Submit at the bottom and the new step will be added to your tour!
2. The other, more intuitive way of adding a step is clicking on a step to view its details, then clicking Preview Step in the top-right corner to enter step preview mode.

This opens up the app for the tour. From here, you can place and add new steps while seeing how they will look in the app!
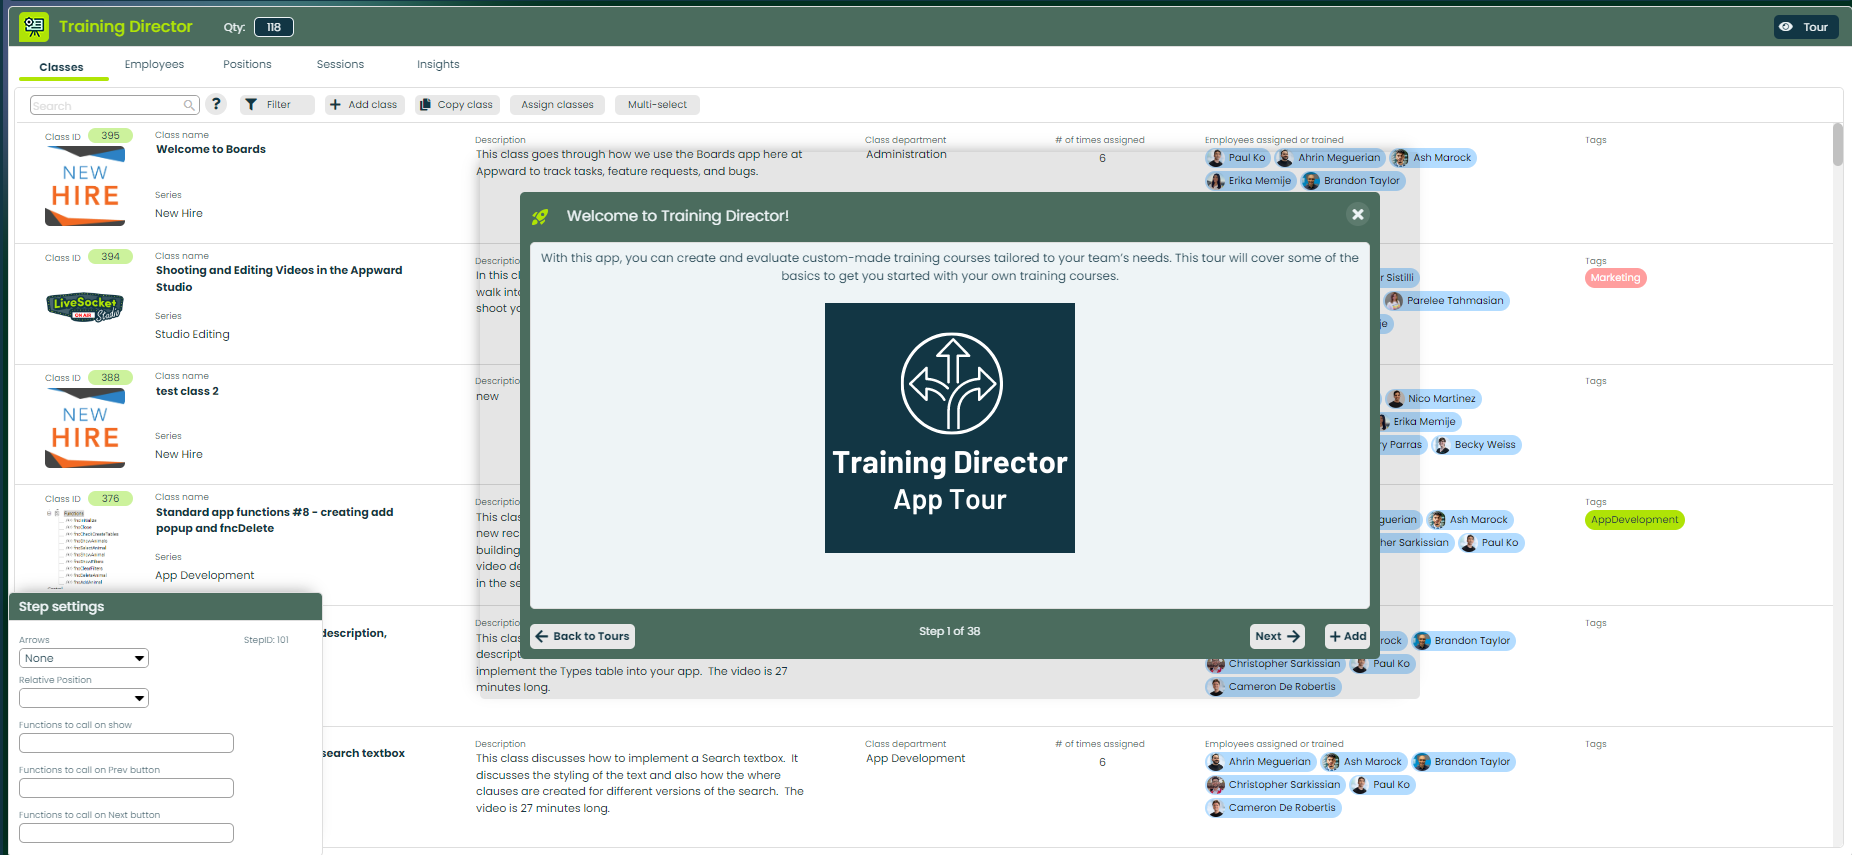
Step settings
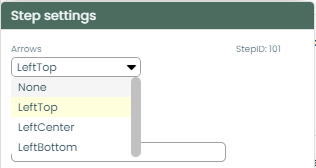
Arrows– This field is where you can select the positioning of the pointer arrow.
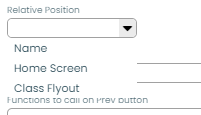
Relative Position – This field allows you to select a relative position point. This is useful to make sure that your Tour can be displayed on all forms of resolutions and screen sizes. Selecting relative positions to flyouts or objects on screen allow concrete positioning of the step popups. For more developmental information on this process, please view Article #680 and navigate to the section called “How to setup relative positioning”.
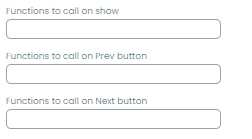
Function calls – These fields allows you to select the function that will be triggered onShow(), onPrev(), and onNext(). Function calls are called from fncRunTour, which is a function that lives locally in the app. This function contains a large select-case statement containing functions that are performed by the app.
**If you are designing Workspace Tours, the function calls will come from fncRunWorkspaceTour.
For more developmental information on this process, please view Article #680.
You can reposition, resize and edit the content of a step more intuitively in this mode. Additionally, you can configure the same step settings from the add process of the previous section. To add new steps, simply click the Add button in the bottom-right corner of the step. One thing not present in this mode is the index of the step. Indexes are numbers which determine the order of your tour steps. You can modify your step indexes in the details of the tour by using the step index buttons:

Repeat this addition process for as many steps as you’d like for your tour! As mentioned previous, you can view exactly what your tour looks like by clicking Preview Tour in the top-right corner of the tour’s details. Have fun creating your own tours!