Table of contents
Getting Started with Parts
Monday November 20, 2023-22 min readIntroduction
Appward’s Parts app streamlines the process of managing your inventory, offering a user friendly solution for effective part tracking. With Parts, you gain a dynamic, teal-time overview of all the parts in your inventory. This visibility extends to how these parts are utilized across your operations.
Let’s get started
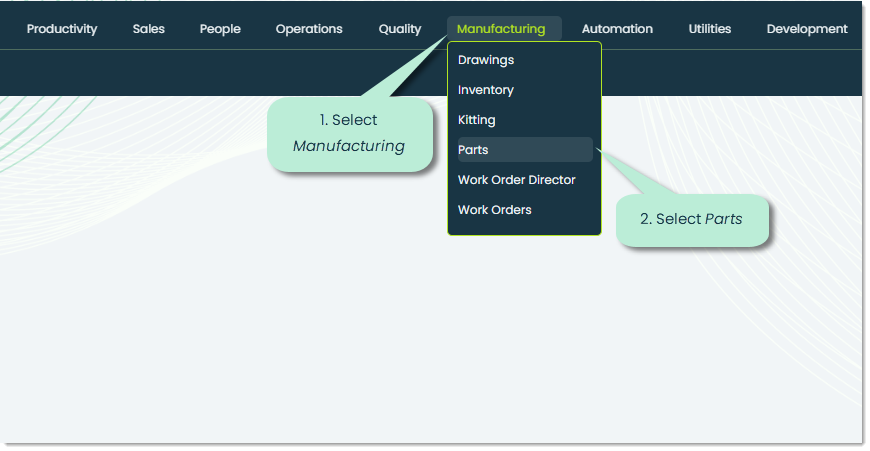
To get to the Parts app, go to the Manufacturing section of the main navigation bar and select Parts.
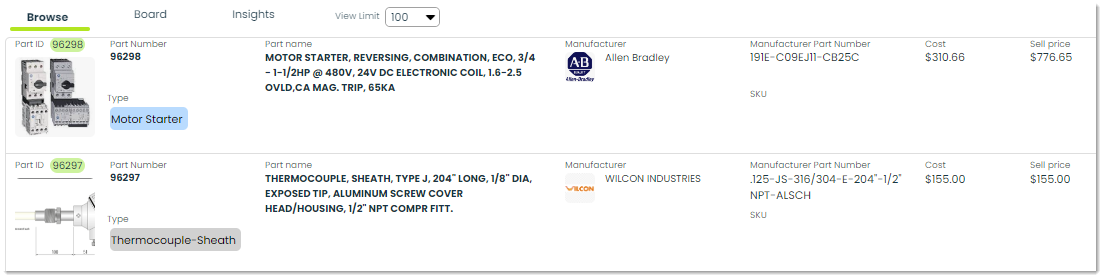
When you first open the Parts app, you’ll be shown the Browse tab, which displays a comprehensive list of your organization’s parts.
Note: If this is your organization’s first time using Parts, this screen will be blank.
At the top of the app screen, you’ll notice three individual tabs. Let’s go over the purpose of each of these tabs.
Browse – In Browse , you have access to a comprehensive inventory of parts within your organization. This tab presents a user-friendly list that provides crucial details such as manufacturer, cost, selling price, part number, and other essential information.
Board – The Board view tab shows you a kanban-style representation of your organization’s parts. Utilizing Kanban boards, you can easily rearrange your parts, simplifying the management of status updates and providing a visual means to monitor inventory status.
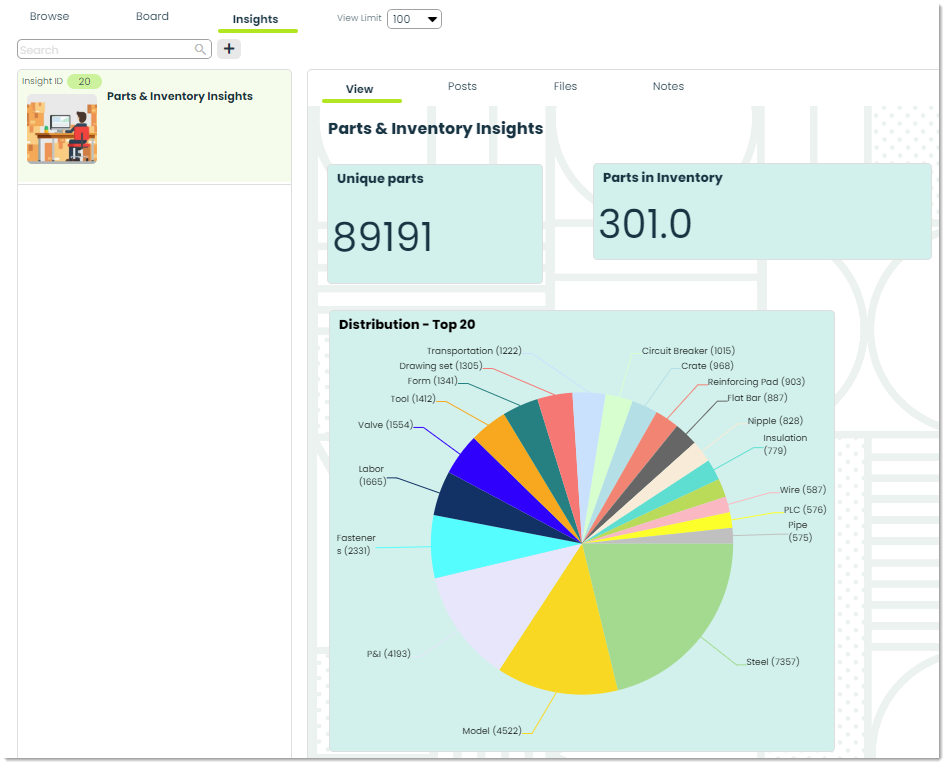
Insights – This tab is used to analyze collected data from your organization’s parts. With Insights, you can uncover valuable information pertaining to part usage, stock, and even location. For more on Insights, please check out our Getting Started with Insights guide.
How to add a part
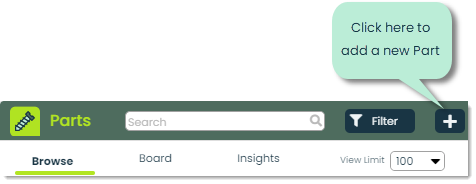
To add a new part to your organization’s record, click the + icon at the top of the screen.
Next, you’ll encounter the Add part popup, providing an opportunity to input details for a new part. Let’s explore the fields available for entering information when adding a new part. Let’s go over the available fields.
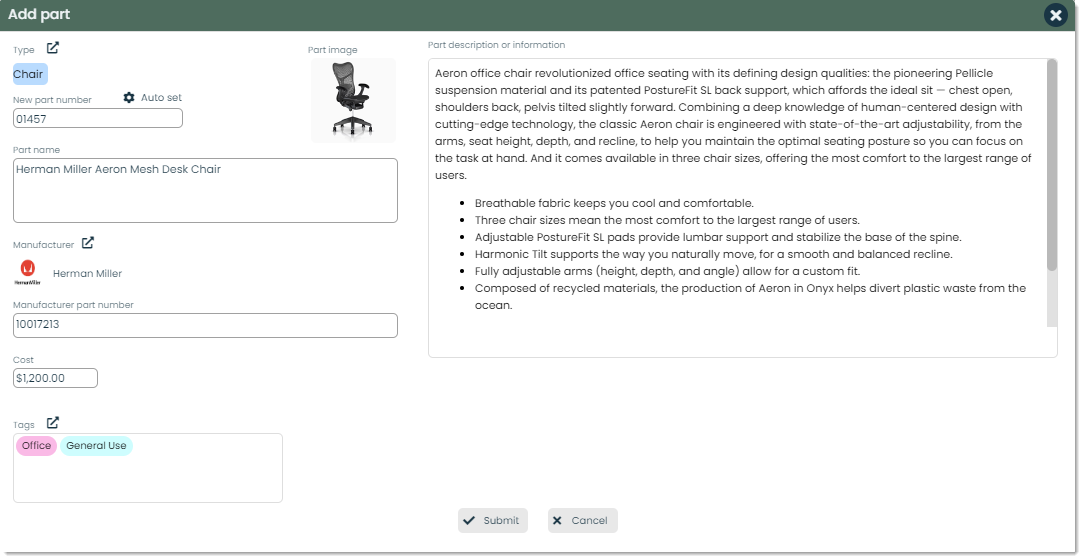
Type – You can categorize the part you create by the type you select. Visually, types are labels with custom names, colors, and images that can be assigned to records throughout Appward. However, types provide you with a way to organize your data in a fully flexible, customized way to suit your business. As an example, a part associated with an Econoclave could be labeled with the part type Econoclave. For more information on Types, please check out Using Types.

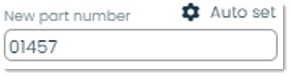
New part number – The New part number refers to a unique identifier that you can assign to a part within the parts app. The app offers an option to automatically generate or assign a new part number upon submission of a new part. This functionality, known as Auto set, provides you with the ability to automatically assign part numbers to newly created Parts records based on your specified criteria.
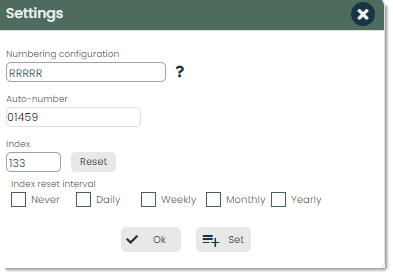
Auto Set – While adding parts to your organization’s Parts app, you might want to set up an automated way to number and organize your parts. To start the process, click on the Auto set button to open up a settings popup providing you with options. When incorporating components into your organization’s Parts app, consider establishing an automated system for numbering and categorizing these parts. You can begin the process by selecting the Auto set button, which will open up a Settings popup offering various options.
Numbering configuration: In Numbering configuration, you can define the numbering convention you want to follow for newly added parts. This format will be autofilled into the record of new parts upon creation.
Auto-number: In this field, you can view and edit the number that the auto numbering system will start from. As an example, if you were to start at 01459, the next part record you create will be numbered at 01460.
Index: The Index refers to the the index or location of where the number is located within the Numberings data table.
Index reset interval: To completely automate the numbering process, you have the option of resetting the index at defined intervals. To define the reset interval, you can select the checkbox that corresponds to your organization’s needs.
Part name – The Part name refers to a descriptive label that you can assign to a specific part.
Manufacturer – The Manufacturer is the company or entity that created the part. Manufacturers are also often the organization responsible for designing and distributing the part. Having a clear understanding of the manufacturer is important for ensuring traceability throughout the entire supply chain.
Manufacturer part number – This field refers to the unique identifier that a manufacturer assigns to the part. These numbers are standardized, and assist other organizations in ordering and ensuring the product is stocked up in their inventory.
Cost – The Cost refers to the price of an individual unit of the part. It includes the expenses associated in manufacturing, purchasing, or shipping the part. Maintaining an accurate record of the total cost of the part, spanning from the supplier to the customer, is essential for effective inventory management.

Tags – Visually, tags are labels with customized font and background colors. They are used throughout Appward to provide better organization and searchability of your organization’s projects. Furthermore, tags offer additional context to individuals within your organization, enabling them to gain insights into the content of a record before they even access it. For more on Tags, please check out Using Tags.

Part description or information – The Part description or information field is where you can define the important details of the part. You can fully customize the description to your organization’s requirements using the integrated HTML editor which offers the functionality to modify the text as you need.

Submit – When you have provided all the necessary information for the part you are creating, you can press Submit.

Cancel – If you wish to stop creating the record, you can press Cancel to stop the process and close the popup window.

Viewing and managing a part
To access the record of a part, simply click on the row of the part that you wish to view.

You’ll then be shown the details flyout for the part, giving you the ability to view or edit information as you need. Let’s go over everything available in here. We’ll start with the unfamiliar fields within the General tab.
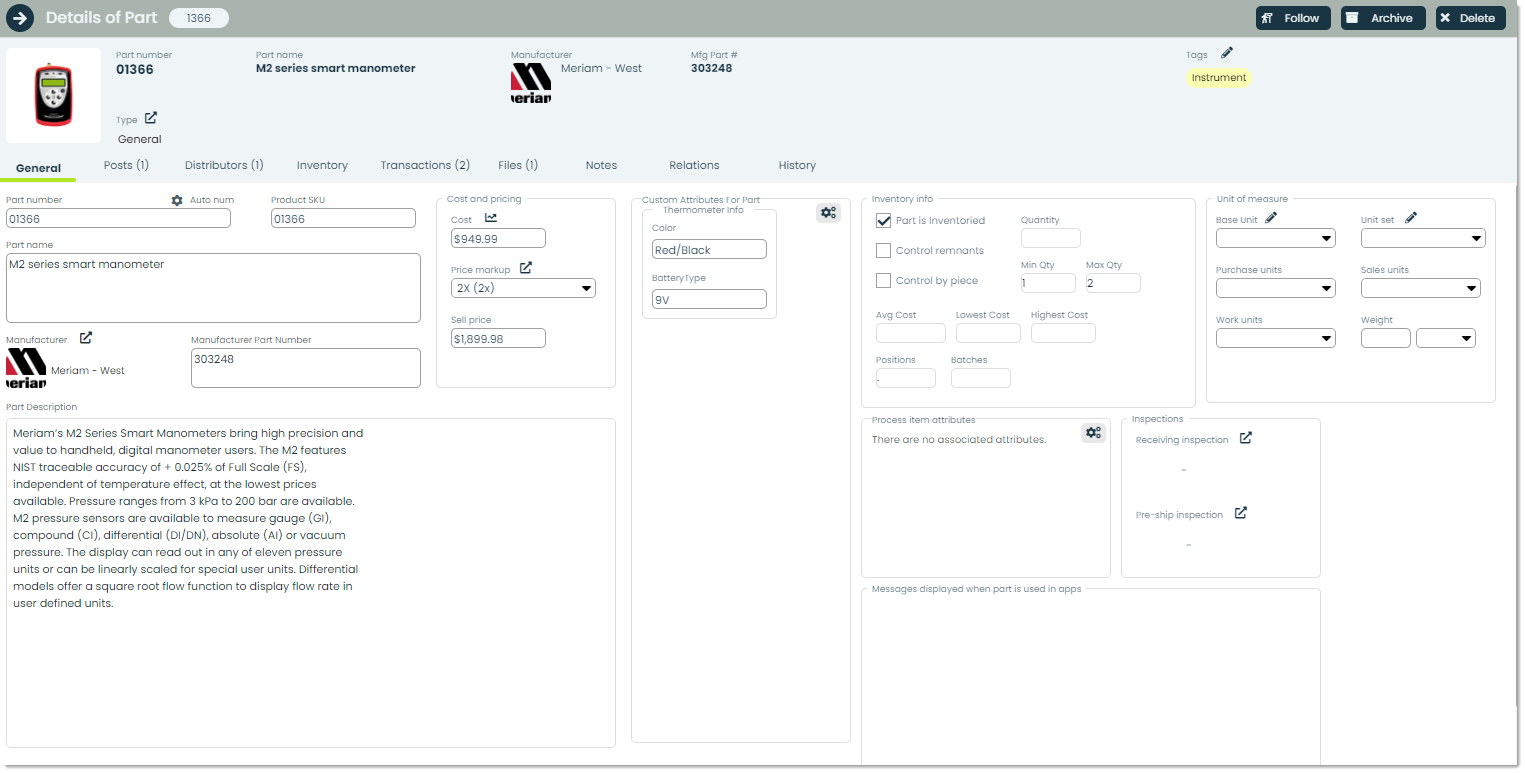
Manufacturer – The Manufacturer is the entity responsible for developing and producing the part. You can select the manufacturer by pressing the external link icon and selecting from a list of your organization’s company contacts.
Manufacturer Part Number – The Manufacturer Part Number or MPN is the unique identifier the manufacturer has assigned to the part.
Cost – The original cost of the product. This is often the price of the item the manufacturer has sold the item to your organization for.
Price Markup – If your organization is a vendor, you can establish a markup price for the item. You can do so by selecting the markup price from menu within the combo box.
Sell Price – The price you will ultimately sell the product for, including the calculation with the markup.
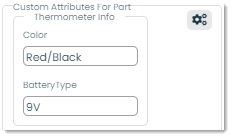
Custom attributes – In Appward, attributes are adaptable fields that can be incorporated into parts to offer a more detailed description. Attribute fields allow you to define and include information that goes beyond the original set of fields for a record. As an example, you can define additional fields related to a part when dealing with a part that is associated with unique use cases or posesses uncommon features.
Inventory info – This cluster of fields is where you can view valuable information originating from the Inventory app regarding the part you are viewing.
Part control: You can define the view you see within the Inventory info pane.
Quantity: The number of units of the item your organization has in inventory.
Min Qty: The minimum number required to be in inventory to ensure a healthy stock.
Max Qty: The maximum number of units allowed to be in inventory to ensure overstocking does not occur.
Avg Cost: The average cost each unit in inventory was purchased for.
Lowest Cost: The lowest cost a singular unit was purchased for.
Highest Cost: The highest cost a singular unit of the part was purchased for.
Positions: The precise location of where the item is located. Positions are created and assigned to parts within Inventory.
Batches: Batches are defined as a group of parts that are produced or purchased together as a set. This is helpful for when you buy a specific part at a wide range of prices. Having these groupings enable your business to track, manage, and account for your inventory. Associating items in batches easily allows you to trace their origin, monitor quality, and ensure consistency in pricing.

How to view and manage distributors for a part
To view or assign the distributor(s) for a part, you can head over to the Distributors tab within a part’s details flyout.
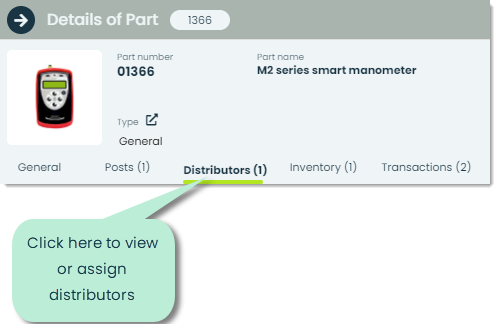
Once there, you’ll be shown a list of contacts who have been assigned as distributors of the part. If your organization has not assigned any distributors to the part, you’ll see a blank pane. Let’s go over how to add a distributor.
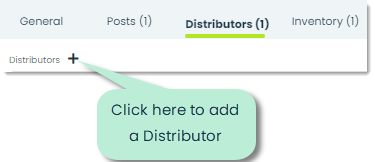
To add a distributor, press the + icon at the top of the Distributors tab.
Doing so will bring up the Select a distributor popup. In this popup, you have the option of sorting and selecting distributors from a list of company contacts within your organization.
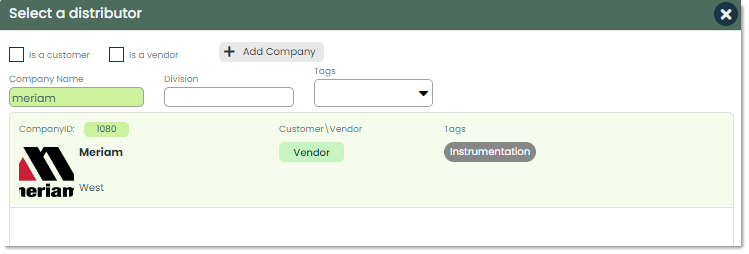
Distributor relationship – Customers and vendors are integral components of a company’s network of contacts. You can select whether you are searching for a company that s a customer or a vendor.
Customer: A customer refers to businesses that purchase goods or services from your company.
Vendor: Conversely, a vendor is a company that supplies your organization with goods and services. Vendors can provide a wide range of things, varying from raw materials, parts, or finished products.

Company Name – In Company Name, you can search the name of a company contact so that it can be used to filter from a list of your available contacts from the Companies app.
Division – Division refers to the division of the company you wish to select as a distributor. Divisions are important when trying to differentiate between different parts of the same company. Having distinct divisions for larger distributors across multiple loations is beneficial, as it facilitates differentiation and organization within the company.
Tags – Another option of searching is Tags. Searching by tags enables you to search not only by customer or vendor but also by specific details highlighted about a company. This approach allows a more nuanced and customized search based on multiple attriibutes of a company.

After sorting the list of companies the way you want to, you can view the results within a list view displayed directly below.

Moving a part into Inventory
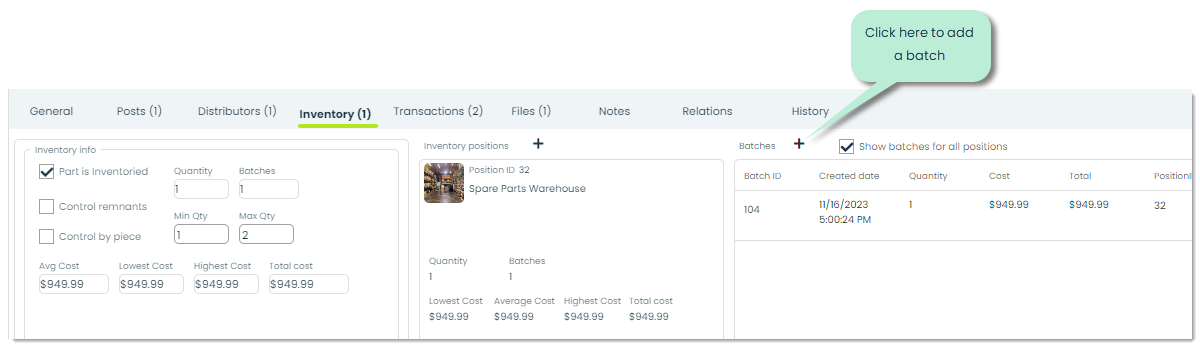
To put a part into your organization’s Inventory app, you can navigate to the Inventory tab within the details flyout for a part.
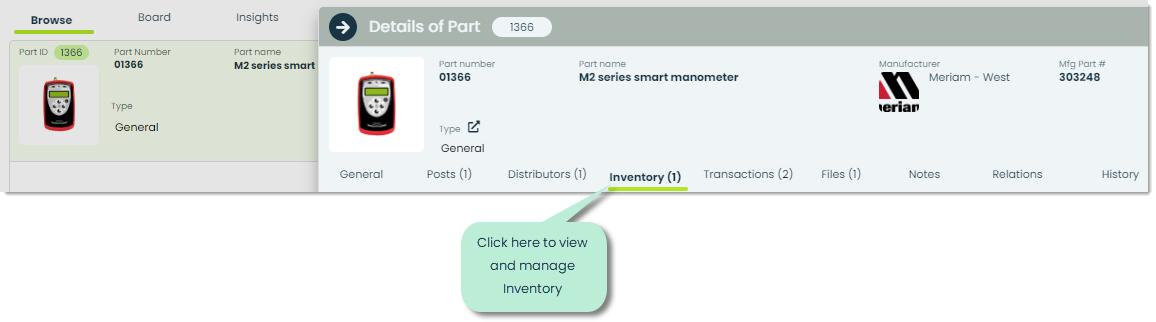
Upon entering the Inventory tab, you will find detailed information about the specific part. Additionally, you have the capability to control the storage position of the item and identify the batch to which it belongs. Let’s cover how you can start adding parts and batches to inventory positions to keep your business on track.

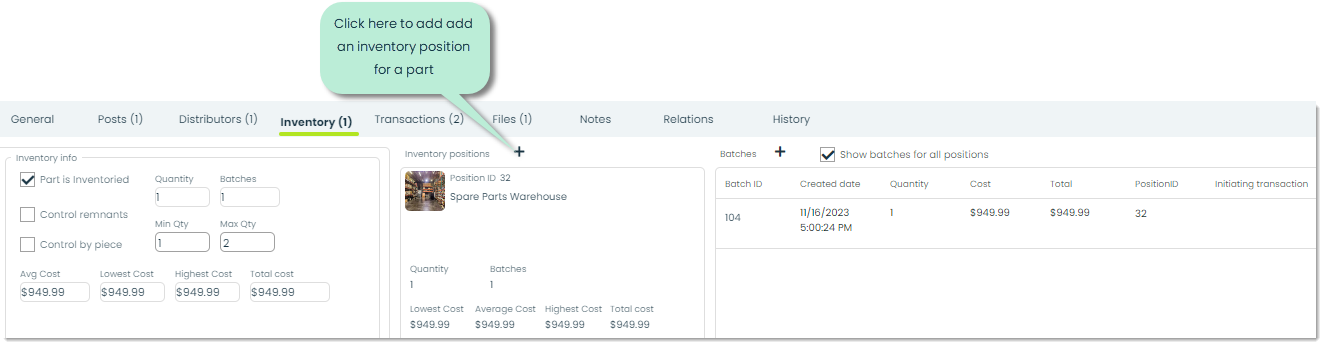
If there are no inventory positions created within your organization, you can start to create them by pressing the + icon adjacent to the Inventory field.
You will then be shown the Add new position for part popup.
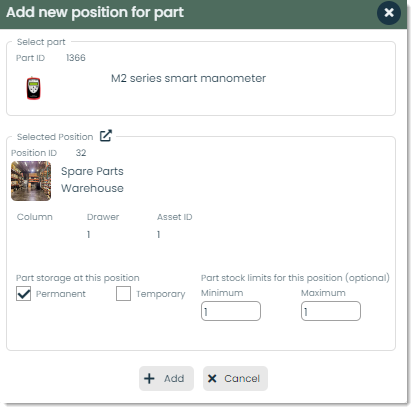
Simply fill out the fields and press Add to include a new inventory position in your organization.
To add a batch to the part record, click the + icon found on the right side of the flyout
You’ll then be able to input the details for the batch you are adding. Price information is automatically imported from the information entered in the General tab.
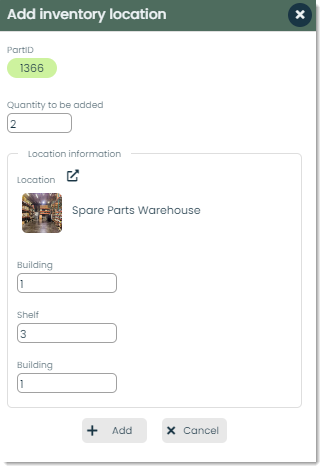
Complete the details with location information and specify the number of parts intended for storage in that particular location, and you’re all set. Your part is now visible within inventory.
How to view transactions
You can view the transactions taken place involving this part within the Transactions tab.
Transactions can originate from many apps within the Appward ecosystem. Some examples of apps where they can be generated from are Work Orders, Projects, and Purchase Orders. Let’s go over where these fields come from.
Date: This field displays the date the transaction occurred, including the exact time down to the second.
ItemID: Represents the unique ItemID for the particular part involved in the transaction.
Quantity: The number of units of a particular part that was involved in the transaction
Transaction: The specific transaction that occurred. This can include actions such as adding or removing new items, or requesting to purchase more units.
Work order ID: If the transaction originated in the Work Order Director app, it will be associated with a Work order ID.
Work order title: Similar to the Work order ID field, the Work order title field will display the title of the work order this part transaction originated from.
Project #: Part transactions can also occur within the Projects app.
Project name: If the transaction is associated with a project, the Project name will be displayed here.
All this information helps your organization stay organized and be its best.
Frontline features of Parts
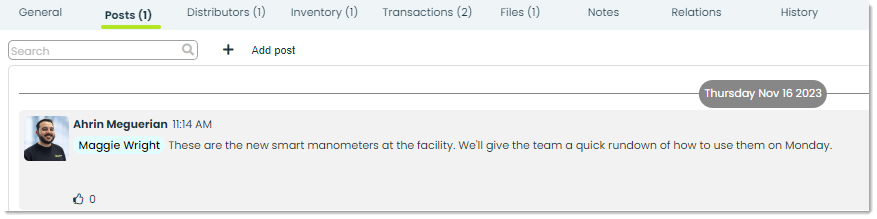
Posts – A post is a comment which can be replied and reacted to by other users in your organization. You can use a post to inquire, discuss, or communicate with a colleague regarding the current status of a part.
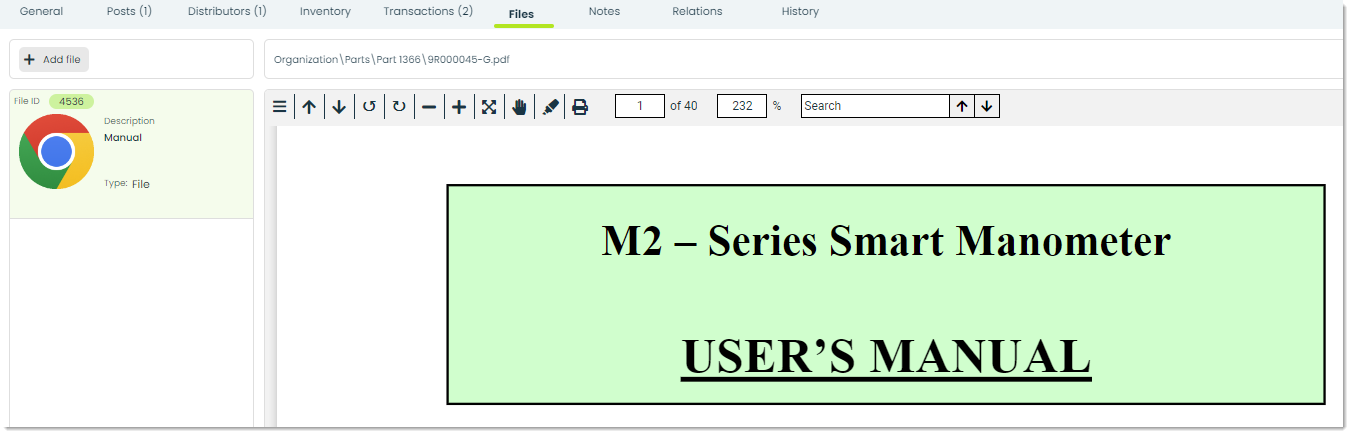
Files – Through the Files tab, you can attach essential documents to part. You have to option to add files directly from your computer or from the Appward Cloud. After adding a file, you can view it through an integrated document preview within the Files tab. A common example of using Files in parts is to provide the viewer with a user manual for a part.
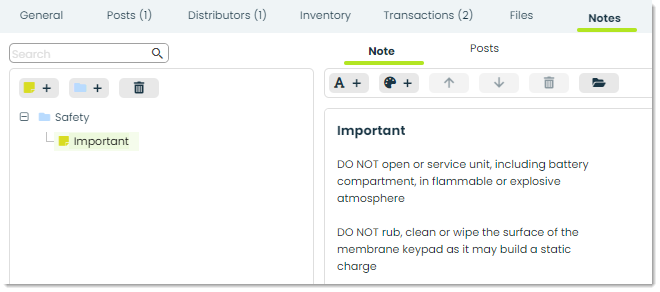
Notes – Within the Notes tab you can write and store written records that help capture and convey your thoughts. You’ll be able to stay organized, provide better context to discussions, and improve communication between you and your team.
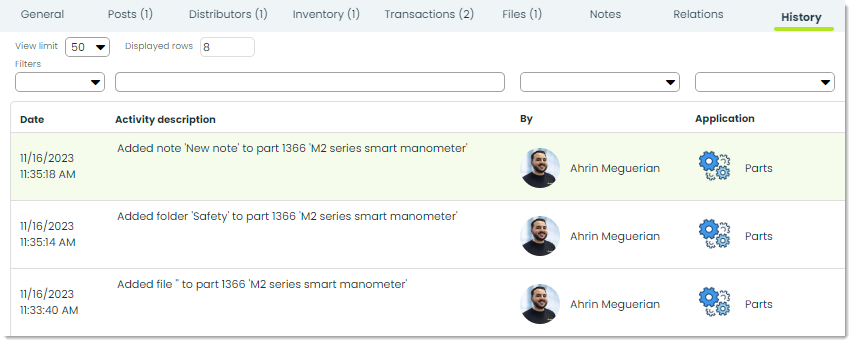
History – In History, you can view an activity log related to the Parts record you are viewing. You will see a list displaying the modifications date, activity description, modification author, and the application in which it was made.
Additional features of Parts
Copy – You can easily duplicate a Parts record by clicking the Copy button at the top right of the app screen. When pressed, this will create an identical copy of the record you currently have selected. This is a great way to save time when inputting multiple parts that share minuscule differences.

Follow – Throughout Appward, many apps contain a feature known as Follow. When you follow a record, you are sent immediate notifications upon a record change. Notification settings can be customized and changed to fit your needs.An example of a notification trigger you can enable is when the quantity of a part changes.

Archive – Archiving is a common feature within the majority of apps in Appward. Archive
serves as an effective tool when you wish to remove a survey record from sight without permanently deleting it. Archived records are essentially concealed from the main screen but remain accessible through specific search filters.

Delete – To delete a Parts record permanently, you can do so using the Delete button. These records will not be recoverable.

Help – Look for the help button in the majority of apps on Appward. It offers tours and valuable information created to assist you in navigating through the app. These tours serve as interactive step-by-step guides tailored for the application you’re using. Utilizing tours can enhance your onboarding experience, providing a user-friendly and effective solution.
