Table of contents
Getting Started with Roles
Monday December 4, 2023-10 min readThe Roles app offers a user-friendly solution for establishing and overseeing various roles within your organization. With this versatile app you can create and manage distinct roles, allowing you to tailor permissions based on specific positions, contacts, and applications. By leveraging Roles, you can strategically regulate access and interactions, ensuring the individuals within your organization engage with the information and functionality related to their responsibilities.
Let’s get started
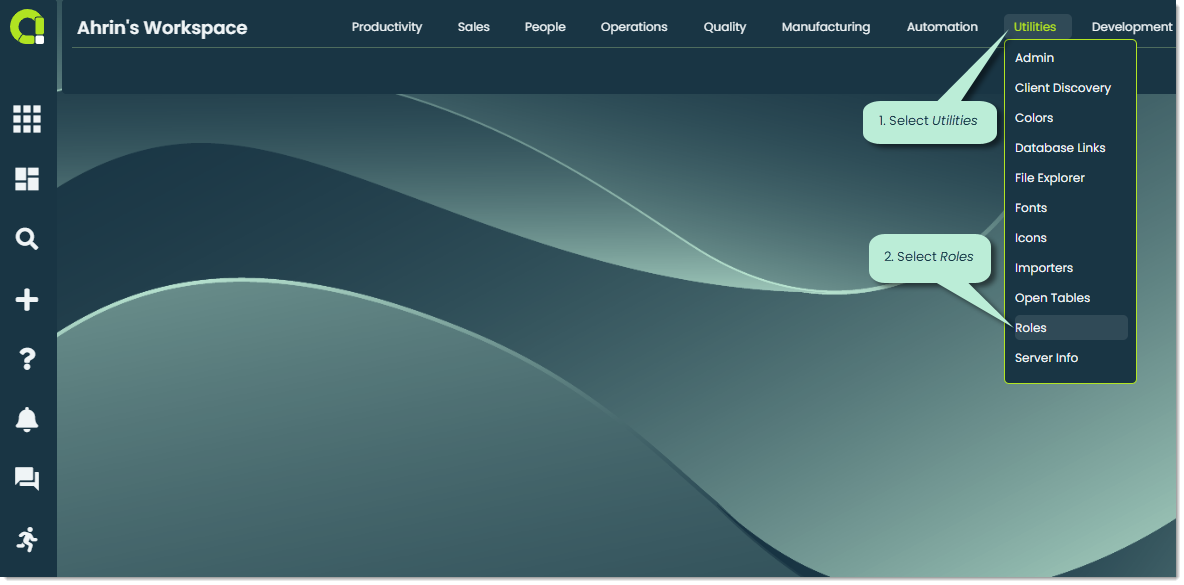
To access Roles, go to the Utilities section of the main navigation bar and select Roles.
When you first open the app, you’ll see a list of Roles and the contacts within your organization they are assigned to.
Note: If this is your organization’s first time opening the Roles app, this screen will be empty.
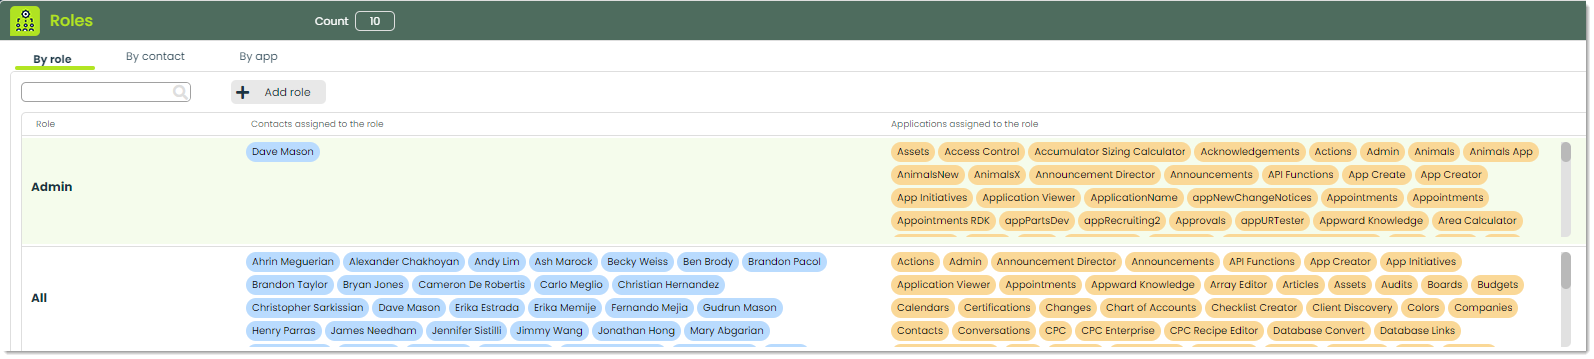
At the top of the app screen, you’ll notice there are three tabs. Let’s go over them.
By role – This tab features an organized list of roles within your organization. It includes two columns showcasing the contacts assigned to each role and the applications associated with them. Upon opening the app, it defaults to this tab, presenting roles in alphabetical order for user convenience.
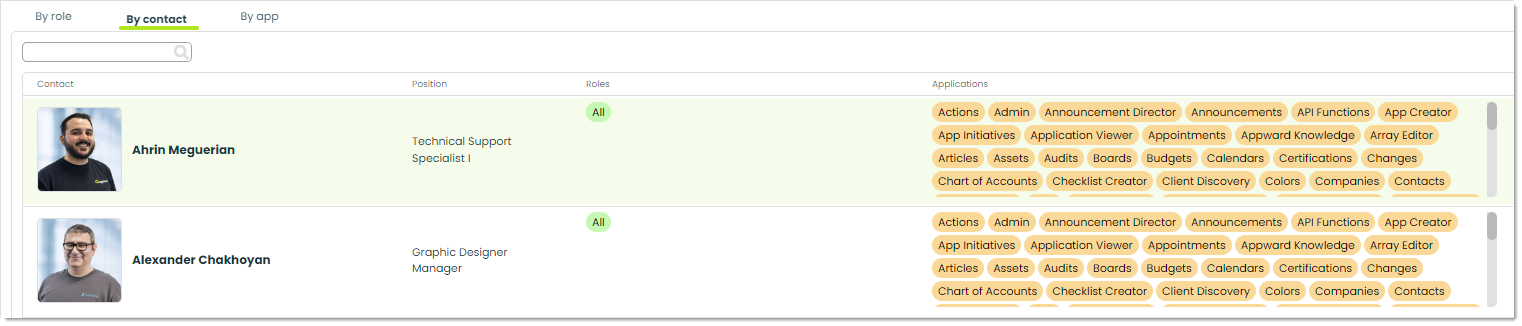
By contact – In the By contact tab, you can view a list of your organization’s contacts. This list displays contact name/photo, position in your organization, roles, and the specific applications they have access to.
By app – This tab displays a list of apps in alphabetical order for your organization. The apps available may differ among organizations, depending on what’s accessible and your employer’s preferences for purchases. Additionally, you can check the roles that grant access to specific apps and view the contacts currently assigned to those roles.

Adding a new role
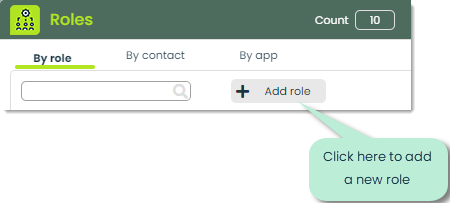
To make the most of the Roles app and understand how it can assist you in managing your entire organization on Appward, let’s explore the process of creating a role and assigning it to contacts. To begin, click the +Add role button at the top of the screen.
Upon selecting +Add role, you will be shown the Add role popup, where you can start to define the role you are adding. First, you’ll want to create a name that clearly defines the role.

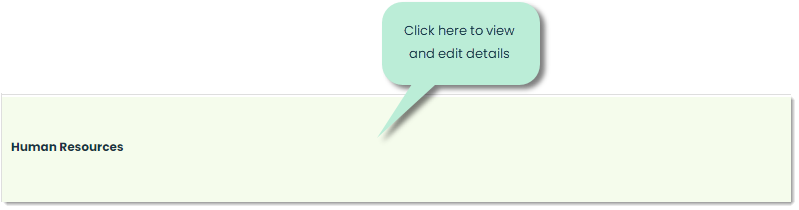
You can then view your newly created role in the By role tab of the app. To edit the important details of the role, simply click on it to open up its details.
The following detail flyout will appear, where you can edit the specifics of the role.
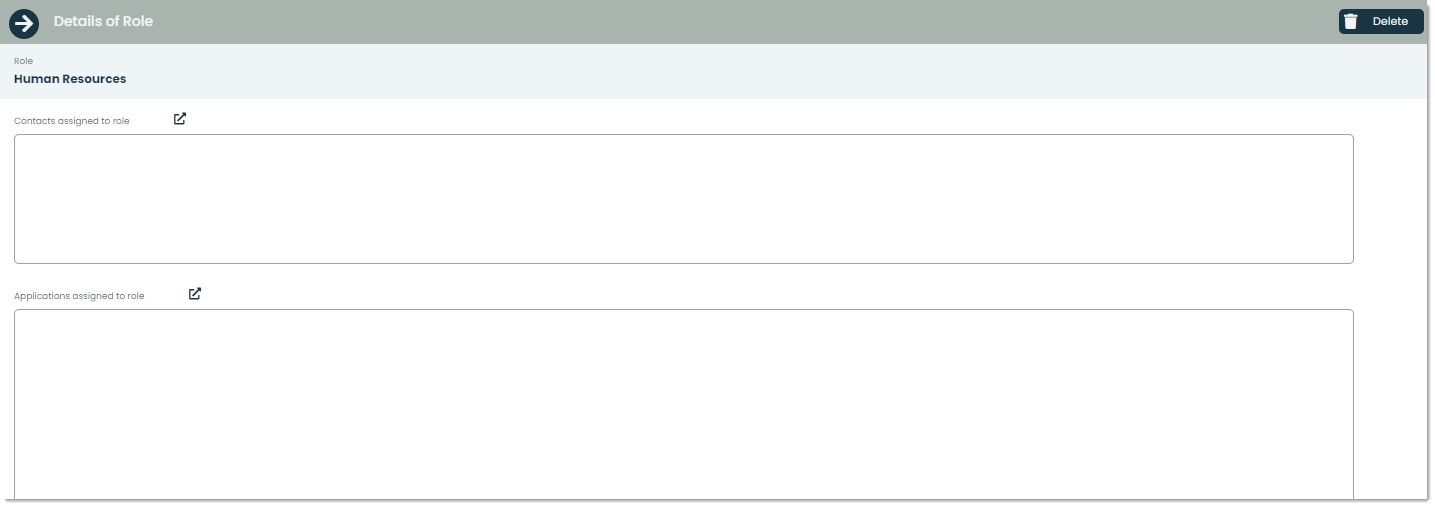
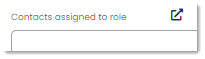
To assign the role to specific contacts, click on the external link icon in the Contacts assigned to role field.
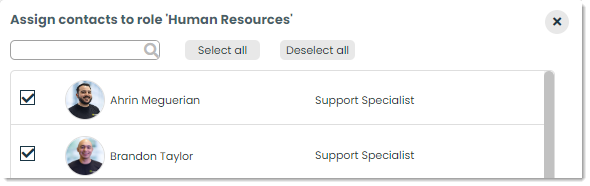
This will bring up a list of contacts from your organization. The list will display their name, profile picture, and position.

To assign a contact to a specific role, you can click on the checkbox next to the contact you wish to assign. You have the option to individually add them, or select multiple contacts at the same time. Once you have selected the required individuals, press the Ok button.
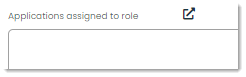
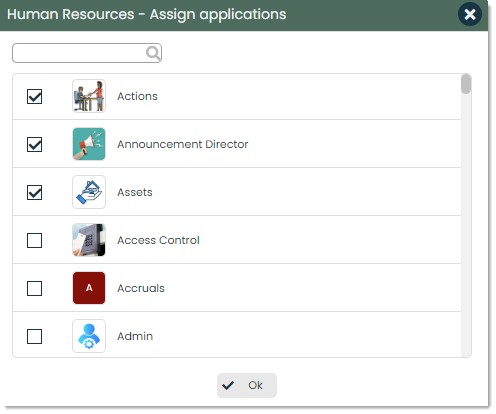
Next, we’ll want to add specific applications that your selected individuals will have access to. This serves as a way to hide or protect certain applications so that they are only shown to the people they should be shown to. To add applications to the role, simply click on the external link icon in the Applications assigned to role field.
This will bring up the Assign applications popup, where you can select individual or multiple applications to assign to the newly created role. Once you have selected the required apps, click Ok to submit this and finalize your Roles record.
Your new role with its specified details is now available to be utilized.

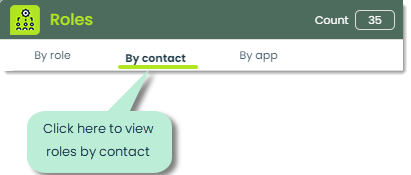
Viewing roles by contact
To view roles by individual contacts, navigate to the By contact tab at the top of the app screen.
This will bring up a list of contacts from your organization who have been assigned roles.
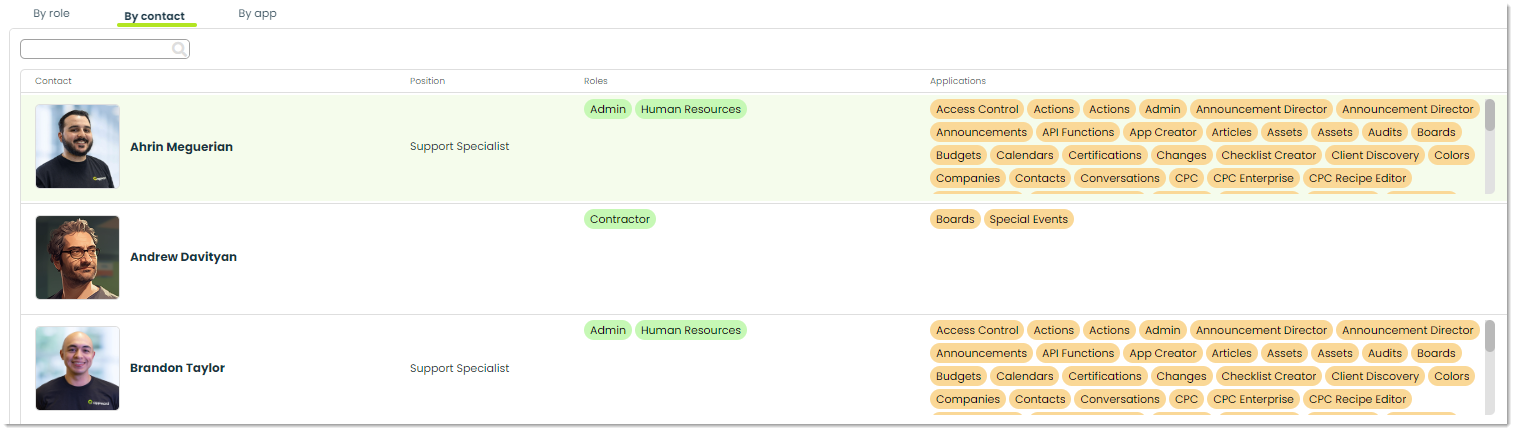
The contacts in this list are sorted alphabetically, and each row displays the position, assigned roles, and permitted applications. To view more details about a specific contact, you can click on their record.
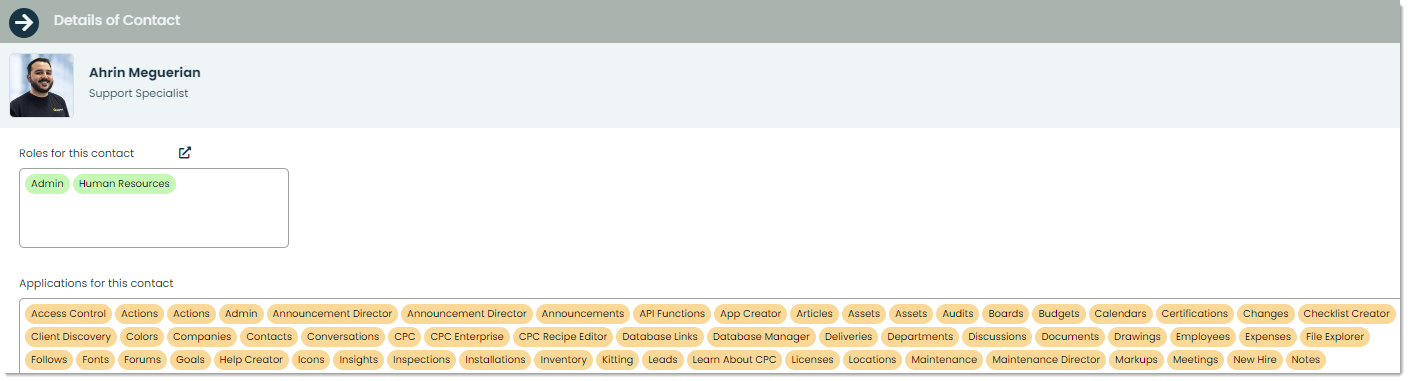
In this view, you can observe the roles assigned to the contact along with the list of applications associated with them. You also have the option to modify the assigned roles directly in this window by clicking the external link icon in the Roles for this contact field and choosing the appropriate roles from your organization’s list.
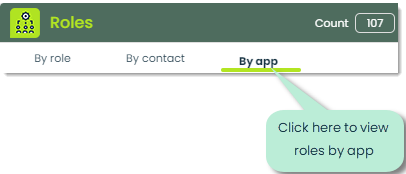
Viewing roles by app
To view the assignment of specifics apps, navigate to the By app tab.
This will bring up a list sorted alphabetically by app name, which displays the roles and contacts assigned to each app.

To view more details about a record, simply click on it to bring up the Application details screen. Let’s go over the unfamiliar fields in this flyout.
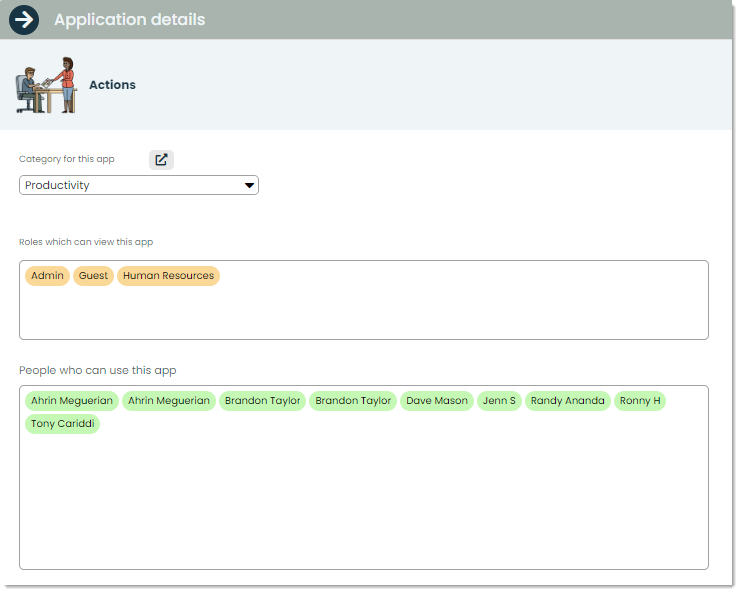
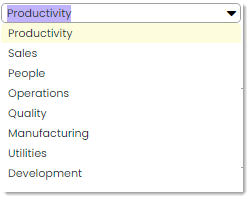
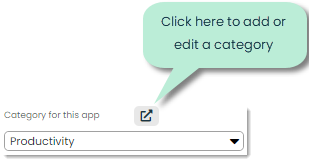
Category for this app – You can select a category for an application in one of two ways. The first way is to select an existing category from the drop-down menu.
To add a new category or edit an existing one, you can click on the external link icon in the Category for this app field.
This will bring up the app categories popup, where you can edit existing categories or create entirely new ones.
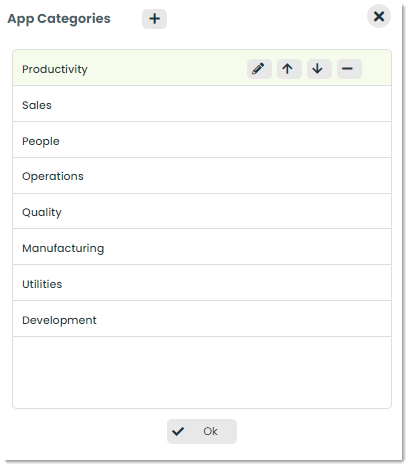
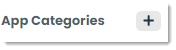
Add a new category – To add an app category, you can click the + icon at the top of the App Categories popup. App categories are important because they are what will be displayed to your organization when they are navigating through Appward.
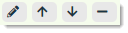
Category functions – Within the App Category popup, there are additional functions you can use to help manage your list of applications.
Edit: You can edit the name of a category by selecting the pencil icon and typing in your edited category name.
Move up: You can move up the highlighted category in your list by selecting the up arrow icon. This list resembles the order of categories at the top of the Appward navigation bar.
Move down: Conversely, you can move the selected category down by one by selecting the down arrow icon.
Remove: To remove an app category from the list, you can press the minus symbol.
Additional features of Roles
Delete – You can delete roles permanently by pressing the Delete button.
