Table of contents
Getting Started with Admin
Tuesday February 27, 2024-12 min readIntroduction
The Admin app is where you can create new Appward users. You can configure each user’s individual access levels as well as define platform-wide settings for everyone. This guide will walk you through the process of adding new users and utilizing the Roles app to configure what apps each person can access.

Let’s get started
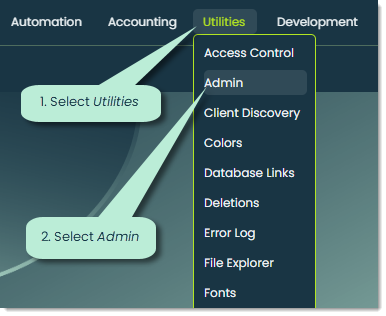
To open the app, go to the Utilities section of the main navigation bar and select Admin.
When the app launches, you’ll see four main tabs at the top of the screen.

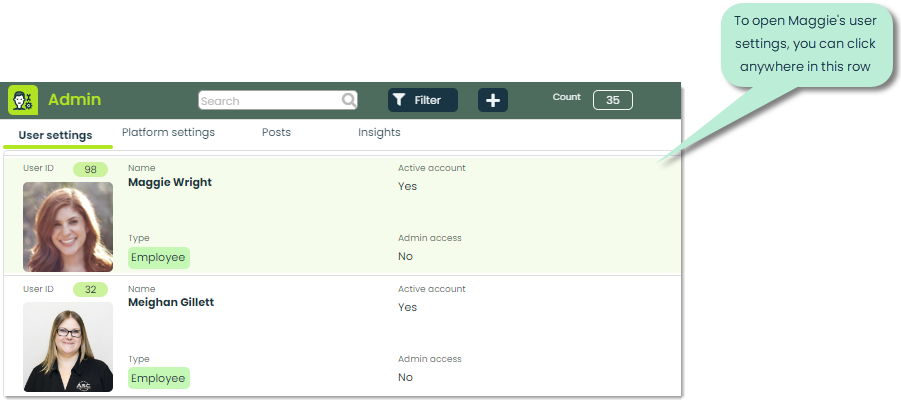
User settings – Here, you can see a list of all users for your organization.

Platform settings – There are two sub-tabs in this section where you can view and edit platform-wide settings.
App settings – This tab displays a list of all apps within your organization. You can see the name of the app, the category it falls under, the Roles from the Roles app that the app is included in and which contacts have access to the app.
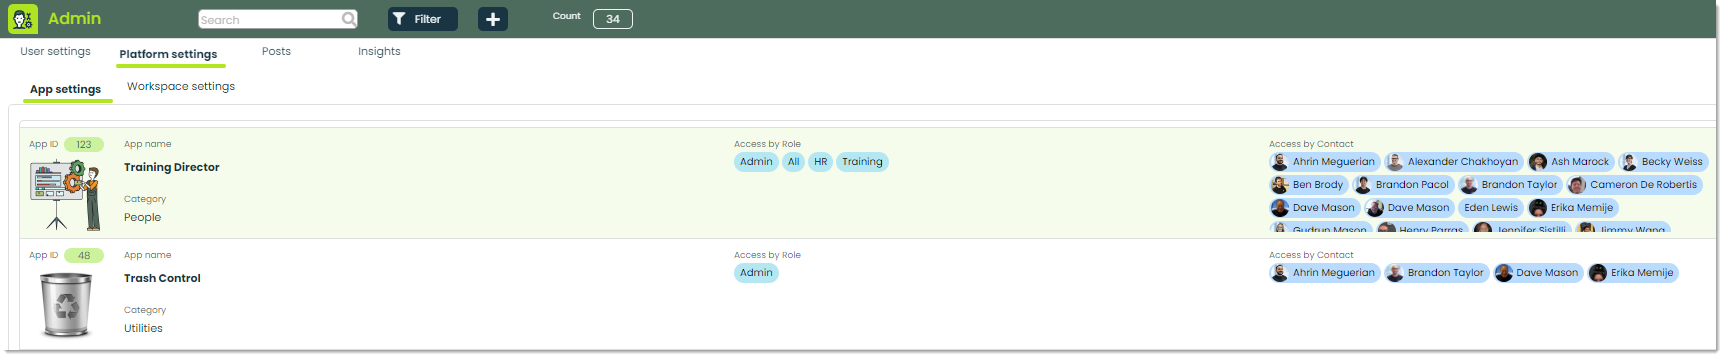
Workspace settings – With this feature, you can set up platform-wide settings for everyone to adhere to.
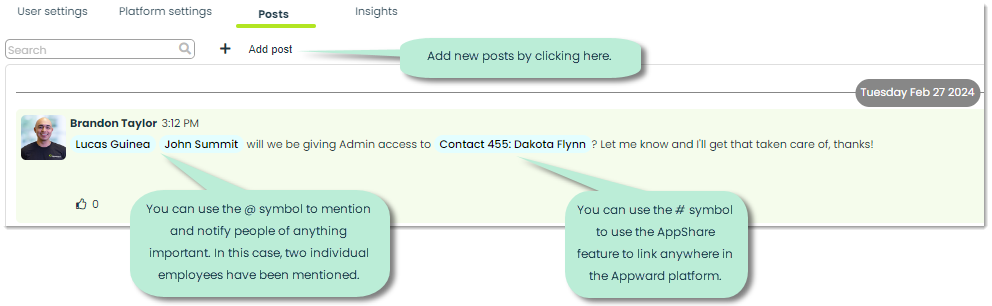
Posts – Posts act as an in-app chat log, making it easy to share updates and communicate with your coworkers about anything related to the Admin app, from the app. You can mention specific people, positions or departments by using the @ symbol followed by the name of the person, position or department. From their notifications, the mentioned parties can jump straight to the app. It keeps everything connected and in context. You can also like and reply to posts, creating a space for meaningful dialogue.
Insights – The Insights tab lets you create and view analyses related to your Appward users. These analyses help you uncover patterns and trends in your data, enabling informed decisions and process improvements. For the Admin app, you could analyze things like user activity, distribution of access privileges, trends in account statuses and more. While Appward provides a default Insight for most apps, you can create your own custom insights for whatever your business wants to track. For a deeper look on using Insights, check out our article on Getting Started with Insights.
How to add a new user
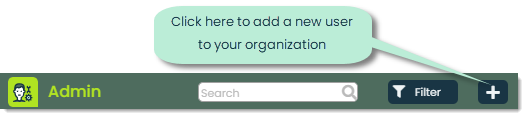
To add a new Appward user, click the + button at the top of the screen.
This will open a popup similar to the following image.
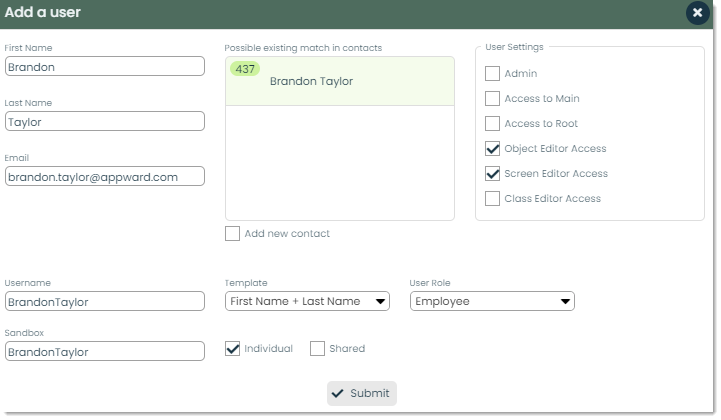
Let’s cover each of these fields.
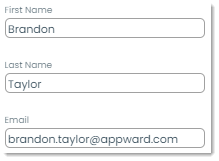
Contact info – Enter the user’s first and last name as well as their email here.
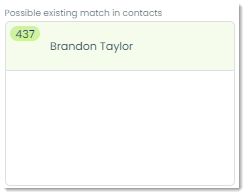
Possible existing matches – Based on the contact information you enter, you can link any existing contact to the user.
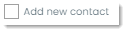
Add new contact – If you’d like to create a new contact (a Contact record in the Contacts app) for the new user, you can check this box.
User Settings – Here, you can choose the specific access that a user will get.
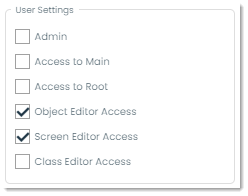
- Admin – Admin access provides the highest level of privileges within the system. Users with admin access will have control over app and platform configurations, user management and access permissions.
- Access to Main – Main refers to the main sandbox environment of the organization.
- Access to Root – Root refers to the highest level or primary sandbox environment across all organizations within the system. Granting access to the root sandbox provides users with access to the overarching or top-level environment, which may include system-wide settings, configurations and shared resources.
- Object Editor Access – Object Editor is a tool used to edit objects which are the developmental building blocks of the Appward environment.
- Screen Editor Access – Screen Editor is a tool used to design and customize user interface screens within Appward apps. Granting Screen Editor access allows users to create, modify or delete user interface screens, layouts, widgets and navigation elements within applications.
- Class Editor Access – Class Editor is a tool for editing classes which are the blueprints that Appward objects are built on. Granting Class Editor access allows users to create, modify or delete classes, scripts, functions and business logic within the application.
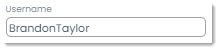
Username – This username will be used for the new user’s login credentials.
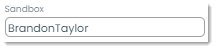
Sandbox – This is the name of the user’s sandbox which is essentially the user’s virtual environment.
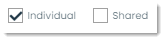
Individual/Shared Sandbox – You can choose to give the new user their own individual sandbox or place them on a shared sandbox. Individual sandboxes provide exclusive control and privacy for individual users, while shared sandboxes facilitate collaboration and resource sharing among multiple users within a single environment. The choice between individual and shared sandboxes will depend on your project requirements, team structure and collaboration needs.
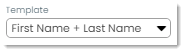
Template – You can choose from several different naming templates for the user’s username and sandbox name.
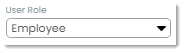
User Role – This is the default role assigned to users within the system. It determines the level of access, permissions and apps that the user will have out of the box. Roles in this dropdown come from your Roles app. Because Employee is selected, the user will have access to all apps included in the Employee role. For more on how to configure your organization’s roles, check out Getting Started with Roles.
Once you’ve added all the necessary fields, click Submit to add the new user. From the login screen, the user should be able to log in with the following credentials:
Username: The username provided
Password: The username provided
The user can then change their password in their personal settings. Note: Usernames and passwords are case-sensitive.
How to view and manage a user’s settings
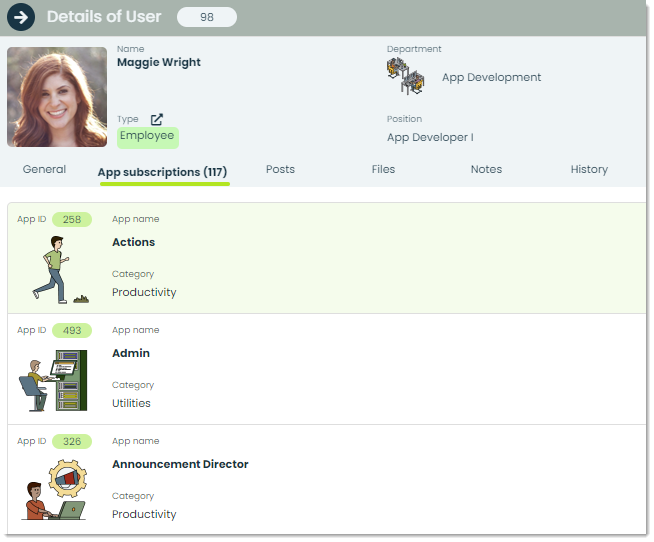
To view and manage a user’s settings, click on their record from the list in the User Settings tab.
This will open a screen similar to the following image.
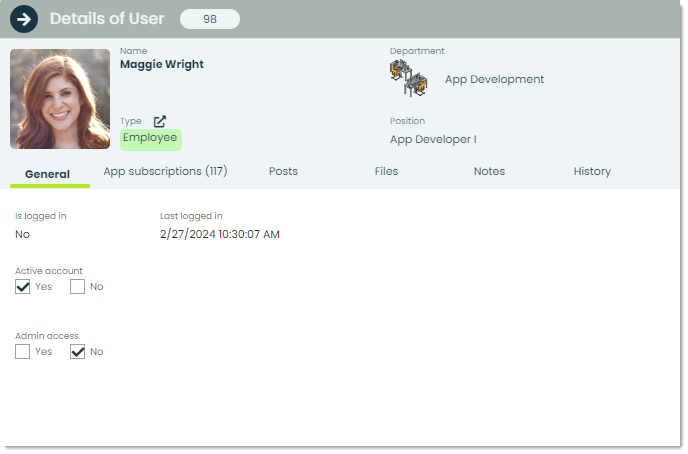
In the General tab, you can check the user’s current login status, their most recent login time, whether or not their account is active and whether or not they have admin access. From this same page, you have the ability to manage their account status and adjust their admin privileges as needed.
To view the list of apps a user has access to, go to the App subscriptions tab.
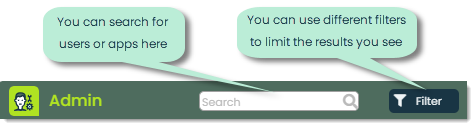
How to use searching and filtering for Admin
To make finding your users and apps easier, Appward provides searching and filtering features. These can be found at the top of the app.
For Admin, you can search by any of the following criteria:
From the User Settings tab
- User ID
- Contact name
- User type
From the Platform Settings tab
- App ID
- App name
- Category name
After you type something in the search bar, press Enter to search.

Additionally, you can use advanced searches which are more precise for finding what you want. Advanced searches use a format of “Field=Value” like the following example.
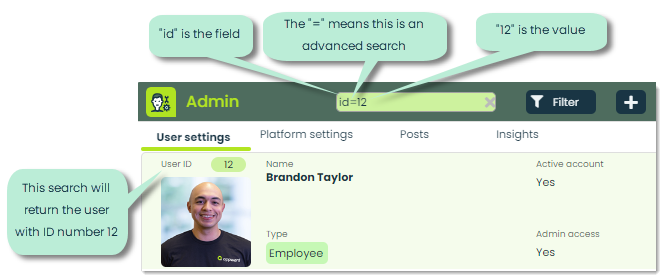
Currently, you can use advanced searches with “id” and “UserID” to search by User ID. Note: Searches are NOT case sensitive, so you don’t need to worry about capital letters.
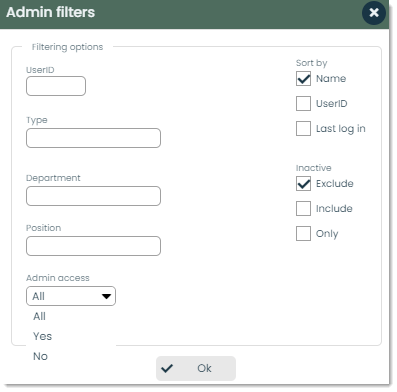
In addition to searches, you can choose from the following filters by clicking the Filter button.
Frontline Features of Admin
Each application has tabs with practical features specific to its use. We call these Frontline Features, and in the case of Admin, these features are:

Posts – Posts act as an in-app chat log, making it easy to share updates and communicate with your coworkers about anything related to an Appward user, from the Admin app. You can mention specific people, positions or departments by using the @ symbol followed by the name of the person, position or department. From their notifications, the mentioned parties can jump straight to the record within the app. It keeps everything connected and in context. You can also like and reply to posts, creating a space for meaningful dialogue.
Files – In the Files tab, you can attach important documents to your user records. You can add as many files as necessary and view them through the built-in document viewer. It’s a practical way to include and review relevant documents such as contracts or other user-related information.
Notes – With the Notes tab, you can capture quick thoughts and details directly within the app, making it a handy tool for on-the-go annotations.
History – The History tab is your record-keeper for recent actions on users. This feature is important for tracing back any changes as far as who made the change, when they made it and what kind of change it was.