Table of contents
Getting Started with Announcement Director
Wednesday October 4, 2023-19 min readIntroduction
Important messages can easily get lost in email inboxes, especially during busy times. Announcement Director, in conjunction with Announcements, tackles this problem by sending messages and announcements directly to employees’ Appward desktops, ensuring they can’t be missed. This guide will walk you through the process of creating, dispatching, and confirming that your announcements are seen by the intended audience.
Getting Started
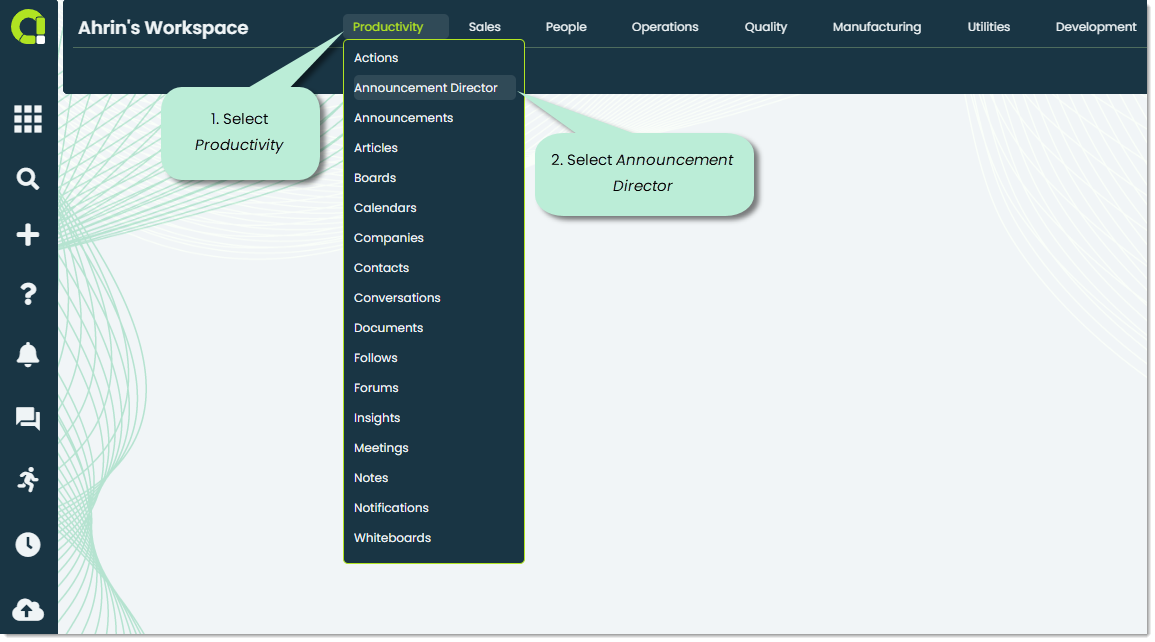
To open Announcement Director, go to the Productivity section in the main navigation bar and select Announcement Director.
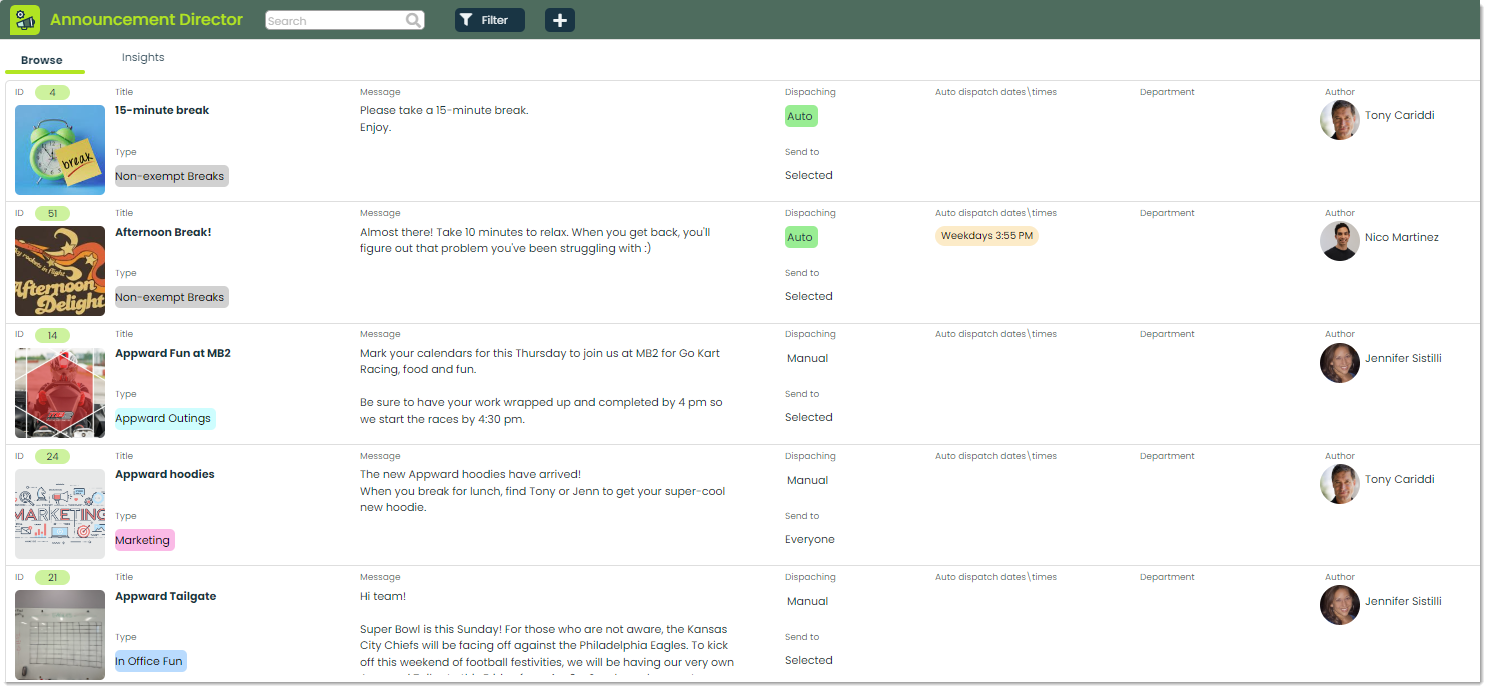
When you first launch the app, you’ll see a screen displaying all the previously created announcements within your organization. Let’s go over the available tabs.
Note: If this is your organizations first time using Announcement Director, this screen will be blank.
Browse – This tab is the default app you will see when you first open the app. In Browse you’ll see all of the previously created announcements in your organization. Announcements play an important role in helping people come together for team events, enabling a productive workflow, and helping people stay well-informed so they can be at their best.
Insights – Insights are used to analyze collected data from your organization’s Announcements. They allow you to extract valuable information concerning announcement types, acknowledgment rates, and frequently occurring times, providing a deeper understanding of the data. For more on Insights, please check out our Getting Started with Insights guide.
How to create an announcement
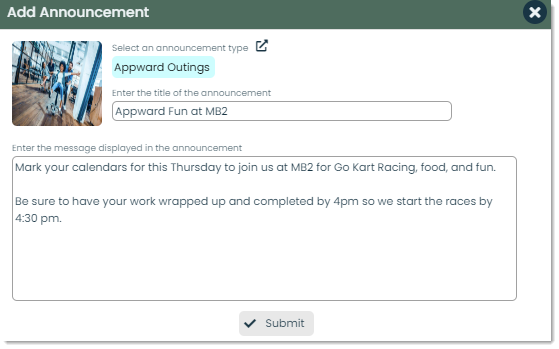
To create a new announcement , click the + icon at the top of the app screen.

You will then be shown the Add announcement popup, where you can add introductory details about your new announcement.
Types are a way of classifying your organizations announcements into their own categories for better organization and search ability. You have the flexibility to establish and designate types that align with the specific needs of your business. For instance, you can establish a type like Appward Outings to classify an event that is centered around Appward and its employees.

To select a type, you can click the picker icon next to the Type caption. You’ll be shown a popup, where you have the option of either adding a new type or selecting an existing one previously made by someone in your organization.
To add a new type, click the + icon in the Select a type picker.

Note: If your organization has not created any announcement Types, the Select a type window will be empty.
Once you’ve selected to add a type, a screen will appear, offering you the choices to create a new type.

Name: It’s important to give your type a name that helps describe the announcement you are creating.
Type Image: Throughout Appward, types are often associated with a Type Image. Type Images provide you with a visual representation of the Type and give you the power to display them within popups and screens in your apps. Images can be selected from your computer, the Appward cloud, or from pexels.com directly.

Update: Once your type options have been selected and you are ready to create your new type, press update. Your new type will now be available to be selected in the Select a Type
popup.

For more on types, please check out Using Types.
Title – You can specify the announcement’s title in the Enter the title of the announcement field. It’s important to make announcement titles clear and attention-grabbing to ensure your messages do not go overlooked. Titles should give the reader a quick understanding of what the topic of the announcement is before they go more in depth and read about the details.
Message – The message of the announcement contains the majority of the detailed information. You can enter all the necessary details of the announcement in the Enter the message displayed in the announcement field. Think of this space as your chance to emphasize key points, explain the announcement’s purpose, and provide supporting information, including any instructions the reader may need.
How to view and edit announcements
To view an announcement within your organization, you can do so by clicking on the record of the certification you wish to view.

Upon clicking, a flyout will appear showing all the announcement details. In this flyout, you have the ability to both edit and view all the essential information, according to your requirements. Now, let’s review the unfamiliar fields accessible for you to view and edit in this flyout.
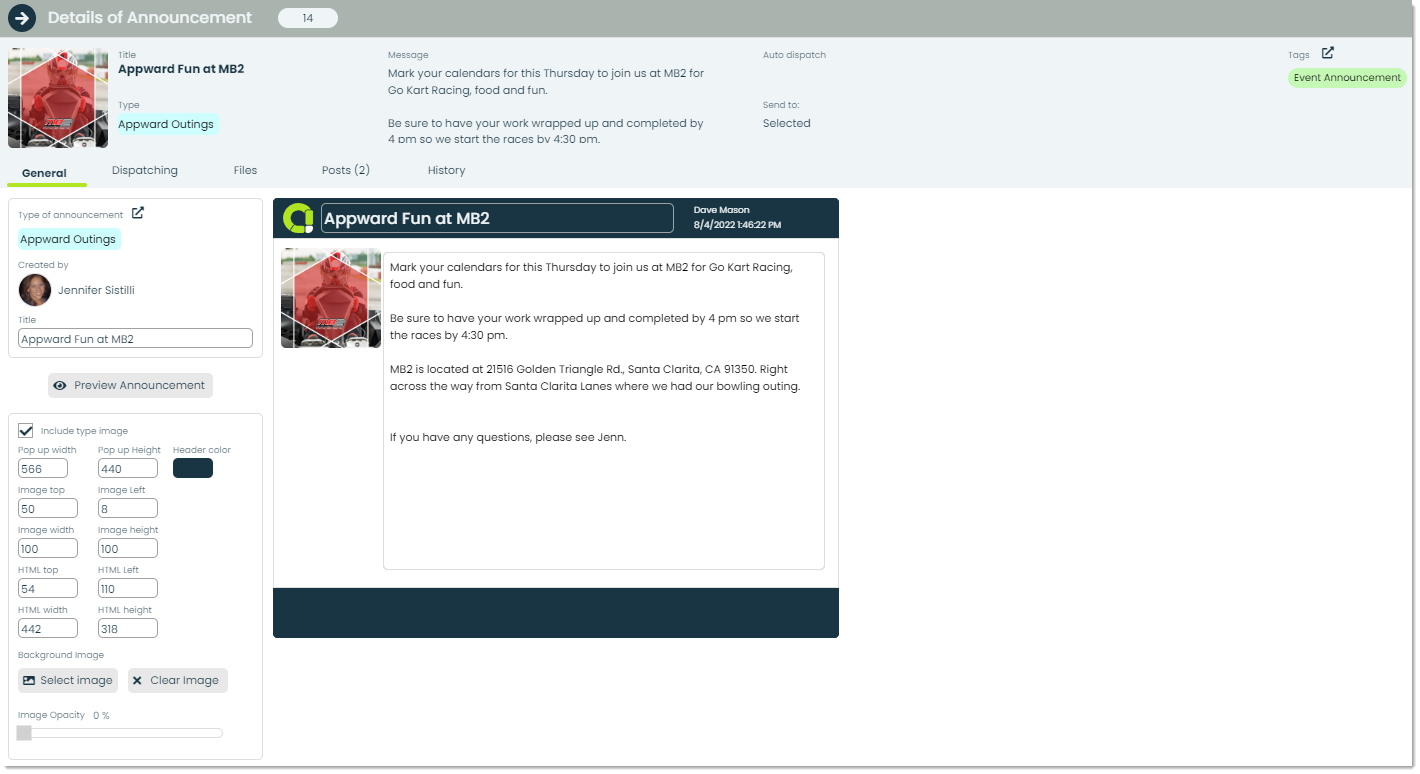
Created by – The creator of the announcement will be displayed in the Created by field.

Include type image – You can choose the type image as the announcement’s image by selecting the checkbox in the Include type image field. Alternatively, if you prefer, you can decide not to use the type image and instead upload your own.

Several of the applications in Appward feature an HTML editor, enabling you to insert and personalize text, images, and videos tailored to your needs. You have the flexibility to rearrange and reposition both the popup and its contents within an announcement by inputting your chosen options into the designated fields. The announcement you create and customize will be presented to the user with the same characteristics. These values can be adjusted to control the size and layout of the popup and its contents, ensuring your message goes out the way you intend it to. Here is a detailed image outlining which fields of the popup can be customized using the provided options.
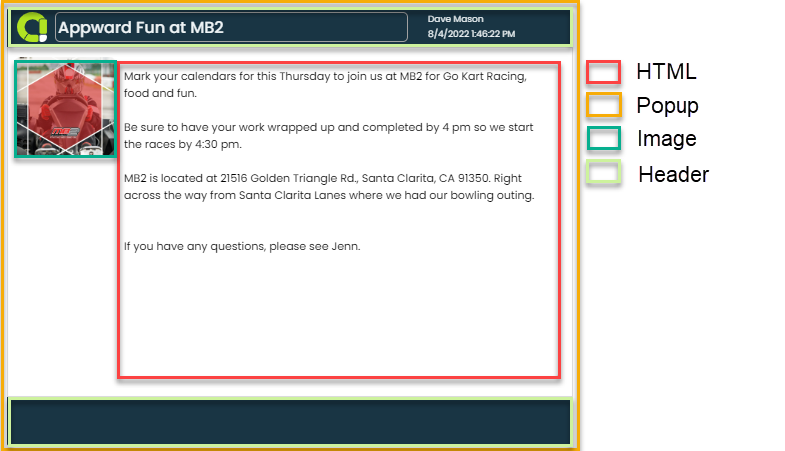
Pop up width – Pop up width refers to the horizontal measurement of your announcement popup.

Pop up height – Pop up height refers to the vertical measurement of your announcement popup.

Header color – You can select a header color to specify what color the header of your announcement popup will be. This color can be any color you need, and can be tailored to your organizations branding using the built in color-picker.
Note: This color will also apply to the bottom of the popup, even though it is considered the header color.

Image top – Image top refers to the distance between the top of the image and top the of the popup.

Image left – Image left refers to the distance between the left side of the image and the left side of the popup.

Image width – The overall width of the image from the left side to the right side can be determined with Image width.

Image height – The overall height of the image from the top side to the bottom side is determined by Image height.

HTML top – HTML top refers to distance between the top of the HTML editor and the top of the popup.

HTML left – HTML top refers to distance between the left side of the HTML editor and the left side of the popup.

HTML width – HTML width refers to the width of the HTML editor from the left side to the right side.

HTML height – HTML height refers to the height of the HTML editor from the top side to the bottom side.

Background image – You can select a background image using Appward’s built in file explorer to serve as the background of your announcement. This image is entirely optional, and can provide you with another dimension of making your announcements garner attention. If there is an existing background image already in place, you can remove the image by pressing the Clear Image button.

Image opacity – If you’ve chosen a background image, you can also adjust its opacity. Image opacity refers to the level of transparency of your chosen image. This option provides a range from 0% to 100%, with higher values indicating less transparency.

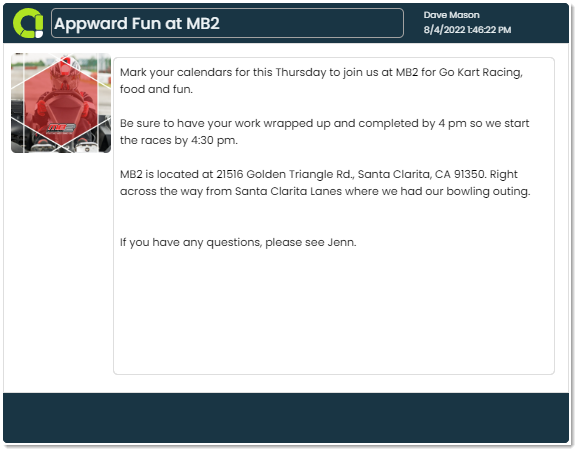
Announcement preview – To preview the announcement you intend to send, simply click the Preview Announcement button. This button displays a copy of the announcement, while ensuring no notifications are sent out and no unintended disruptions occur within your organization.

Now that we’ve gone over how to fully customize an announcement popup, let’s cover how to dispatch it to the people who you need to see it.
How to dispatch an announcement
To view, manage, and dispatch your announcement, navigate to the Dispatching tab within the details flyout. Let’s go over the available fields that make dispatching your announcement easy.
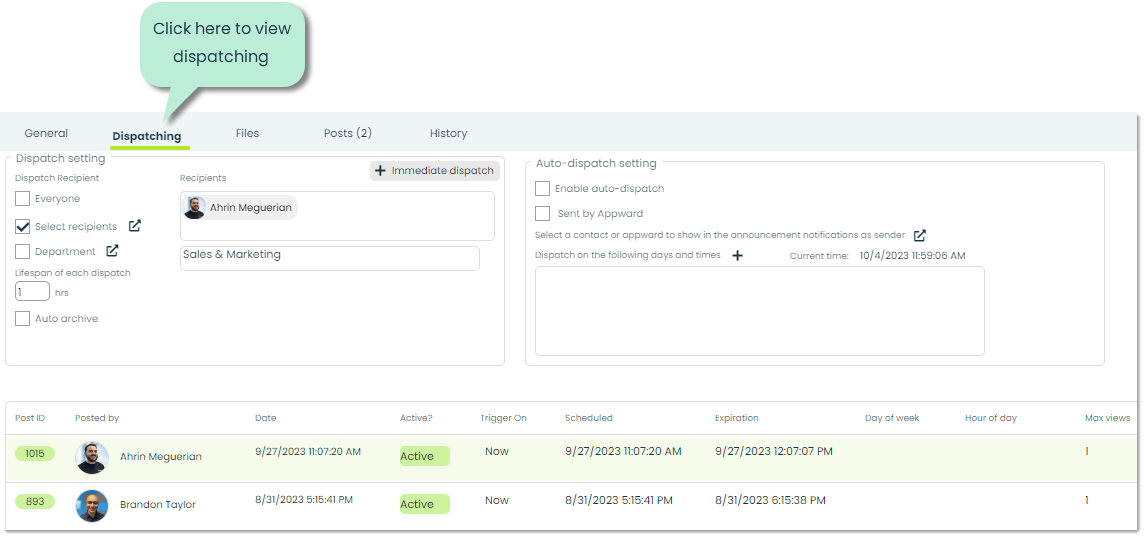
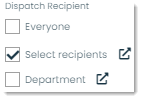
Dispatch Recipient – The Dispatch Recipient refers to an individual or group who is intended to receive your announcement. You can define the recipients by choosing from everyone, selecting specific individuals, or organizing recipients based on their department.
Everyone: The announcement will be sent to everyone in your organization.
Select recipients: The announcement will be sent to only the people you select within the Select recipients field. To pick the people who will see the announcement, simply click on the icon to the right of the Select recipients caption. This will bring up a list displaying the available contacts you can choose from.
Department: You have the option to designate a dispatched announcement for distribution to all personnel within a particular department.
Lifespan – The Lifespan of each dispatch field is where you can define how long a dispatch will stay active for. You can specify the time you prefer in hours simply by typing in the amount in the provided text entry field.

Auto archive – You can designate the announcement you create to be auto archived. This means that after the announcement has gone out, it will auto archive so that it will not be visible in Announcement Director unless specifically searched for with filters.

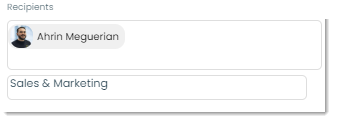
Recipients – Recipients shows who the announcement will go out to and what department the announcement is coming from. The recipient list can consist of on or more people.
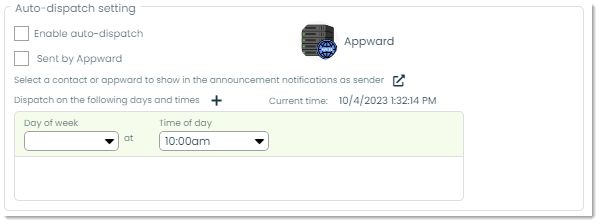
Auto dispatch settings – Here you can define your preferred settings for auto dispatching announcements. You can choose to activate auto dispatch, determine whether its sent via an application, designate a different sender, and specify the date and time for when the announcement will be sent out.
Enable auto-dispatch: Define whether the dispatch will automatically be dispatched based on a selected time frame.
Sent by Appward: You can select the checkbox in Sent by Appward to select the Appward server as a sender.
Contact as sender: Choose a contact from within your organization to serve as the sender.
Dispatch date/time: You can establish a date and time for dispatch to ensure you have a clear schedule for when announcements will be sent.
Additional announcement details – In this section of the details flyout you will see a log of all the posts made related to the announcement you are viewing. Announcements can be created by an individual, and reused by anyone in your organization. For this reason, having a ledger is important and very useful when keeping track of announcements sent.
Post ID: This is the post ID for the sent announcement popup. This unique identifier distinguishes this particular record within the database, making it straightforward for you or anyone searching for it to locate.
Posted by: In Posted by you can determine who the announcement was posted by. Since announcements can be reused by others in your organization, it’s essential to track the sender.
Date: This signifies the date when the announcement was sent by the person mentioned in the Posted by field.
Active: This field indicates whether the individual mentioned in the Posted by section is currently online. This detail can be crucial for real-time interactions.
Scheduled: The time at which an announcement was scheduled to go out at. This can relate to an instant dispatch or a scheduled one.
Expiration: The time at which a dispatch will expire. This duration is specified before sending out the announcement within the Lifespan of the dispatch field. In the case of the example in the image, the dispatched announcement was set to expire in 1 hour.

Frontline features of Announcement Director
Posts – A post is a comment which can be replied and reacted to by other users in your organization. You can write a post to ask questions or remind a colleague to send out an important announcement for an upcoming event.

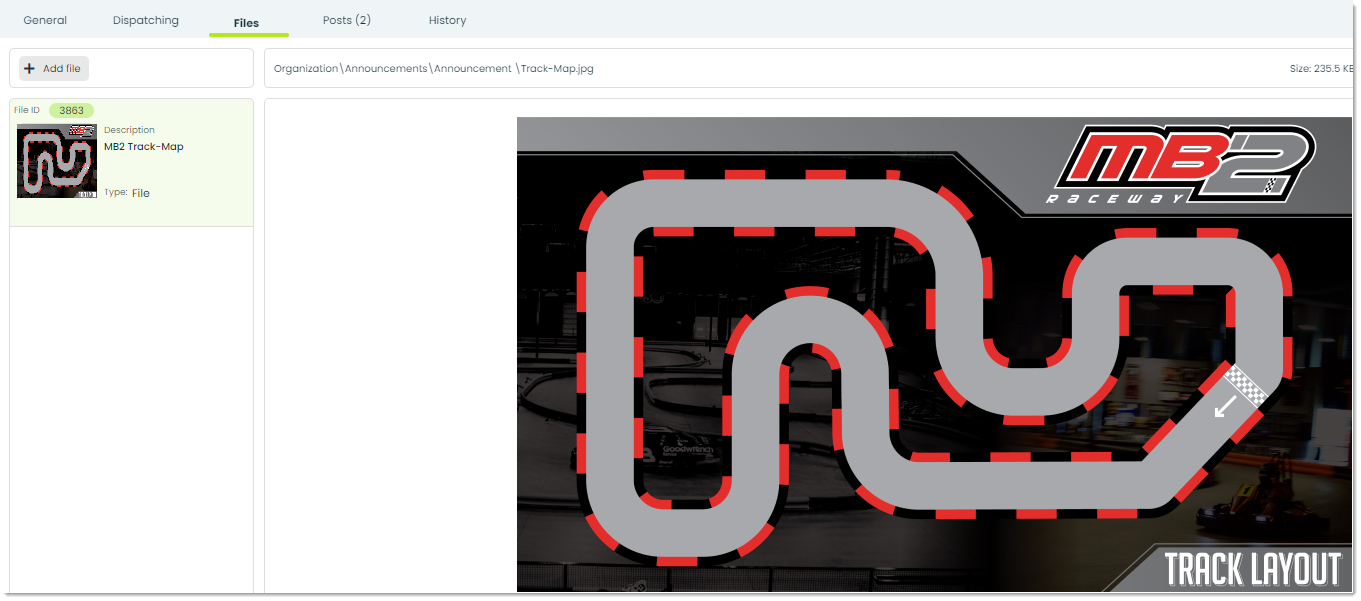
Files – Through the Files tab, you can attach essential files to a certifications record. You can add files directly from your computer or from the Appward cloud. After adding a file, you can view it through an integrated document preview within the Files section. Individuals within your organization with access to the record can download the file to their personal computers.
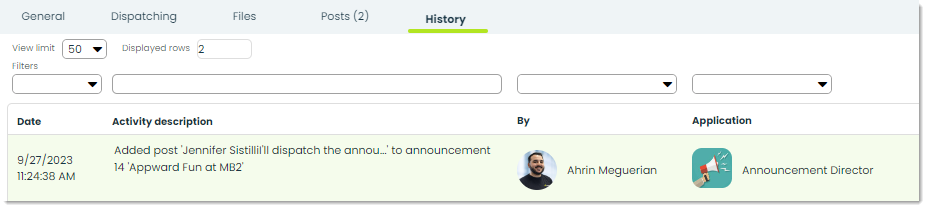
History – You can monitor changes and updates made to an announcement through the History tab. Within this tab you can track the changes made, date of change, and the individual responsible for making the change.
Additional features of Announcement Director
Archive – Archiving is a common feature within the majority of apps in Appward. Archive serves as an effective tool when you wish to remove a record from sight without permanently deleting it. Archived records are essentially concealed from the main screen but remain accessible through specific search filters.

Delete – To delete an announcement permanently, you can do so using the Delete button. Deleted records will not be recoverable.

Tour – You can discover tours in most of the apps on Appward. These tours are created to provide you with an interactive, step-by-step guide for the application you are using. You can take advantage of tours as a user-friendly and effective onboarding solution.
