Table of contents
Getting Started with Departments
Thursday October 12, 2023-9 min readIntroduction
Departments are the building blocks of any organization. They provide structure, specialization and coordination that are essential for achieving your company’s mission and vision. This guide is designed for the administrators who handle the creation and management of departments within your company. It will cover features such as adding new departments, viewing and editing the employees and positions of each department and how to archive or delete unused departments.
Before we start, let’s go over how departments are used in Appward
Because departments are fundamental blocks of your organization, you’ll notice their use in several core Appward applications. For instance, in the Positions app, each position belongs to a parent department. Additionally, in the Training/Training Director apps, training classes can be linked to departments for better structure and organization of classes.
The bottom line is that departments are used all over Appward, so establishing your departments as early as possible is important for the best possible Appward experience. Forming the general structure of a department goes as follows:
1. A department is created within the Departments app.
2. In the Positions app, any positions belonging to that department are linked by selecting the department.
3. In the Employees app, any employees belonging to any position that fall under that department are linked by selecting any of those positions.
This system will form what you see within the Departments app. Now that we have that established, let’s look into the features of Departments. For more information on Positions and Employees, check out our articles Getting Started with Positions and Getting Started with Employees.
Let’s get started
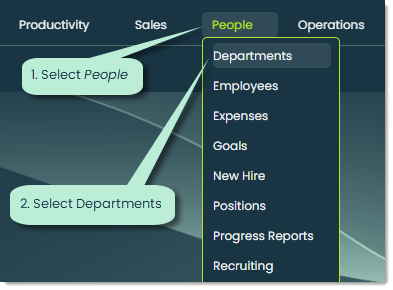
To open the Departments app, go to the People category of the main navigation bar and select Departments.
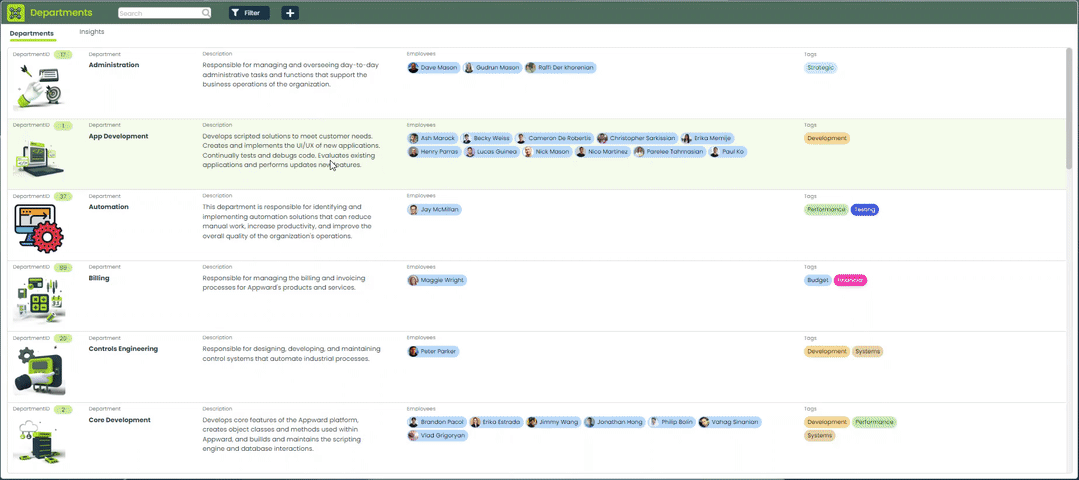
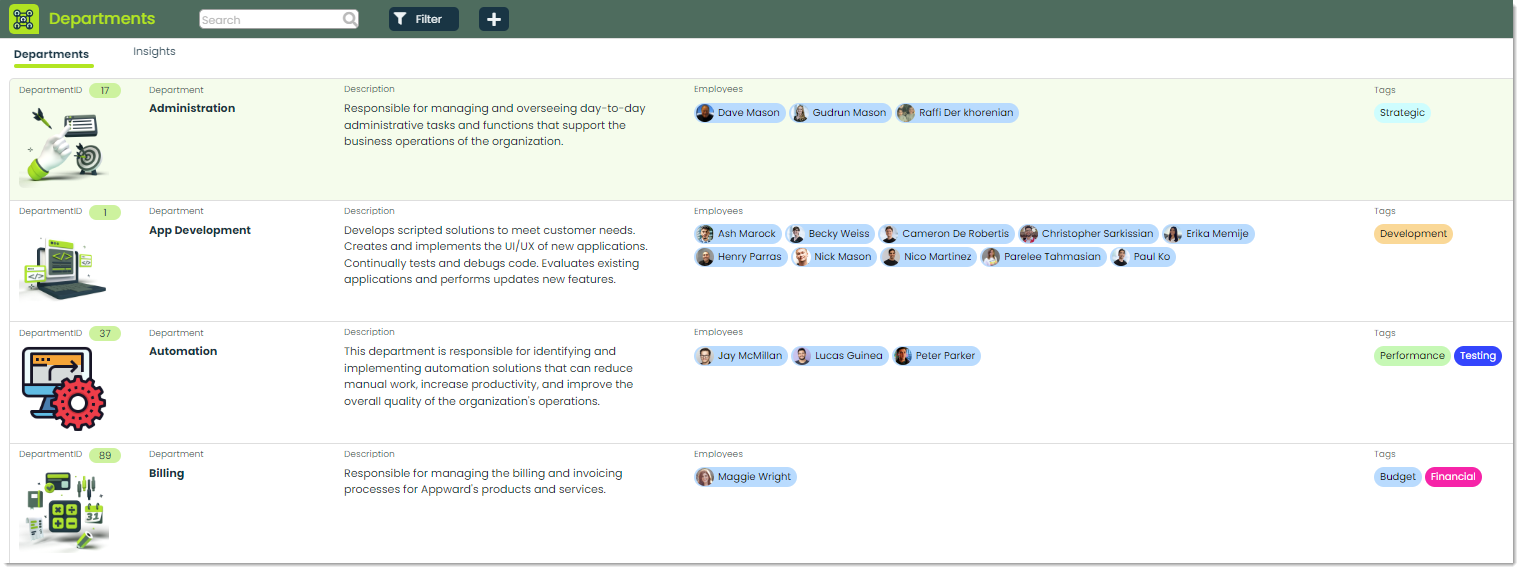
When you open the app, you’ll see a list of all the departments that have been added to your organization’s database. This list is sorted alphabetically.
Let’s go over each tab:
1. Departments – This is the default tab when opening the app. It contains a list of all the departments that have been added to your organization’s database along with the employees that belong to each.
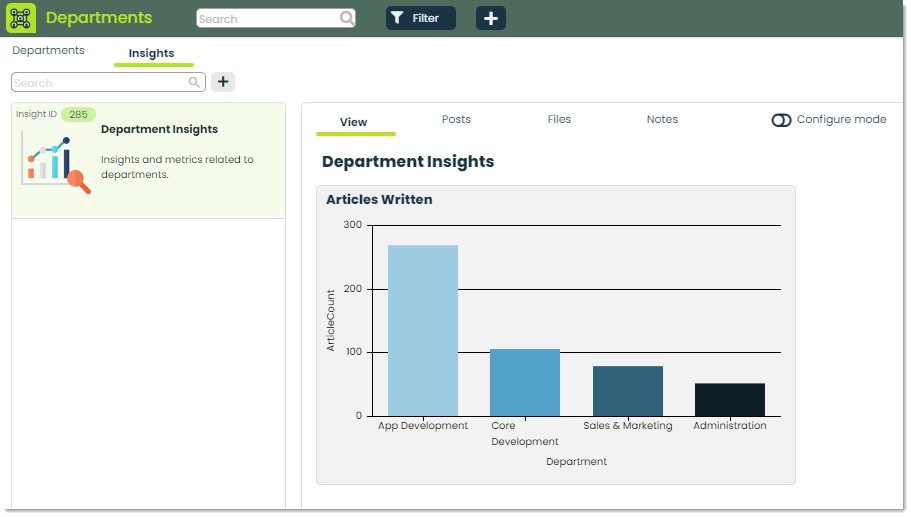
2. Insights – This tab is used to analyze any kind of department data you desire. You can configure highly-customizable SQL queries for gaining valuable, measurable components of your departments such as resolved tasks per department, money spent per department and more.
How to add a new department
To add a new department, click the + button at the top of the screen.
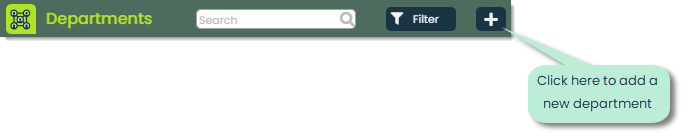
This will open a popup for adding the details of a new department.

Let’s cover each field of this popup.
Department name – Enter the name of the department here. The name should indicate what the department is responsible for, helping employees, stakeholders and outsiders understand the department’s role within the organization.

Image – For a better visual representation of the department, you can add in an image from either your computer or the Appward file explorer.

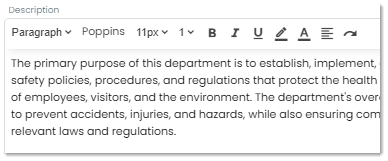
Description – You can add a description of the department with this field. It should identify the department’s purpose as well as set expectations of its roles within the organization.
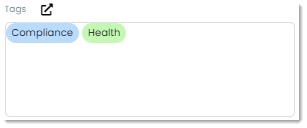
Tags – Tags are labels with keyphrases and colors which are used to categorize departments. They provide better organization and searchability of your departments as well as give some context into the contents of each department record.
Click the Submit button at the bottom of the popup to create the new department.
How to view and edit a department’s details
Once a department has been created, you can view its details by clicking on it from the Departments tab. A flyout will appear where you’ll be able to modify the different fields of the department.
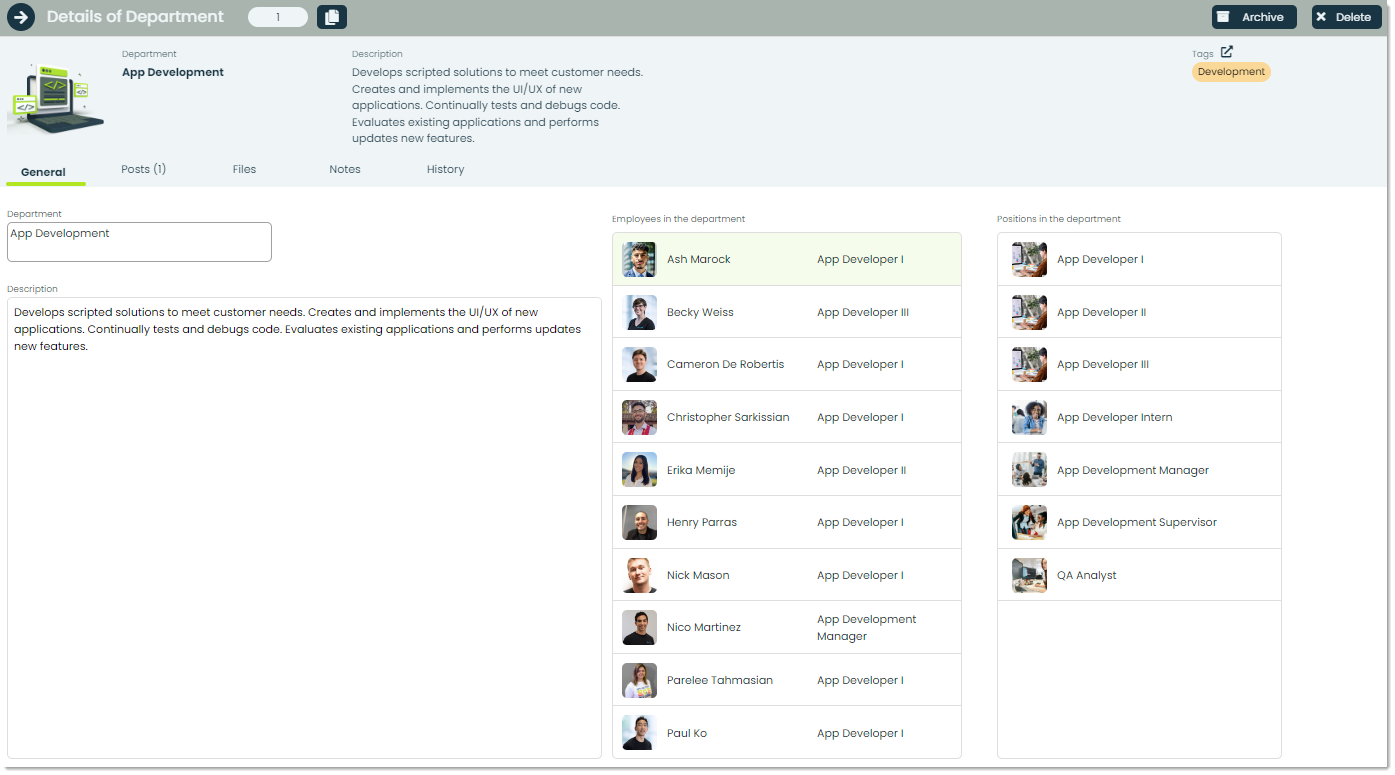
You’ll notice two lists in this flyout: Employees in the department and Positions in the department. Let’s cover each list and how they are formed.
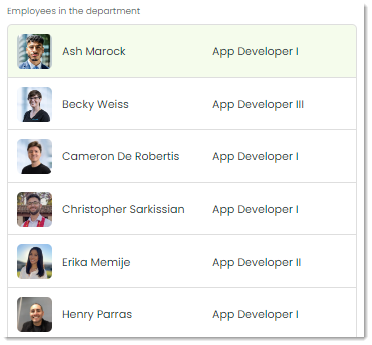
Employees in the department – This list consists of all employees who have a position that falls within the selected department. You can see the employee’s name, picture and their position within the company.
You can click on any employee from this list and it will bring up that person’s contact details:
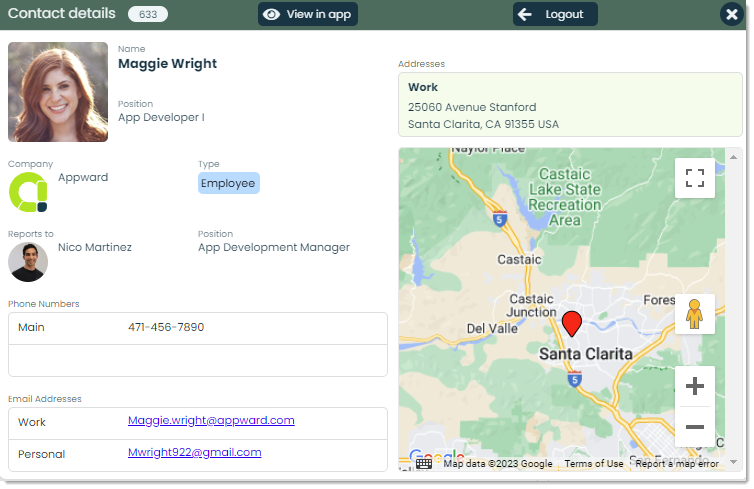
From here, you can click the View in app button at the top and it will take you to the Contacts app for that employee.
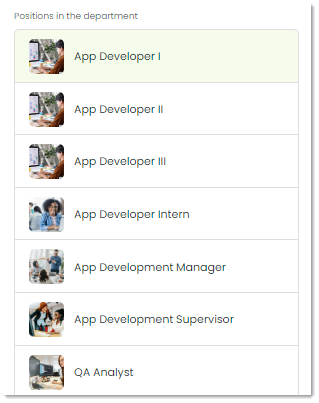
Positions in the department – This list contains all positions from the Positions app which belong to the selected department. You can see the name and image associated with the position.
You can click on any position from this list and it will bring up that position’s details:
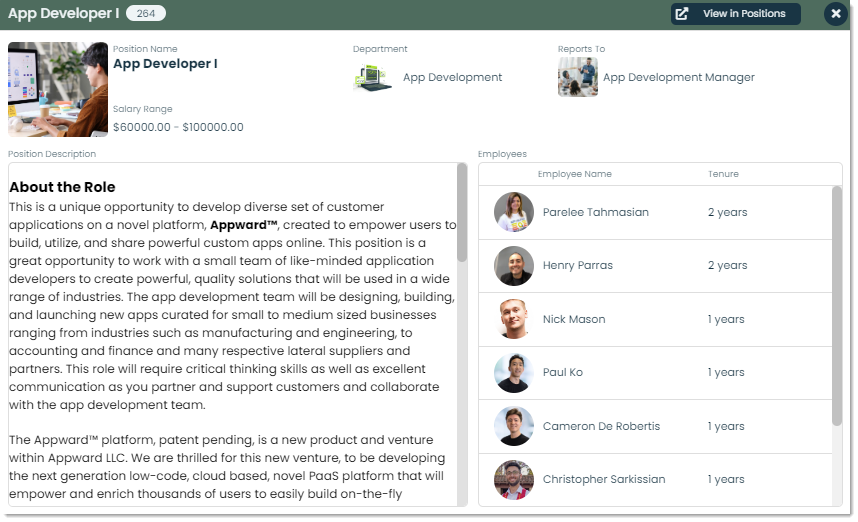
With each position, you’ll be able to see its name, parent department, managing party (Reports To), a description of the position and the employees who belong to it. To view the full details of the position, you can click View in Positions and this will take you to the details page of the position within the Positions app.
How to use the Frontline Features of Departments
Each app has a set of Frontline Features which are tabs that provide powerful utility based on the app they are found in. In the case of Departments, these features can be found in the details page of any department. They are:
- Posts
- Files
- Notes
- History
Posts – A post is a comment which can be replied and reacted to by other people in your organization. You can write a post with any questions or comments about a department as well as mention people or departments by using the @ symbol to notify the respective parties of the post.

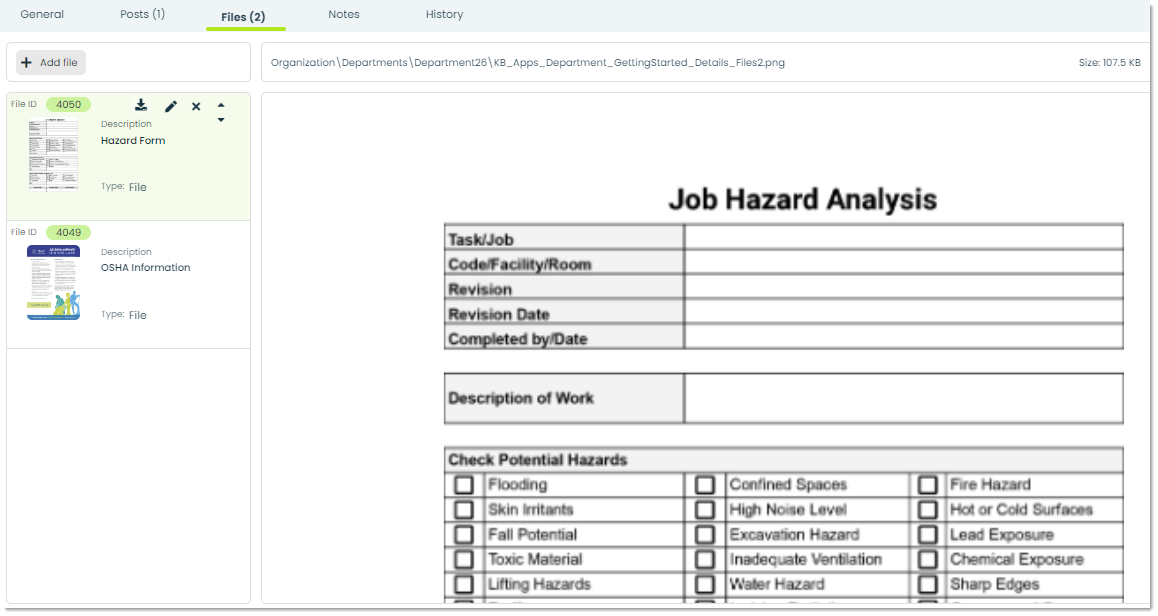
Files – Any important documents that you’d like to attach to a department record can be added in the Files tab. With this feature, you can add in as many files as you want and view them with the embedded document viewer.
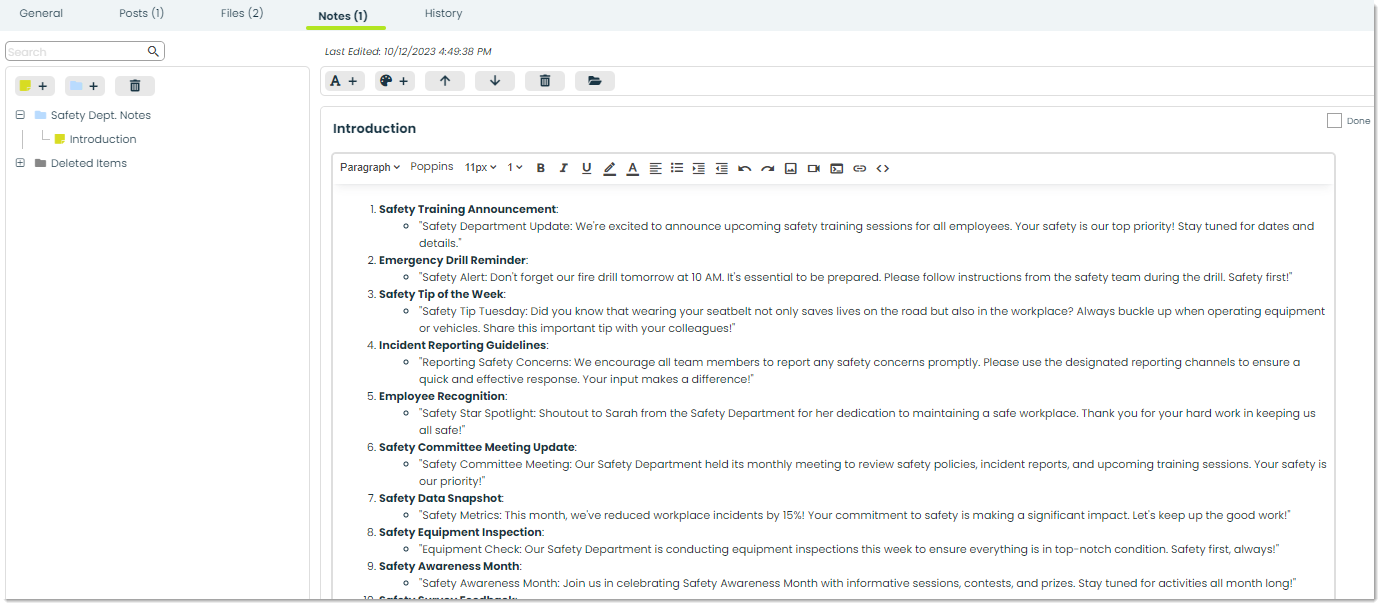
Notes – Any bits or pieces of information that you want to jot down regarding a department can be added in the Notes tab. You can also place your notes into folders for an organized hierarchy of information.
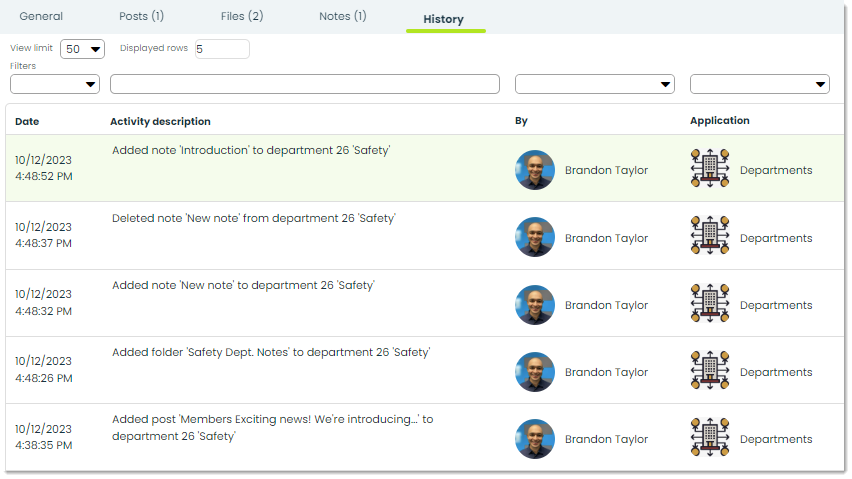
History – The History tab provides a detailed log of recent actions performed on a specific department record. This is useful for tracking any changes made, who made them and when.
How to archive or delete a department
This section will cover two features that can be found in the top-right corner of the details page of all department records. These are archiving and deleting.

Let’s cover these buttons and how they work.
Archive – Archiving is used to store records in a safe, accessible location other than the main list. It’s good for hiding records that don’t need to be seen.
Delete – To delete a department entirely, you can use this feature and the record will be removed.