Table of contents
Getting Started with Safety Incidents
Thursday November 30, 2023-29 min readIntroduction
Tracking safety incidents is crucial for your company. It helps spot potential hazards which can prevent future accidents. This creates a safer work environment, cutting the risk of injuries and illnesses while identifying patterns that can be improved.
Safety Incidents is an application for keeping track of workplace accidents. This guide will cover everything you need to know about Safety Incidents – from recording a new incident to following up with everyone involved and taking corrective actions based on those incidents.
Let’s get started
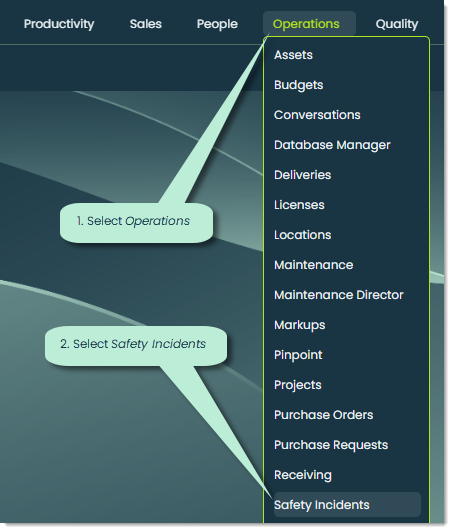
To open Safety Incidents, go to the Operations category of the main navigation bar and select Safety Incidents.
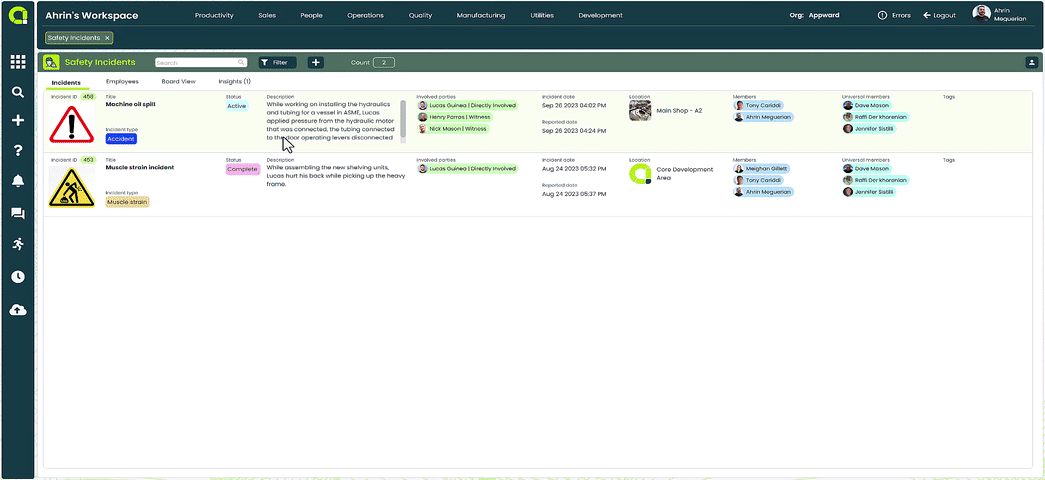
When you open the app, the first thing you see is the Incidents tab. Here, anyone with the right access can check out all the safety incidents that have been recorded.
We’ll talk about who can access this and how to change access later. For now, let’s go through the different tabs of the app.
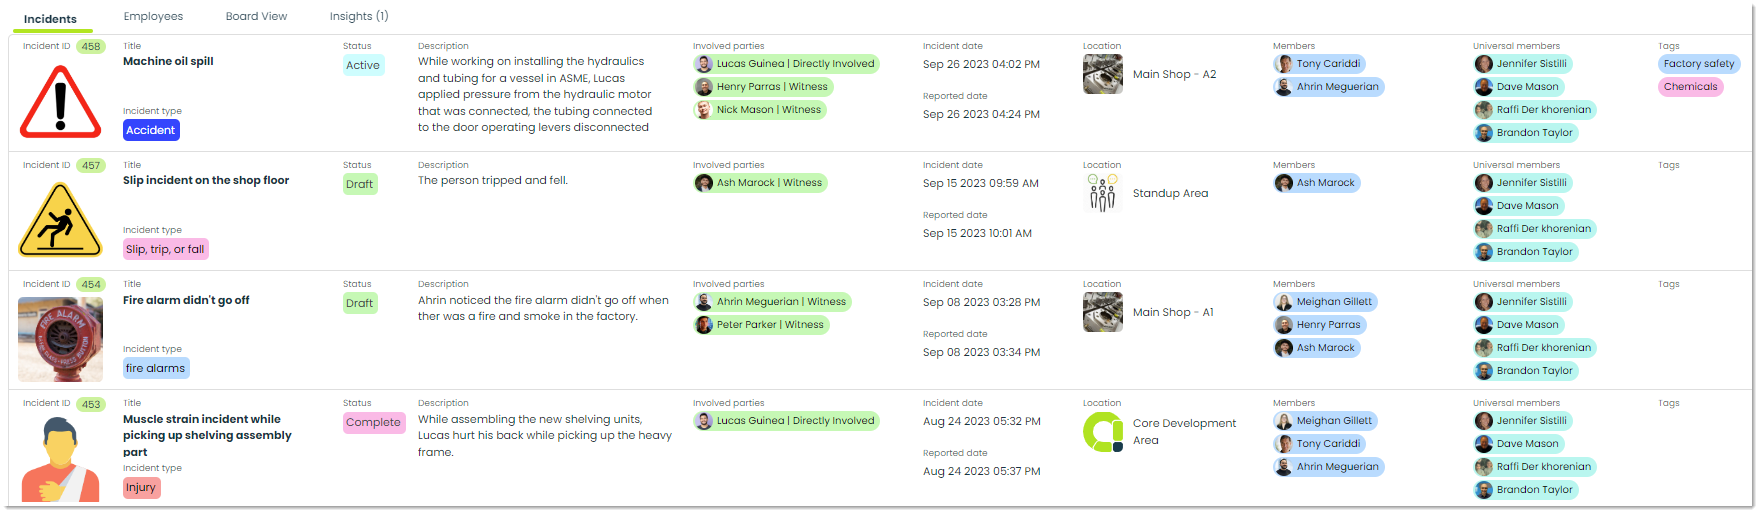
Incidents – This tab displays a list view of your organization’s recorded safety incidents. Depending on the level of access granted, you will be limited to the records you can see in this tab. This is the default tab when opening the app.
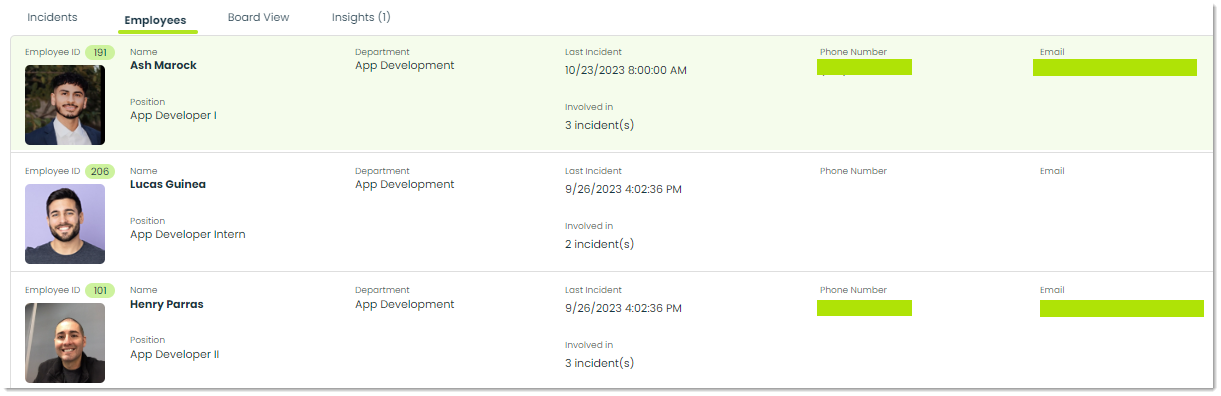
Employees – This tab shows a list of all your organization’s employees and how many incidents each person has been part of. It’s a handy way to keep track of incidents for each employee. You can click on any employee to get a full scope of the details of all the incidents they have been involved in.
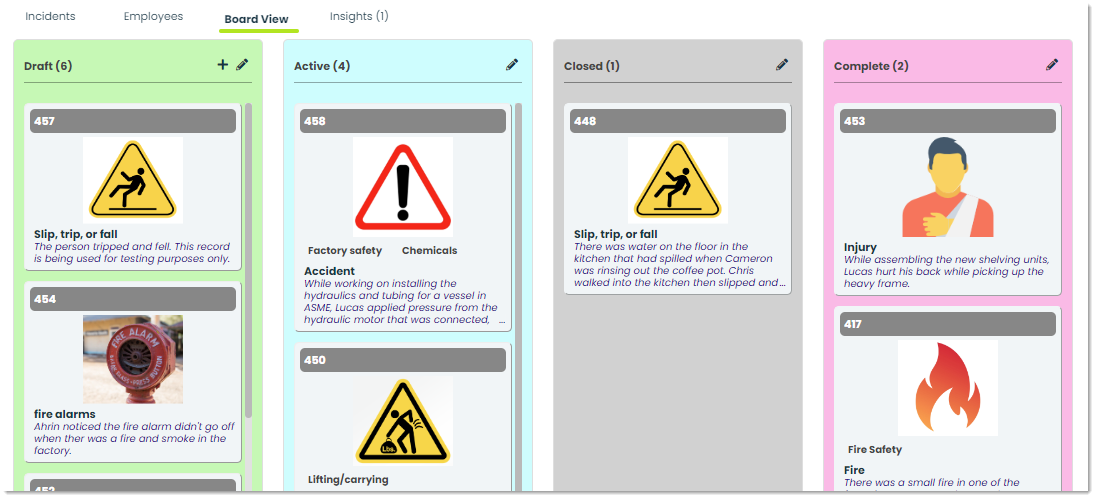
Board View – This tab shows a Kanban-style display of incidents grouped by their current status. For example, all incidents with a status of Active will appear in the Active column. The board view give a clear picture of how incidents are moving along-from the creation of them to taking action. By putting incidents into different groups based on their status, it’s easy for management to see where each incident stands and makes it simple to track and manage them.
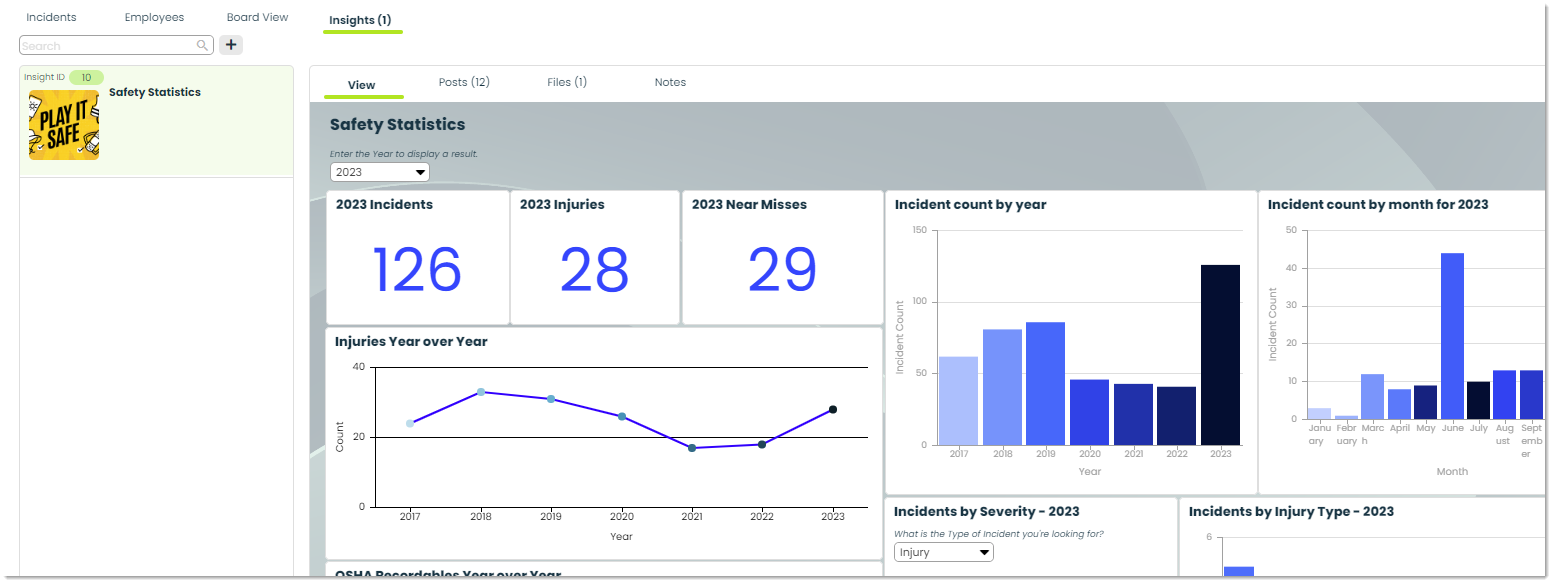
Insights – Insights give you a visual way to analyze data related to safety incidents. You can make your own insights with custom SQL queries and use charts or tables to display the data. Some useful insights for Safety Incidents might include information about incident trends, number of incidents per month or incidents by severity level.
How to record a new safety incident
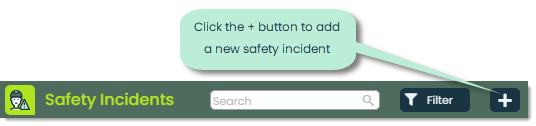
To record a new safety incident, click the + button at the top of the app window.
This will open a popup for you to add the details of the incident. This is a multiple-step process, so let’s go over each step and the fields within each step.
Step 1: Incident description
This is where you’d enter the general details about the incident.
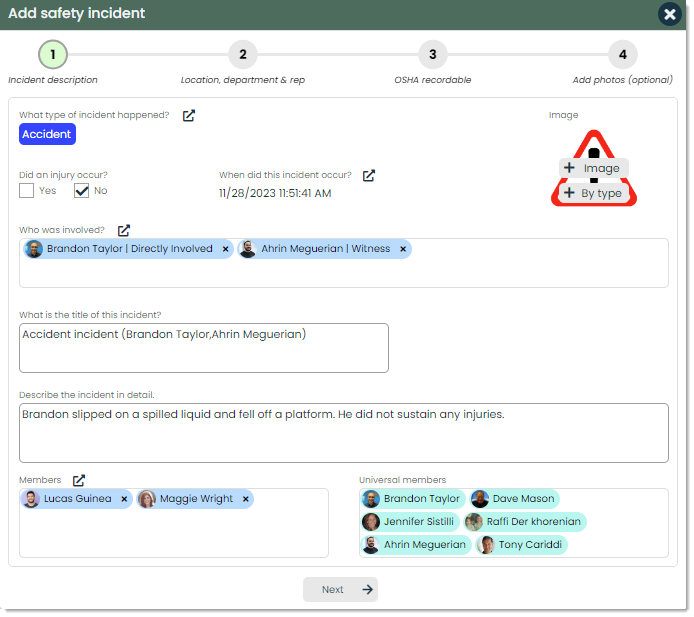
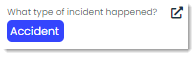
Accident type – The accident type is the specific kind or group an incident falls into based on what happened. It’s a useful label consisting of a name, color and associated image which can be used to organize and categorize your safety incidents. It’s like putting incidents into different boxes so we can understand and deal with them better. One important thing to note is that types are created by you to suit your business in the best way possible. For more on types, make sure to check out our article on Using Types.
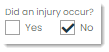
Injury (yes or no) – You can use these checkboxes to indicate whether or not an injury has occurred as part of the incident.
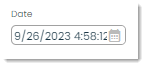
Date – This is the date and time when the incident happened. It’s set to the current date and time by default, but you can change it by clicking the link icon and picking a new date and time.
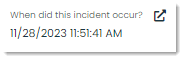
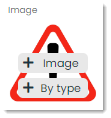
Image – You can associate an image to a safety incident for better visualization and understanding. Sometimes, a picture can convey information more effectively than words alone. To add a picture, just hover over the image space and click either + Image for any picture or + By type to choose the type image. Type images are covered in the Accident type field definition.
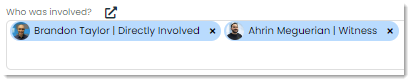
Involved parties – With this field, you can indicate the people involved in the incident and what kind of involvement they had. In the example below, Brandon and Ahrin are two involved parties. Brandon was directly involved with the incident while Ahrin was a witness of it. Knowing who was involved is important because it helps figure out who is responsible for what happened. This is crucial for holding people or groups accountable for their part in either preventing or causing the incident.
To add a new involved party, click the external link icon next to Who was involved? This will open a popup for you to select a contact from your Contacts app:
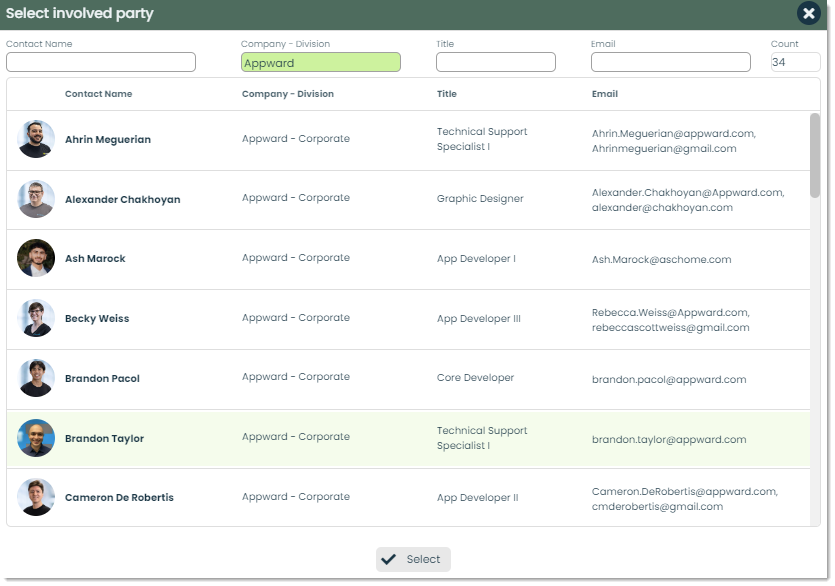
If you need any help on creating contacts, check out our guide on Getting Started with Contacts.
Once you select who was involved, the following popup will appear for adding other information:
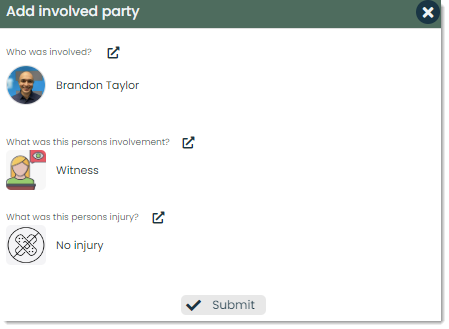
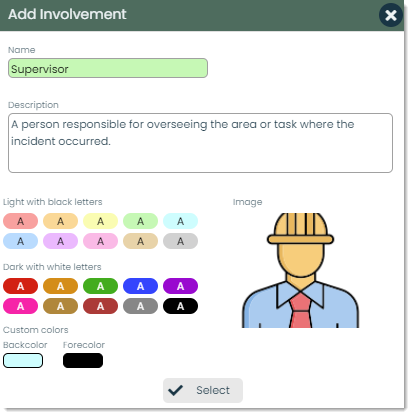
Here, you can choose or edit the person involved, their type of involvement and the injury that they sustained as a result of the incident. You can choose a person’s involvement by clicking the icon next to What was this person’s involvement?
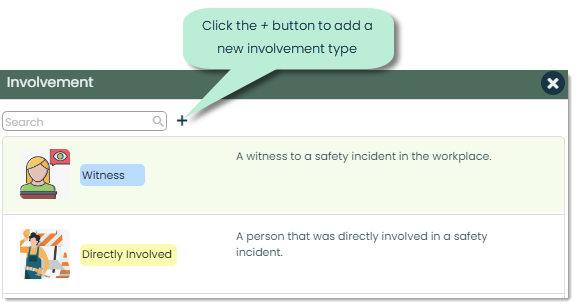
The involvement types, similar to accident types, are created by your organization. You can add new involvement types by clicking the + button. This will open the following popup for you to create the new type:
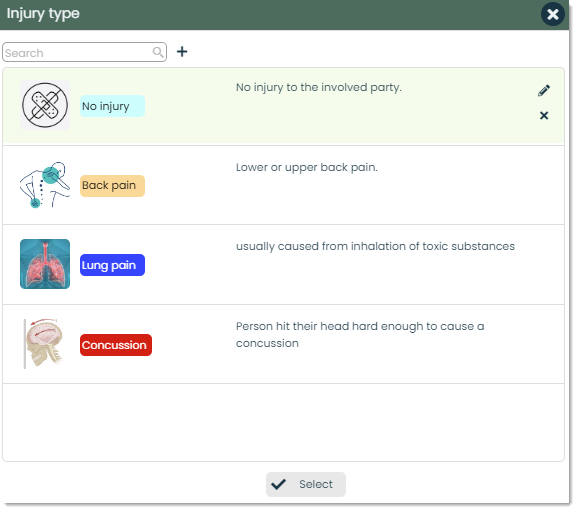
For injury, a similar process is followed. Clicking on the external link icon next to What was this person’s injury? brings up a list of injury types. You can choose from the list or add a new type:
After the person, involvement type and injury type have been selected, click Submit to add that party. Repeat this for all the involved parties for the incident.
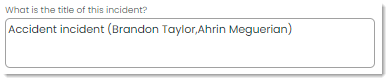
Title – This is the title of the safety incident. It should clearly and concisely capture the essence of the incident. A good title gives readers a quick insight into the main idea without having to dive into the details. A default title is automatically generated for you which consists of the incident type and the involved parties.
Description – This is the description of the safety incident. With this field, you should explain the context, outline the steps, and articulate any supporting details that will help others fully comprehend the incident.

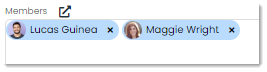
Members – You can pick a group of members for the incident meaning only those people can see and access what’s inside it. It’s a way to control who gets to view and engage with the incident content. To select members, click the icon next to Members. Similar to involved parties, this will open a popup where you can check all the contacts you’d like to provide access to.
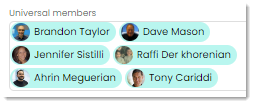
Universal members – This is a list of members which have access to ALL safety incident records. This means that both the Members and Universal members will have access to this incident. This field is for display and is only modifiable through the app settings which will be covered in a later section.
Step 2: Location, department & rep
In this section, you can indicate where the incident occurred, the specific department or area it affected and the representative or responsible person associated with that location. Providing this information helps in pinpointing the exact place of the incident, understanding the context within the organization and establishing a contact person for further inquiries or follow-up actions.
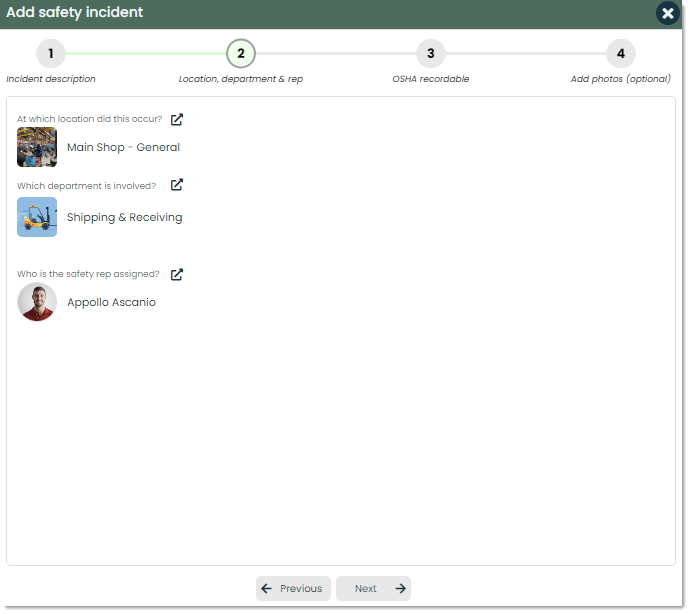
Locations are pulled from your Locations app, departments are pulled from your Departments app and contacts are pulled from your Contacts app. You can click the icons next to each caption to select values. If you need additional help creating records in any of these apps, please refer to the guides for those apps here:
Getting Started with Locations – https://www.appward.com/knowledgebase/getting-started-with-locations/
Getting Started with Departments – https://www.appward.com/knowledgebase/getting-started-with-departments/
Getting Started with Contacts – https://www.appward.com/knowledgebase/getting-started-with-contacts/
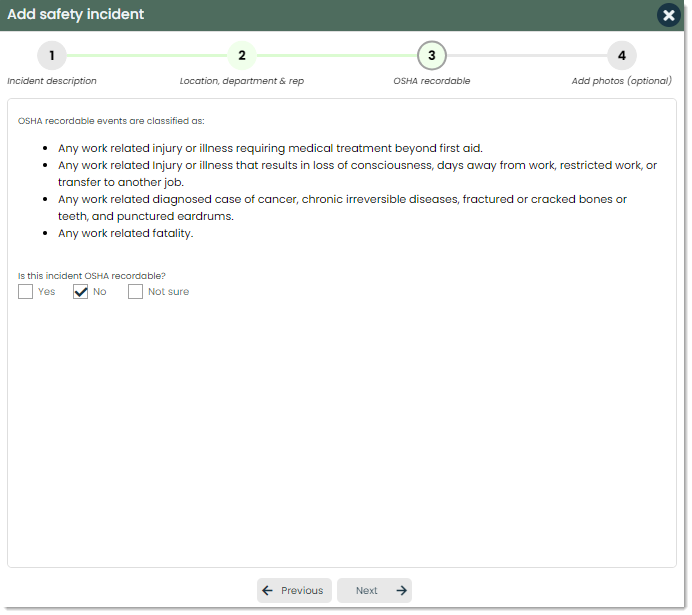
Step 3: OSHA recordable
OSHA (Occupational Safety and Health Administration) sets standards for workplace safety in the United States. Reporting and recording OSHA recordable events is a legal requirement. Ensuring compliance is important for your company to avoid penalties and legal consequences. On top of this, OSHA recordable events provide valuable data for analyzing trends and identifying areas for improvement in workplace safety. This information can inform preventative measures, training programs and safety protocols to reduce the likelihood of similar incidents in the future.
Use the bullet points to determine whether the safety incident is deemed OSHA recordable, then select the corresponding checkbox at the bottom.
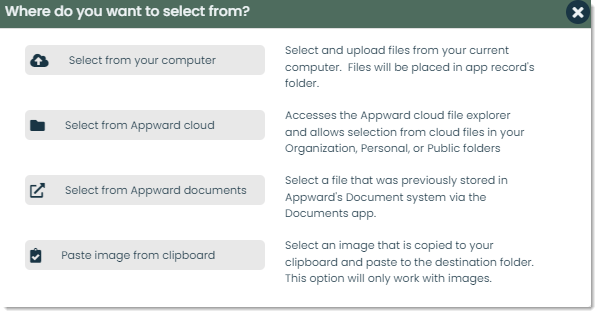
Step 4: Add photos (optional)
If there are any pictures related to the incident, you can upload them here. They can make things clearer and give a visual understanding of what happened. They can also act as evidence that can be used by investigators and safety officers to figure out exactly what happened.
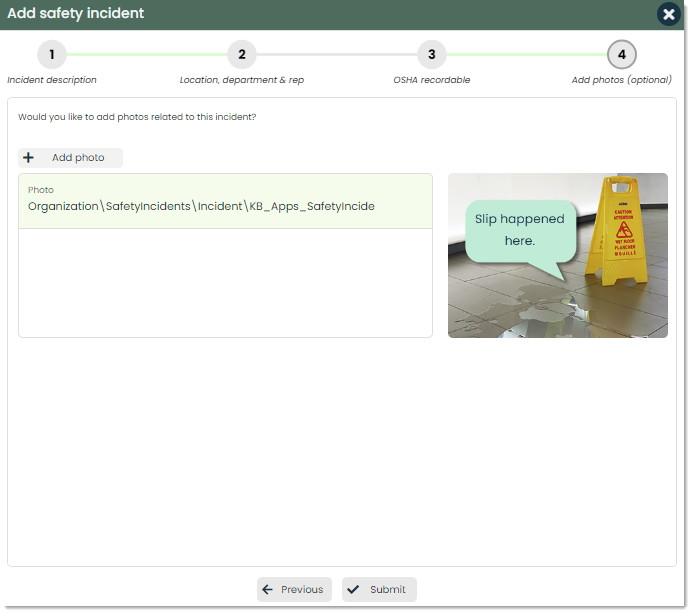
To add a photo, click the + Add photo button. From here, you can add a photo from your computer, the Appward File Explorer, Appward Documents or from your clipboard. You can add as many photos as you’d like.
Once you’ve entered all the necessary information, click Submit at the bottom to create the incident record. You can go back to any step and modify information by clicking the circled numbers at the top or using the Previous and Next buttons.
How to view or edit the details of a safety incident
To view or edit the details of a safety incident, click on the record from Incidents or Board View tabs.
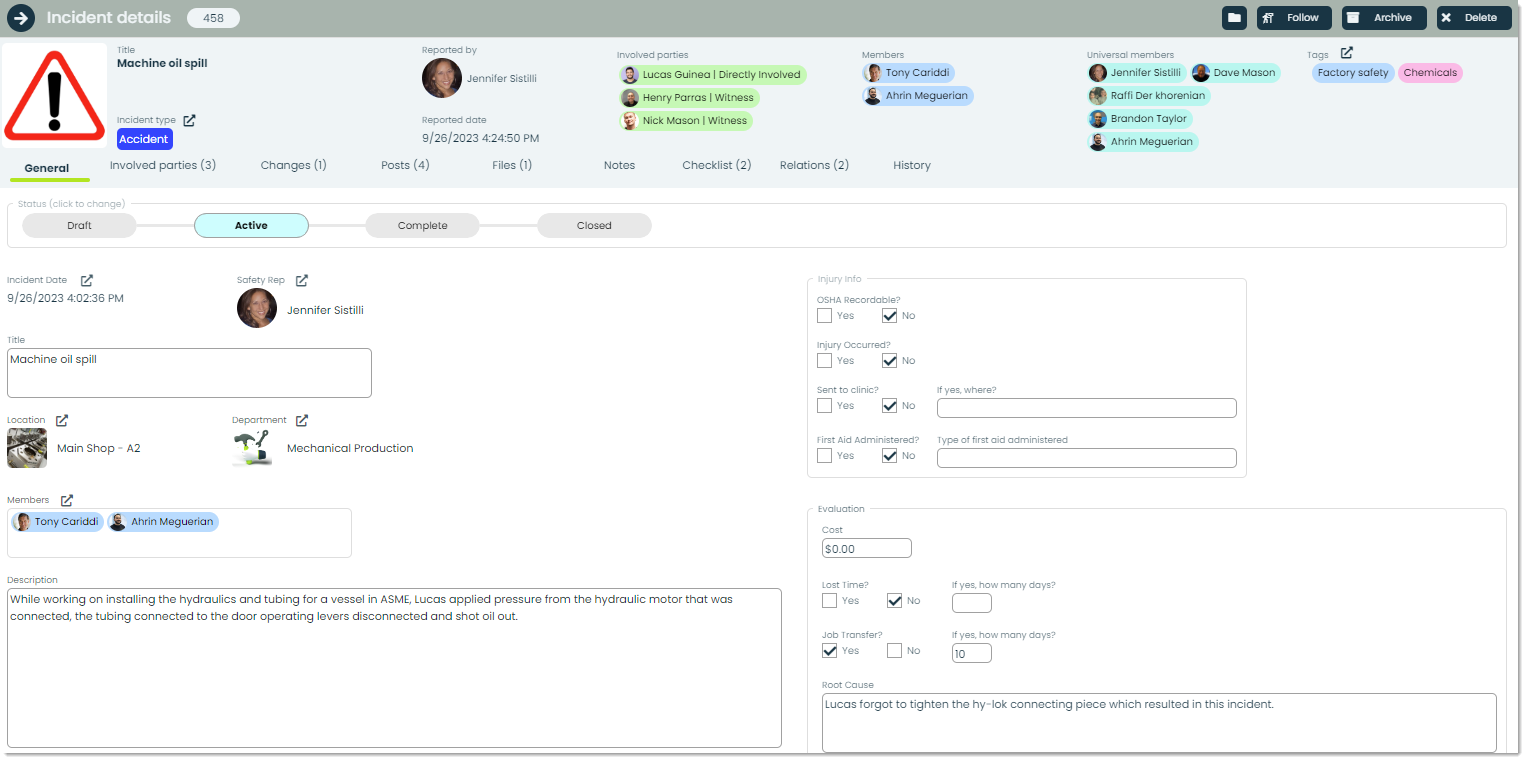
If you have access, you can quickly change details of an by editing the information in the text boxes or using the checkboxes and external link icons to select new data. Thanks to Appward’s autosave feature, any changes are saved instantly.
Let’s go through the additional fields of the General tab that were not covered when adding the suggestion.
Status – The status of a safety incident indicates its current position or progress within the safety incident workflow. It provides a quick snapshot of where the incident stands in terms of submission, response or completion.

Here are the different statuses of a safety incident and what they mean:
- Draft – The incident is in the initial phase, where details are being entered and the report is being prepared. It has not yet been submitted for formal review or action.
- Active – The incident is currently being addressed, investigated, or managed. It is an active stage in the safety incident workflow, involving ongoing efforts to understand, respond to and resolve the situation.
- Complete – The incident has been thoroughly addressed, investigated and necessary actions have been taken. The incident is considered resolved and no further immediate actions are required. This status may indicate that the incident is awaiting final documentation or review.
- Closed – The incident is officially closed, indicating that all necessary actions and reviews have been completed. The incident is considered fully resolved and closed in the safety incident management system.
At any point, you can adjust the current status of an incident by simply clicking the correct status from this progress bar.
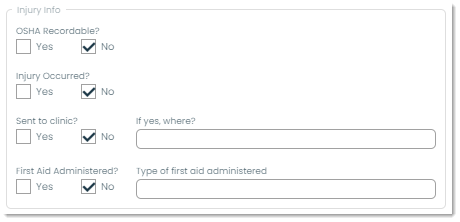
Injury info – Apart from saying if the incident was OSHA recordable and if there was an injury, you can also mention if the person involved went to a clinic and where. Additionally, you can note if any first aid was given, and if yes, specify the type of first aid provided.
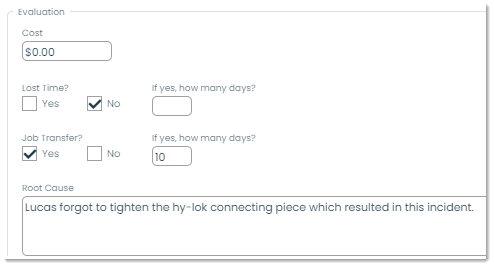
Evaluation – You can show how much the incident cost in terms of time or money to fix. Tell if any work time was lost (and if so, how many days), if there was a job change because of the incident (and if so, how many days) and explain why the incident happened in the first place.
Tags – Tags are like labels that use keywords and colors to sort safety incidents. Unlike types, you can attach several tags to one record, helping you organize and find safety incidents easily. Tags offer a way to add context to each record, making it simpler to understand and search for specific information. For more on tags, please refer to our article on Using Tags.
How to manage the involved parties of a safety incident
Once a safety incident record has been created, you can manage the involved parties of that incident by going into the details of that safety incident record and going to the Involved parties tab.
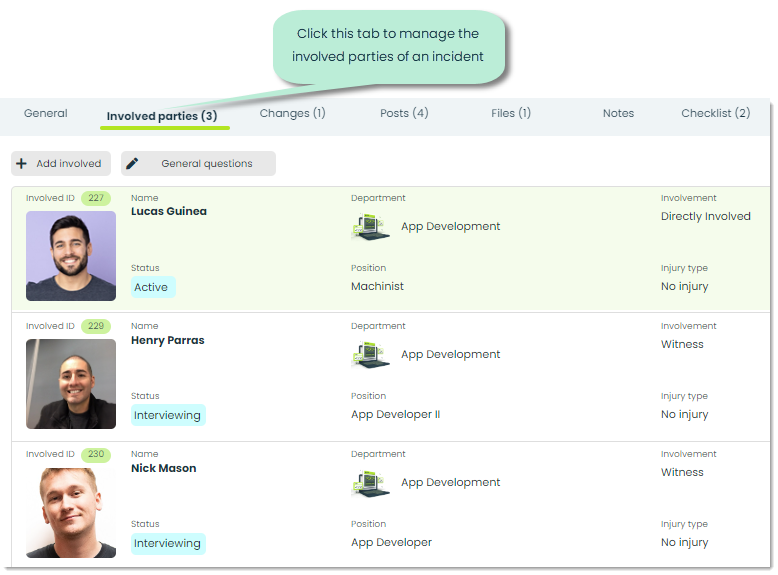
From here, you can see a list of all the involved parties, their involvement and several other details. Let’s cover the options from this main screen, then dive into the finer details of each involved party.
+ Add involved – With this button, you can add additional involved parties.
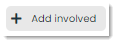
General questions – With this button, you can configure a set of general questions for each of the involved parties to answer.

By clicking this button, you open the following popup which can be used to add in a customized set of questions:
In the example above, two sets of questions have been chosen and grouped. Each set, labeled as Directly involved and General questions, contains specific questions that can be customized and used again. The selected groups, indicated by checked boxes, include questions like “Where is your back pain located?” and “Did you see a doctor?” (as shown in the preview on the right).
The purpose of organizing questions into these groups is to have a consistent and organized way of asking questions. These question groups can be reused for different incidents, providing a structured approach. You can mix and match as many question groups as needed, and the combined questions from all groups form the general set of questions assigned to each involved party. This helps ensure that everyone involved is asked the necessary and relevant questions. Once you’ve selected the questions in this section, you can click on any person it will appear in their General questions section. Their answers can be recorded and stored in a simple, accessible location.
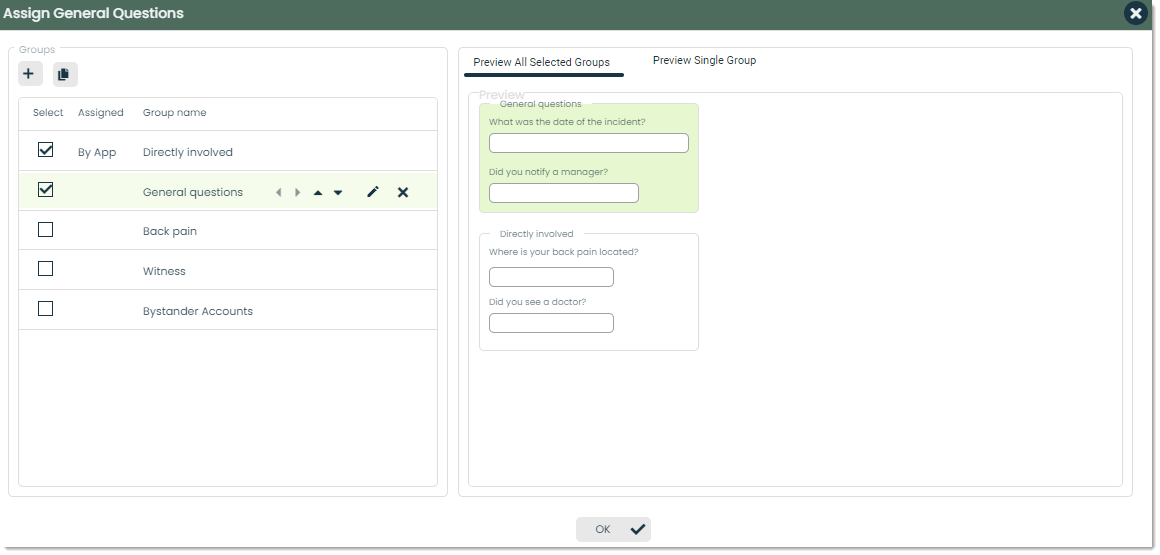
Let’s take a close look at the details of each involved party now. Click on any record to open their details page.
Here are the fields found on this page which can be viewed and modified for any involved party:
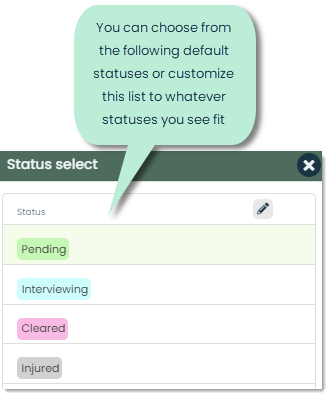
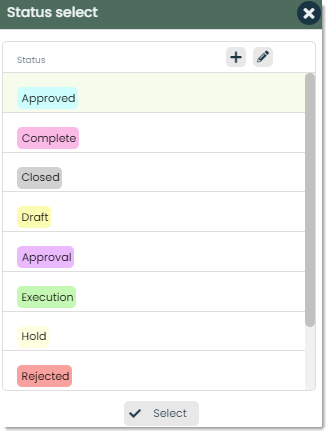
Status – This represents the current state or condition of the involved party in the context of a safety incident. It includes standard statuses like pending, interviewing, complete, etc. However, you can also customize additional statuses to align with specific needs. This feature allows for a flexible and tailored tracking system, ensuring that the status accurately reflects the stage or situation of each involved party throughout the incident resolution process.

Click the icon to bring up this popup for adding new statuses.
How to create and manage a change from a safety incident
In the context of safety incidents, a change request is a documented way to suggest and initiate corrective actions to address and resolve safety concerns. It typically includes details about the proposed changes, their impact and the reasons behind them. Change requests are crucial for maintaining and improving the safety and effectiveness of systems or processes within an organization. As a result of a safety incident, you can create a formal change request from the Safety Incidents app to take corrective action. This is done in the Changes tab of any incident’s details page.

To add a new change, click the + button next to the search bar. This will open a popup for adding all the details of the change request.
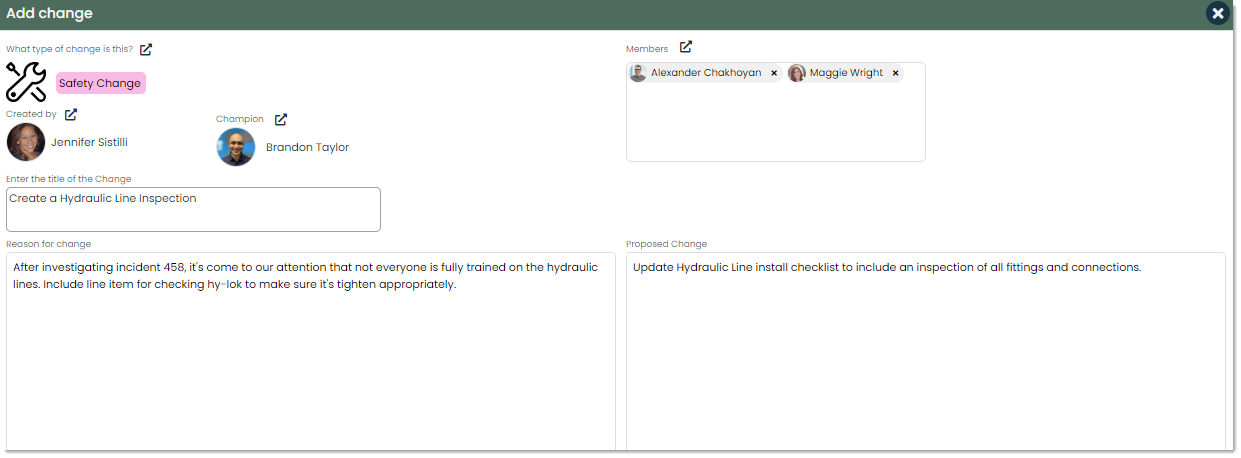
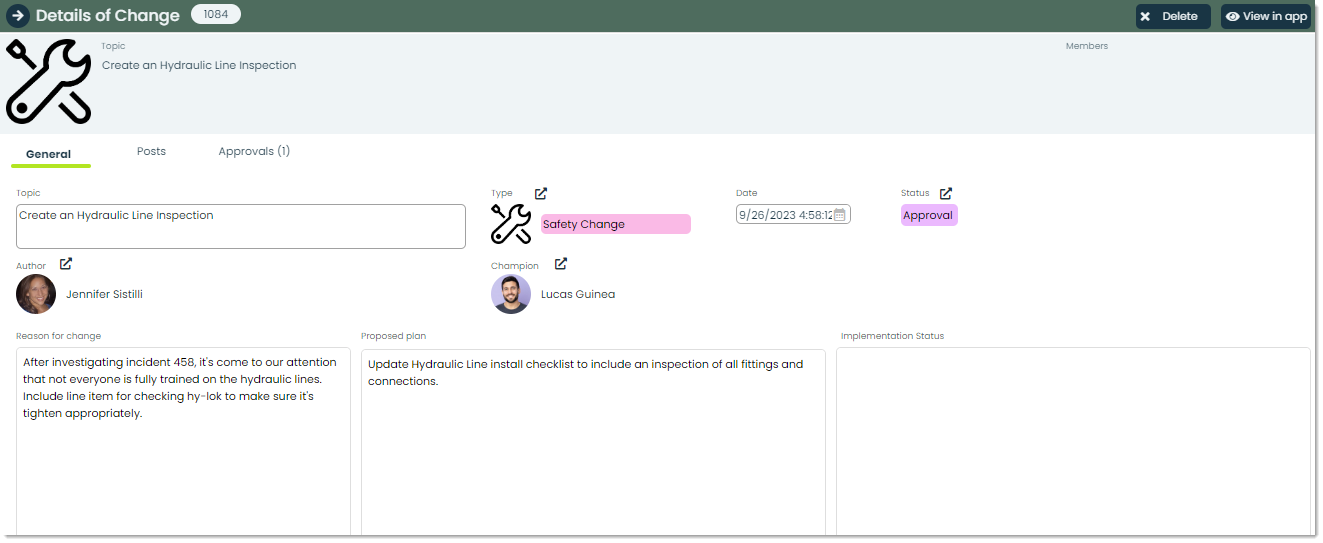
Here’s the information you can enter for a change:
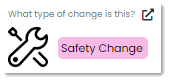
Type – Similar to safety incident type, you can assign a singular type to a change to categorize that record.
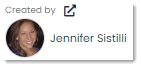
Creator – This is who created the change record. This will default to whoever is adding the change, but you can change the creator to another contact from your Contacts app.
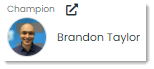
Champion – The champion of a change request is the person who will lead the charge for implementing the improvements. They’re the driving force behind turning the idea into action.
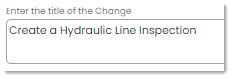
Title – This is the title of the change which should give readers a quick insight into the main idea without having to dive into the details.
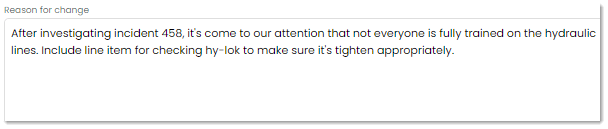
Reason for change – This field indicates why the change is being proposed. Because it comes from a safety incident, that’s usually the main reason behind the request.
Proposed change – This is the plan of action for the change which gives any approvers a clear roadmap. It outlines the steps and details of the change, providing a structured guide for approvers to understand the proposed modifications.

Members – Similar to safety incidents, you can assign members to a change which will give access to the listed individuals. These people will be able to view and modify the information of the change record.

After you’ve entered all the necessary information for the change, click Submit at the bottom to create it. From here, all involved parties can follow up on the change either from this app or from the Changes app by clicking View in app within the details of the change. For more on the Changes app, make sure to check out Getting Started with Changes. For now, let’s focus on following up from Safety Incidents.
Once a change record has been created, you can view and follow up within its details page similar to the details page of a safety incident.
Here are the additional fields on this page and what they are for:
Date – This is the date that the change was created.
Status – The status of a change, similar to a safety incident, indicates its current position or progress within the change workflow. It provides a quick snapshot of where the change stands in terms of proposal, approval or implementation.

You can edit the status by clicking the external link icon and selecting from one of the default statuses or adding your own depending on what makes sense to your business.
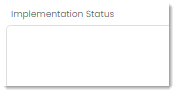
Implementation status – With this field, you can note-take any updates on the implementation of the change. It’s a good way to keep all members of the safety incident in the loop on its progress.
After creating a change proposal, you can request a formal approval from your team in the Approvals tab. Add approvers by clicking + near the top. A screen will appear for adding approval details.
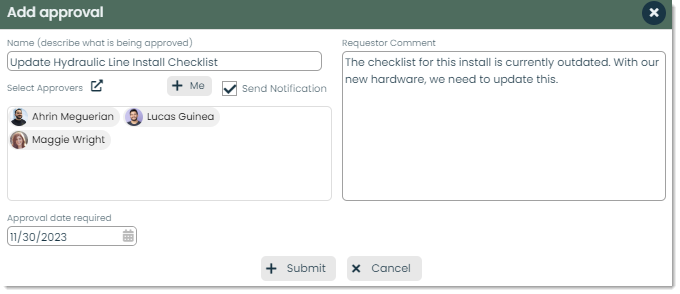
You can indicate the approvers, the name of the approval, a comment to go out to each selected approver when requesting Approval, and your own Approval and comment on your approval or denial. An approval will be generated for each person to respond to. Each approver will then be responsible for approving or denying the request.
How to configure the universal members and administrators of the application
If you have administrative access of the Safety Incidents app, you can set up a default list of team members for each new record as well as designate specific administrators with access to view all incident records. You can do this by clicking the profile icon in the top left corner of the app screen:
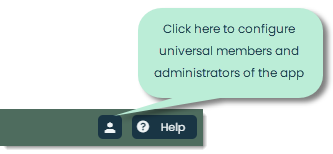
The following popup will open:
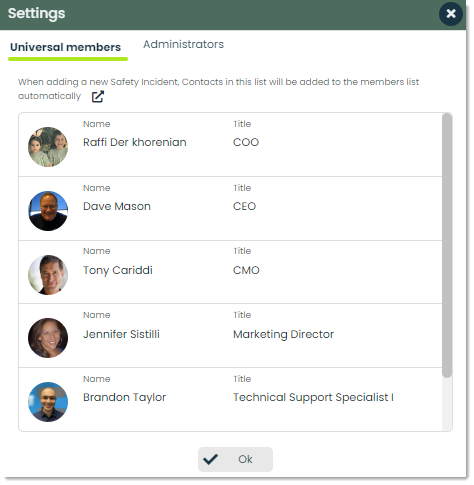
You can view the current list of universal members and administrators, as well as modify the lists by clicking the link icons in each tab. To confirm the new lists, click Ok at the bottom of the Settings screen.
How to use the other frontline features of Safety Incidents
Each app has a set of Frontline Features which are tabs that provide powerful utility based on the app they are found in. In the case of Suggestions, these features can be found in the details page of any suggestion. They are:
- Posts
- Files
- Notes
- Checklist
- Relations
- History
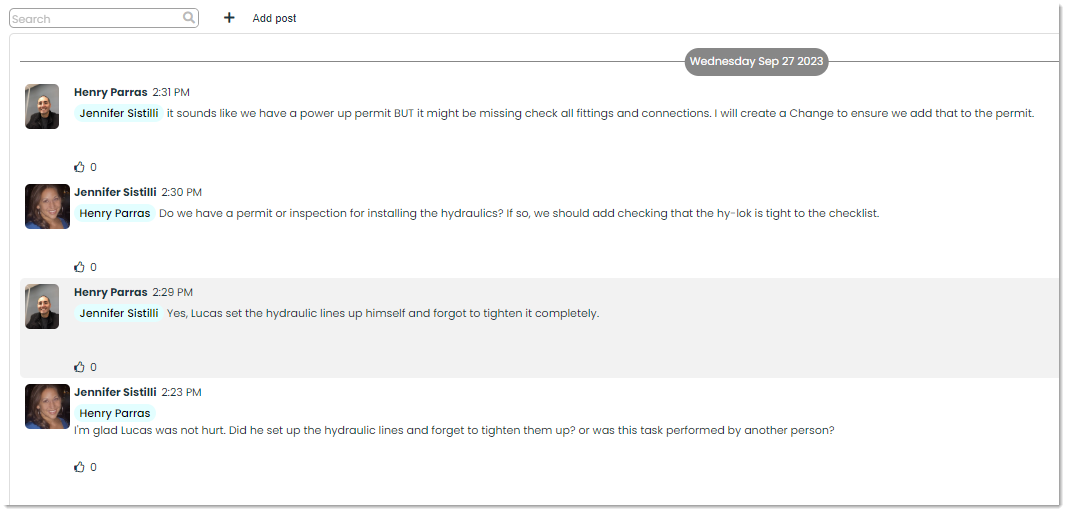
Posts – A post is a comment which can be replied and reacted to by other people in your organization. You can write a post with any questions or comments about a safety as well as mention people or departments by using the @ symbol to notify the respective parties of the post.
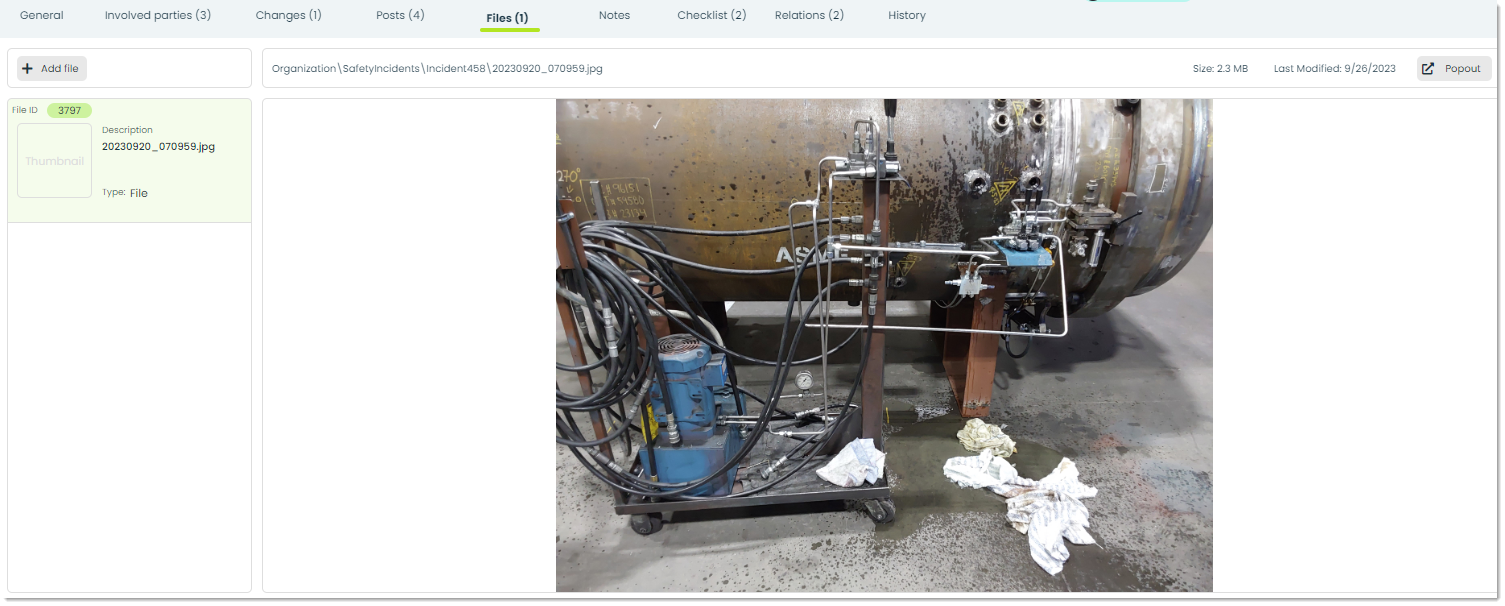
Files – Any important documents that you’d like to attach to a safety incident record can be added in the Files tab. With this feature, you can add in as many files as you want and view them with the embedded document viewer.
Notes – Any bits or pieces of information that you want to jot down regarding a safety incident can be input in the Notes tab. You can place your notes into folders for an organized hierarchy of information.
Checklist – Checklists are a method of standardizing the processes of something. In the case of safety incidents, checklists are a great tool for making assessments on what took place with consistent criteria. To add a checklist to a lead, go to the
Checklist tab and click Add checklist. For more on creating Checklists, check out Getting Started with Checklist Creator.

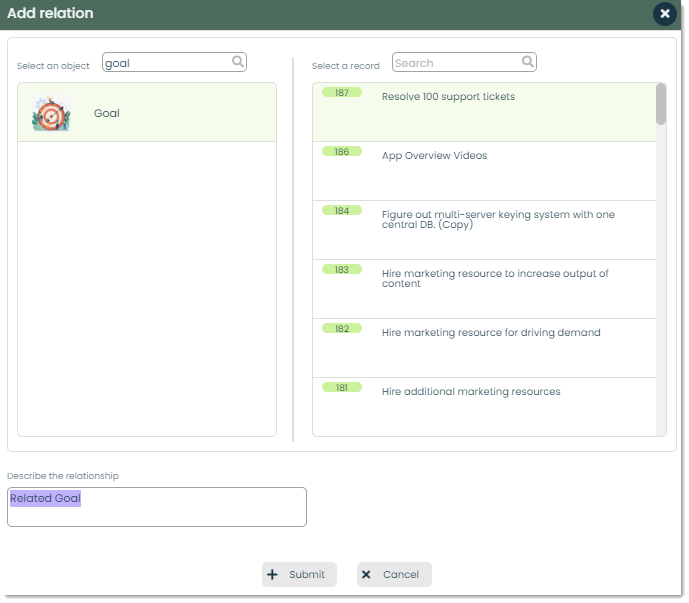
Relations – Relations are used to create a link between different pieces of data. Say, for example, a goal has been created in the Goals app for reducing the number of safety incidents for a given period of time. If we wanted to link all recorded incident records to the goal for a centralized set of information, we can accomplish that through relations. From the Relations tab, you can click the + button to form a new relation. You can indicate what kind of object the incident is related to, identify the specific record and describe the relationship between the two records.
History – The History tab provides a detailed log of recent actions performed on a specific suggestion record. This is useful for tracking any changes made, who made them and when.
How to follow, archive, delete or view the attached files of a safety incident
This section will cover the buttons that can be found in the top-right corner of the details page of all safety incident records.

Here are how those buttons work:
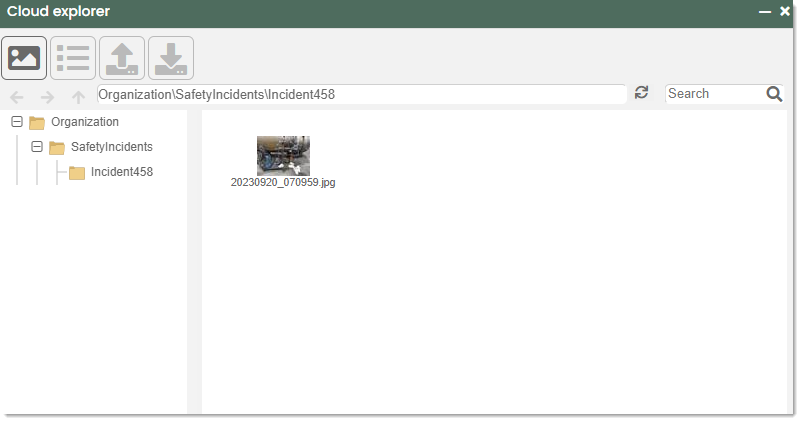
View files (folder icon) – You can view the files that have been added to a safety incident by clicking this button. This will open the Appward File Explorer to where those files have been stored, and from here you can upload any new files or download any resources you may need.
Follow – In many apps, you can “follow” records which will notify you of changes to that record. In the Safety Incidents app, you can follow an incident to be notified whenever specific actions related to the incident happen. For example, if you want to get notified when an edit has been made to an incident, you can use this feature to get that notification. To follow an incident, click the Follow button in the top-right corner. From the popup that appears, you can select exactly what you’d like to be notified of.

Archive – Archiving is used to store records in a safe, accessible location other than the main list. It’s good for hiding records that don’t need to be seen.
Delete – To delete a safety incident entirely, you can use this feature and the incident will be removed.