Table of contents
Getting Started with Changes
Tuesday October 31, 2023-30 min readIntroduction
Appward’s Changes app provides a comprehensive solution to manage change requests thoroughly while minimizing disruptions, mitigating risks, improving resource allocation and promoting a culture of continuous improvement. With Changes, your employees have a structured system for requesting improvements, while giving your organization’s management a way to evaluate and execute changes.
Let’s get started
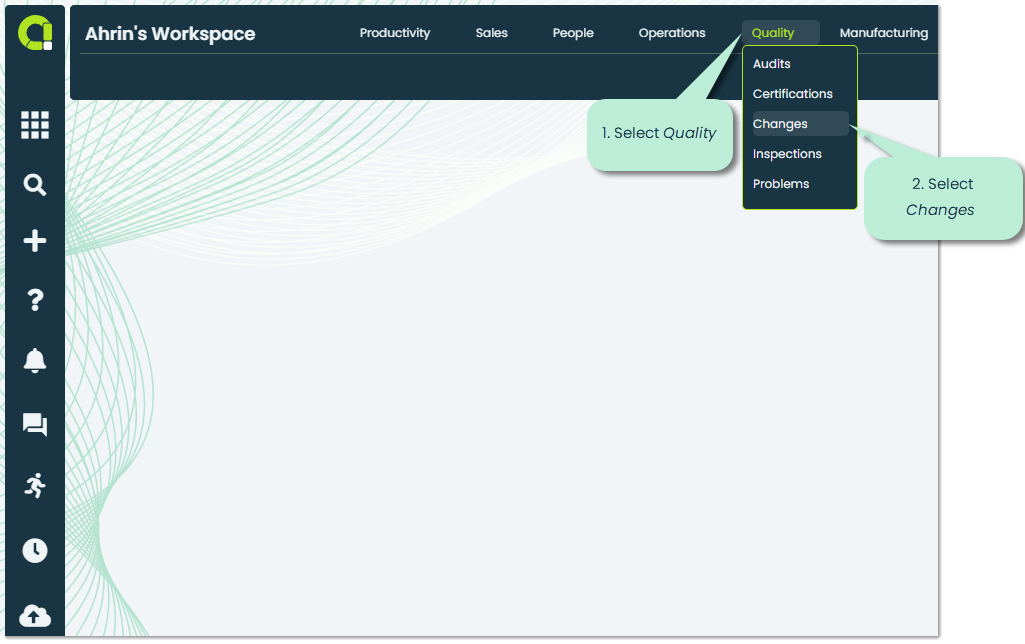
To open the Changes app, go to the Quality section in the main navigation bar and select Changes.
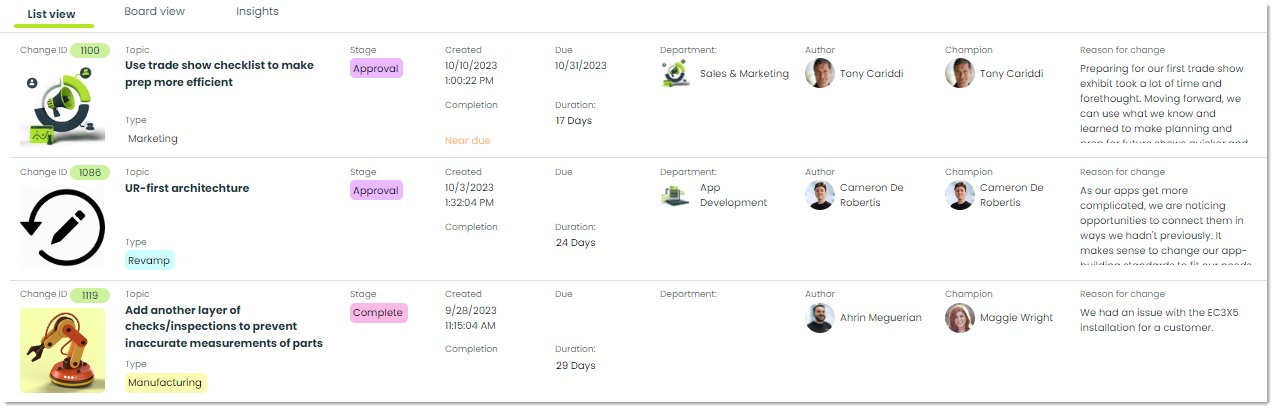
When you first open the app, you’ll find a list of all the requested changes in your organization. Let’s cover the main tab available in the Changes app.
Note: If this is your organization’s first time using this app, then this screen will be blank.
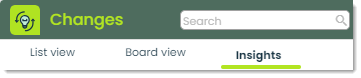
1. List View – In List View you can see a comprehensive list of the changes within your organization. Each row in this pane represents its own Changes record and provides you with the key information of the change, so you can identify it at first glance.
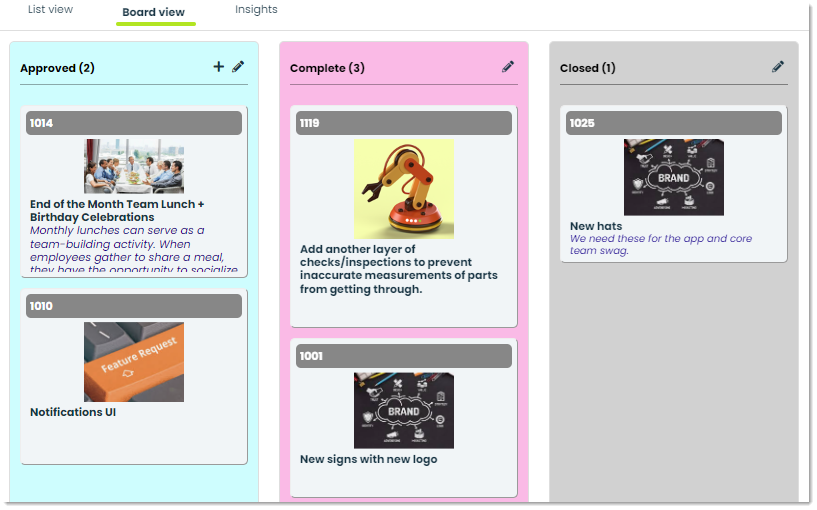
2. Board View – In this tab, you’ll see a Kanban-style layout of the requested changes in your organization, grouped by their current stage. For example, if a change has been approved, it will be in the Approved column of the board. You can easily update the stage and status of each card by dragging them to the relevant column.
3. Insights – This tab is used to analyze data from your organization’s changes. Using Insights, you have the opportunity to uncover and make use of valuable information related to change types, statuses, budgets and more. For more on Insights, please check out our Getting Started with Insights guide.
How to add a Changes record
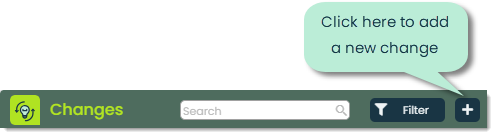
To add a new change to your organization, click the + icon at the top of the app screen.
Next, you’ll encounter the Add change popup, providing you with the opportunity to input details for a new change. Let’s explore the various fields available for you to enter information into.
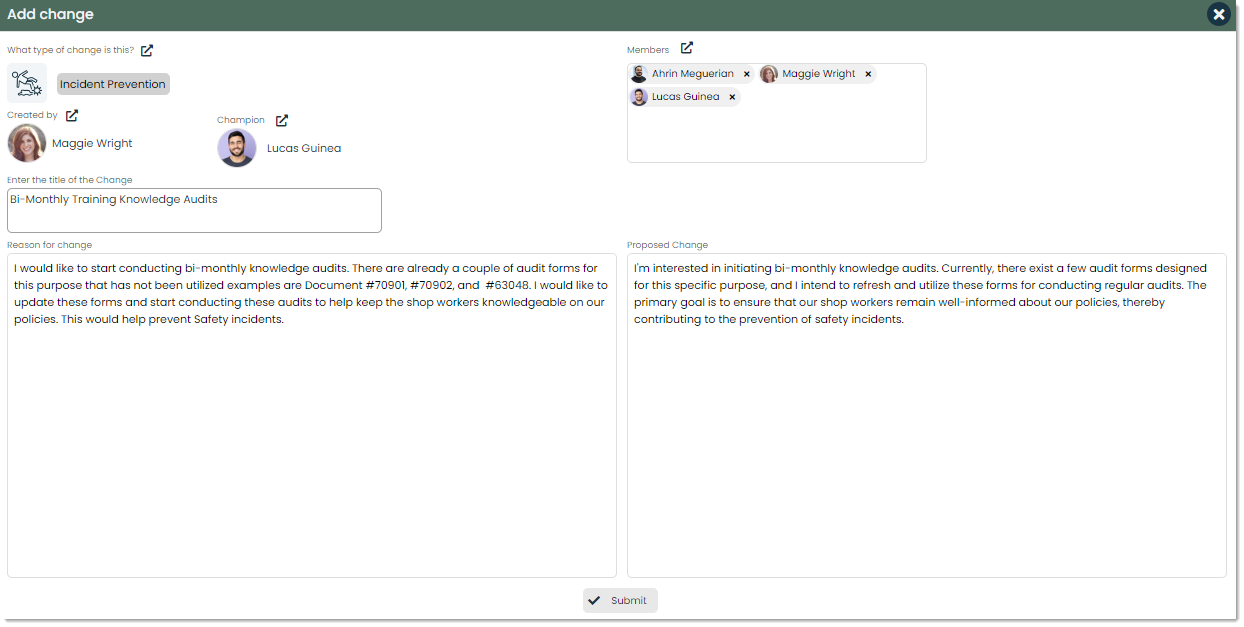
Type – You can categorize the changes you create by the type you assign to them. Types appear as labels with custom names, colors, and images that can be directly associated with records throughout all of Appward. Types provide you with a way to organize your data in a fully flexible, customized way to suit your business. As an example, a change associated with improving safety incident standards might be categorized by the type “Incident Prevention”. For more information on Types, please check out our article Using Types.

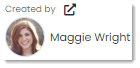
Created by – This field represents the individual from your organization who is responsible for creating the changes record. You can define the individual displayed in the field by clicking the icon in the Created by field. This action will bring up a list of available contacts from your organization, allowing you to designate the who is displayed in the Created by field.
Champion – A Champion is defined as an individual in your company who takes a proactive approach in promoting and helping drive a change. You can define the champion of the record by clicking the icon in the Champion field and selecting someone from a list of available contacts in your organization.

Title – In Title, you can create a clear and concise title for your submitted changes. It provides readers with a quick and clear indication of what the subject of the change is, without going into extensive detail.

Members – In Appward, many apps use members as a way to manage the permissions to edit or view records. In Members you can press the external link button and select individuals from a list of organizational contacts to assign them as members of a Changes record.

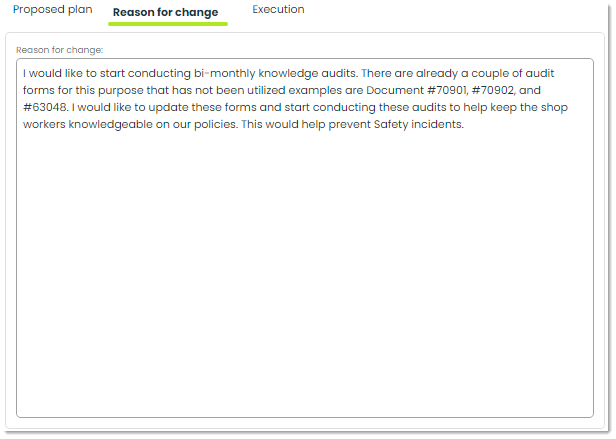
Reason for change – In Reason for change, the creator of the change can provide readers with an explanation of why they are suggesting the change. This explanation serves as an importance piece of information for readers, helping them understand the underlying motivations that prompted the change.

Proposed change – A Proposed change refers to a specific adjustment or modification that is put forward for consideration and implementation within an organization. These proposed changes are driven directly by the Reason for change.

Submit – After you have finished entering information into the fields in the Add Change section, you can simply click the Submit button to create a change record with the provided details.

How to view and edit records in Changes
To view a record within Changes, you can click on the row of the record you wish to view.

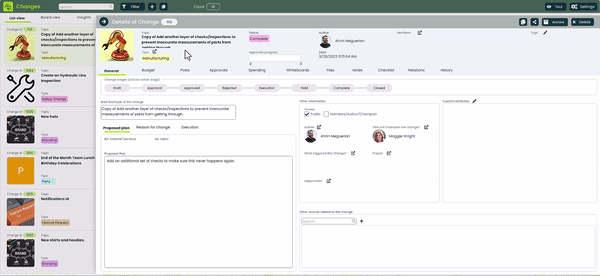
After selecting a record to view, you’ll be shown a details flyout displaying all the necessary information pertaining to a changes record. Let’s review the fields in this flyout and discuss the details of each one.
Change stages – Change stages are used to track and manage the process of implementing changes. The stage can be determined by clicking on the button that most accurately represents the current situation. This allows you and your team to have a clear understanding of the stage of the change process at any given time.
Draft: This is the initial stage where the change is created as a preliminary document or plan. It includes fundamental details about the requested change but is not yet ready to be finalized.
Approval: A change will enter the approval stage once it has been published and a request for approval has been made to a manage or other responsible individual.
Approved: This stage signifies that a change request has received approval, and the processes for its implementation will commence.
Rejected: When a change is rejected, the record will transition to the Rejected stage, indicating that no further action will be taken based on the current details of the change.
Execution: During this stage all the planned actions will be taken. In the Execution stage, the change is actively being implemented, with all planned actions being carried out.
Hold: You can put the change in the Hold stage if progress on the change is at a standstill, or if modifications to the original plan are required.
Complete: The Complete stage indicated that all planned actions and tasks associated with the change have been completed. This is where you can confirm that the implementation of the change has concluded, and all activities within your original plan were carried out.
Closed: A change can be moved to the Closed stage when there are no further actions going to be taken on it. This means that the change has been implemented and the plan to make the change has been completed. When marking a change as closed, you will receive a prompt to archive the record.

Title – Here is the place to specify the title for the change. You can make titles brief yet informative, providing readers with a clear idea of the content before they choose the record.

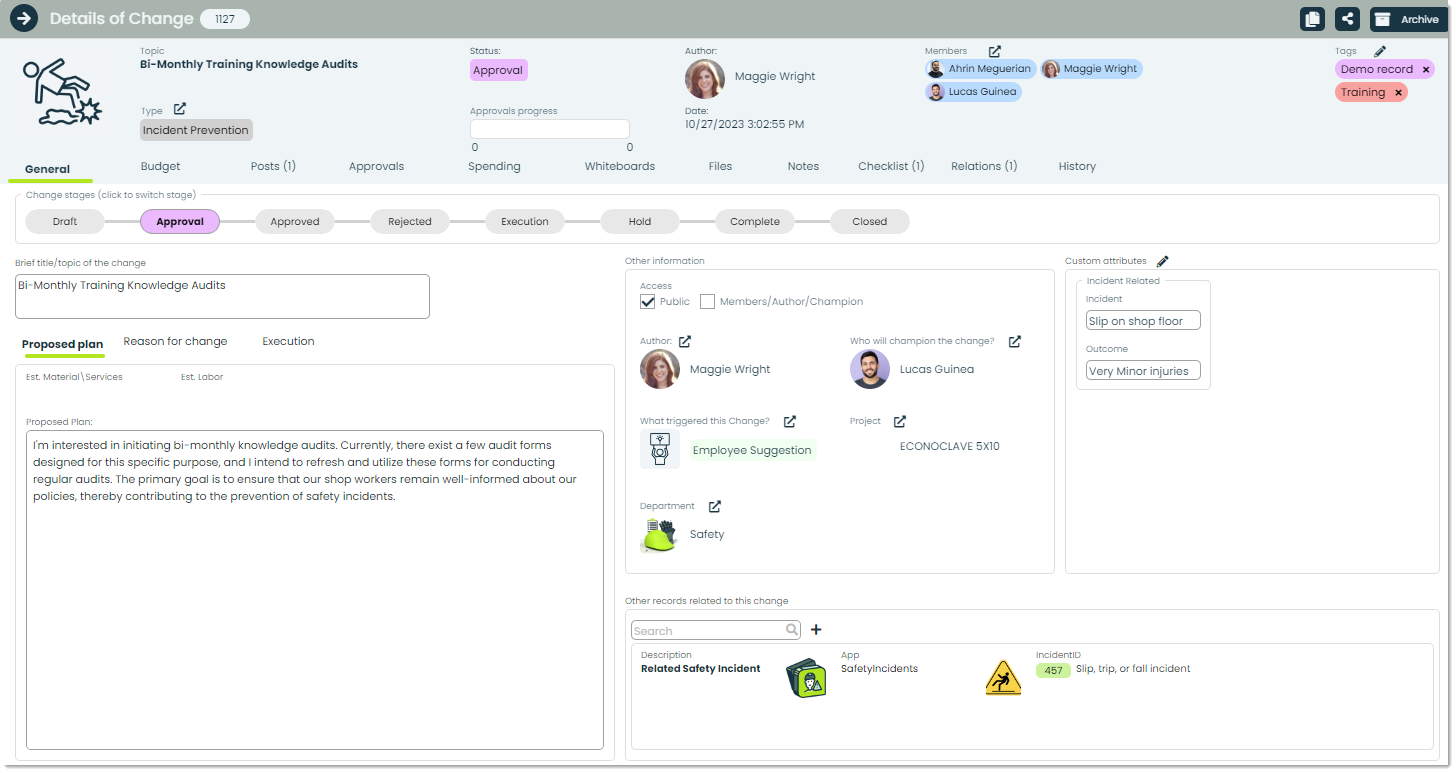
Other Information – Within the Other Information section, you have the ability to view and manage supplementary details related to your change. Let’s explore what’s available in this section.
Access: In Access, you can define the privacy level of the record. By selecting the checbox for Public, you are requesting this record to be available to everyone within your organization. On the contrary, by selecting the checkbox for Members/Author/Champion, you can indicate that the record is only accessible by members, authors, and the champion of the change.

Author: This is where you can define the author of the change. It’s important to note that the author is not necessarily the same as the individual who is creating the Changes record. You can define who the author of the record is by clicking the external link icon in the Author caption and selecting the individual from a list of organizational contacts.
Trigger: In What triggered this Change? you can define the specific event or reason that the change is being suggested within your organization. For example, if a change was prompted by an employee’s suggestion, which then lead to the creation of a Changes record, you can define the trigger to be an “Employee Suggestion.”
Project: You can link a project to a change by choosing it from a list of previously created projects imported directly from the Projects app. For more on Projects, please check out Getting Started with Projects.

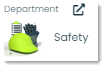
Department: In Department, you can define what department this change is associated with. Your organization’s departments can be defined within the Departments app, then are used throughout many of the apps in Appward. For more on Departments, please check out Getting Started with Departments.
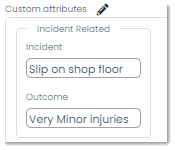
Custom Attributes – In Appward, attributes are adaptable fields that can be incorporated into changes to offer a more detailed description. Attribute fields allow you to define and include information that goes beyond the original set of fields for a record. As an example, you can define additional fields related to a safety incident when dealing with a change that is associated with a safety incident that occurred.
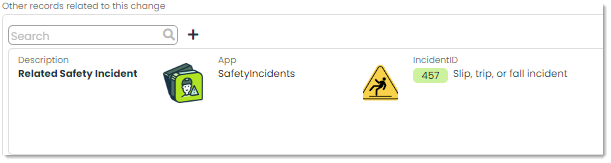
Records related – In Other records related to this change, you can define records within your organization that are related to the change you are viewing.
Within the General tab there are three additional tabs giving you even more features to help you implement and manage changes in your organization.
1. Proposed Plan – In Propose plan, you can provide the necessary details of what it would take for your organization to implement the proposed change. This includes a proposed plan, an estimate for materials/services, and the estimated labor required to accomplish the required tasks.
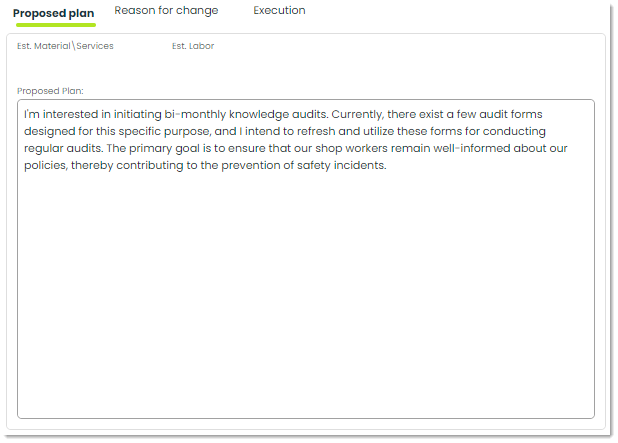
Est. Material/Services : In Est. Material/Services, you can view the estimated materials or services required to complete the change from start to finish.
Est. Labor: Est. Labor will display the estimated labor required to complete the tasks from start to finish.

2. Reason for change – In this section you can explain why you want to make the specific change. This can include finding problems, aligning with strategic goals, keeping up with trends, or adapting to ensure regulatory compliance. In essence, it’s the reason or motivation behind the proposed plan.
3. Execution – In the Execution tab you can define the steps that will be taken to accomplish the plan in Proposed plan.
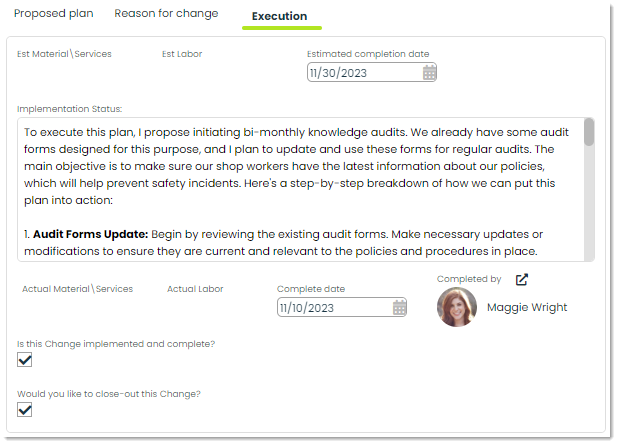
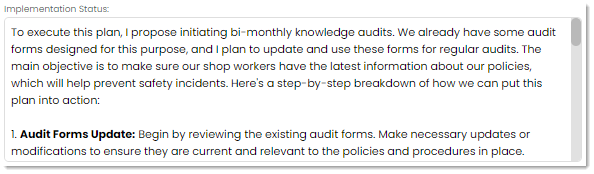
Implementation Status: You can provide details about the current status of the proposed plan within the Implementation Status field. Any updates or new findings about the proposed plan can be shared here to ensure your team stays informed about the ongoing developments.
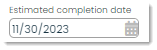
Estimated completion date: The Estimated completion date is when your organization expects the change to be fulfilled.
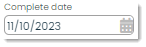
Completion date: This is the day when the change was truly finished. It is different from the estimate date and helps to compare the actual time taken with the expected completion time.
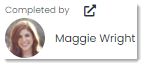
Completed by: The individual who completed the change will be denoted in the Completed by field.
Confirmation: To confirm that all of the necessary steps have been completed for the change, you can check the checkbox for Is this Change implemented and complete. This will then prompt you wish a popup asking if you would also like to change the status of the record to complete.

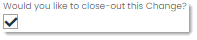
Close: To close out the change and archive it, you can check the checkbox in this field.
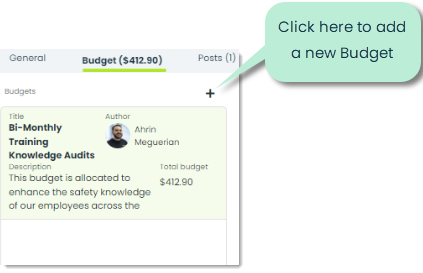
Managing the budget and spending for a change
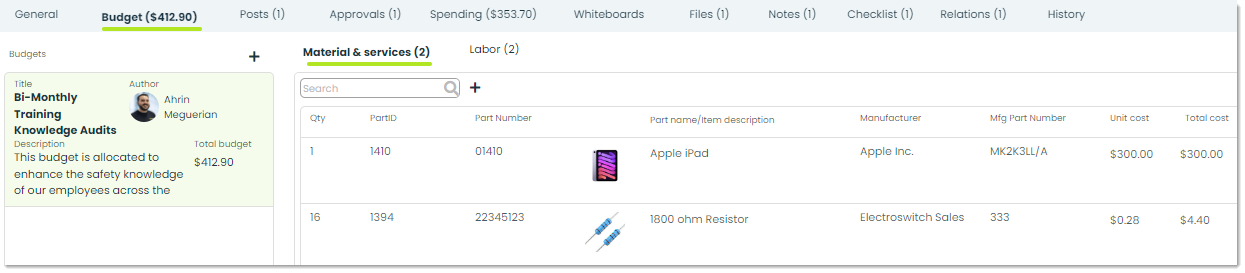
To view and manage the budget for a change, navigate to the Budget tab within the details flyout. Within the tab, you’ll find the overall cost of materials, services, and labor. Now, let’s explore how to add a budget so you can efficiently keep track of your organization’s spending related to the proposed change.
You can add new budgets by pressing the + icon near the top of the tab.
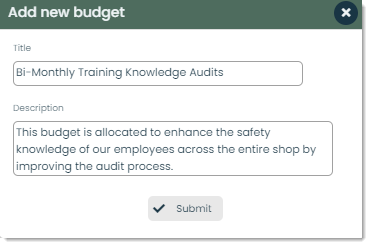
You will then be shown a screen to add a new budget which will house the individual costs of each material and labor item.
After submitting the budget, you can specify individual materials, services, and costs for the budget. To add a budget item, click on the + icon right below the Materials & Services and Labor tabs.
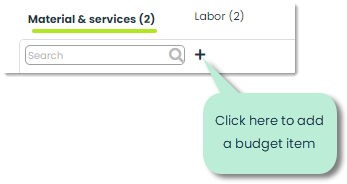
You will then be shown a popup where you can select items to add to the budget of your proposed change.
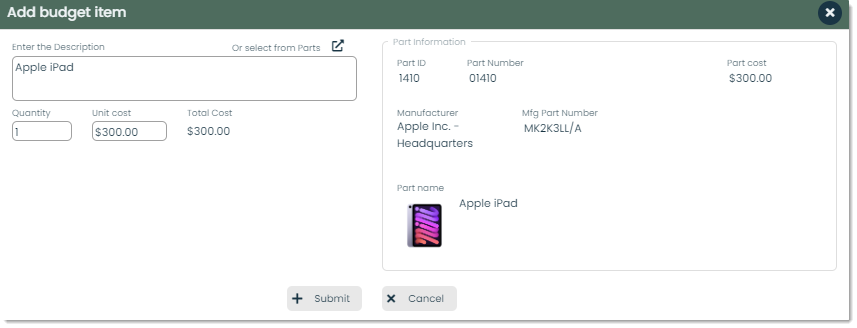
Description – Here, you have the option to either input a description manually for a part or import all the required details by choosing a part from your organization’s parts app. The parts app serves as a comprehensive, centralized system for efficiently managing your organization’s parts. You have the option of selecting an existing part directly from the Parts app by pressing the external link icon next to the Or select from Parts caption. For more on Parts, please check out Getting Started with Parts.
Quantity – This field represents the quantity of the parts involved in the proposed change.

Unit cost – You can access the price of the part right here. Appward will import this information from the Parts app, making this entire process convenient for you. However, you also have the flexibility to input a new price on the spot, allowing you to change the cost of the item as required.

Total cost – This field represents the overall cost of the item. It is calculated by multiplying the unit cost by the quantity, providing an accurate calculation of the total expense related to this particular part.

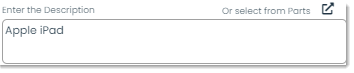
Part Information – In Part Information, you can view a detailed set of data relevant to the specific part being added to the proposed change. Let’s cover the unfamiliar fields detailed in this section.
Part ID: The Part ID is a unique code designated to a specific part within your organization. They help you distinguish parts, making them easier to manage and account for in all aspects of your business. Having a unique identifier for each part prevents miscommunications and confusion, and helps you facilitate essential tasks at an efficient rate.

Part Number: The Part Number also helps you identify specifc parts within your organization.

Manufacturer: This refers to the company that manufactured the part. Having a clear understanding of thee manufacturer is essential for quality control, returns, and reordering parts when needed.

Mfg Part Number: In Mfg Part Number , you can view the specific part number assigned from the manufacturer themselves. This number is not decided by the organization using the product, so it’s important to remember that this number is often set and never changed.

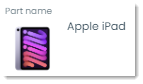
Part name: The Part name is a label given to a part, that provides the viewer with a way to quickly identify the part without relying on other characteristics of the part.
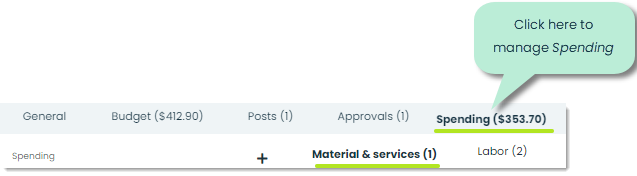
Similarly, the same process can be used to add up the total amount spent within the Spending tab.
How to create approvals for Changes
To create approvals, navigate to the Approvals tab at the top of the details flyout and click on the + icon.
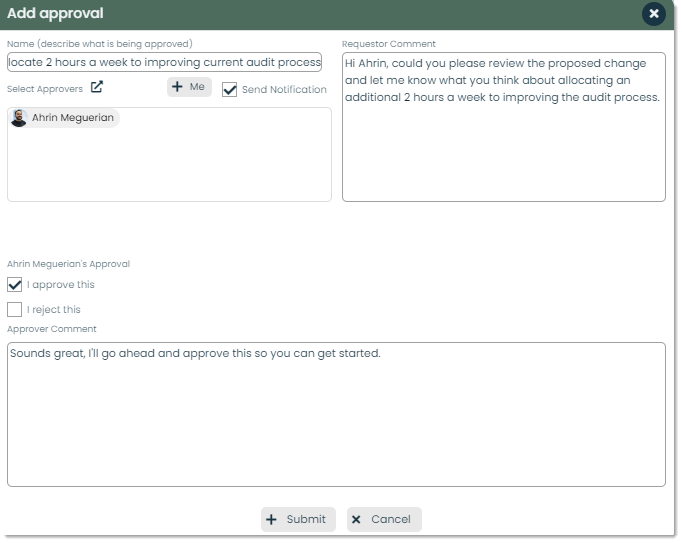
Name – A short description of what is being approved. This name or title should be straightforward and concise, allowing the reader to identify what they are about to view with a quick glance.

Select Approvers – Within Appward, those who have the responsibility of approving or rejecting approval requests are known as Approvers. To designate approvers, simply click the icon in the Select Approvers section, which will bring up a list of selectable contacts for you to choose from. If you want to assign yourself as the Approver you can easily do so by pressing the + Me button.

Send Notification – You can send the approver(s) a notification by marking the checkbox in the Send Notification field. This will trigger a notification to appear in the approver’s notifications tab in their workspace.

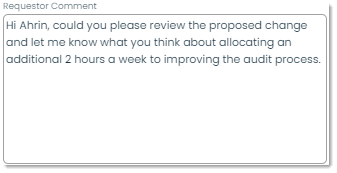
Requester Comment – The individual who is creating the request has the ability to add additional context within a comment in the Requester Comment field.
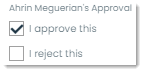
Approver’s approval – If you are the approver, you will be shown additional options in the popup. Options to approve or reject the approval request will be available to you.
Approver Comment – After approving or rejecting the approval request, you can provide a comment in the Approver Comment field to explain why a specific decision was made.

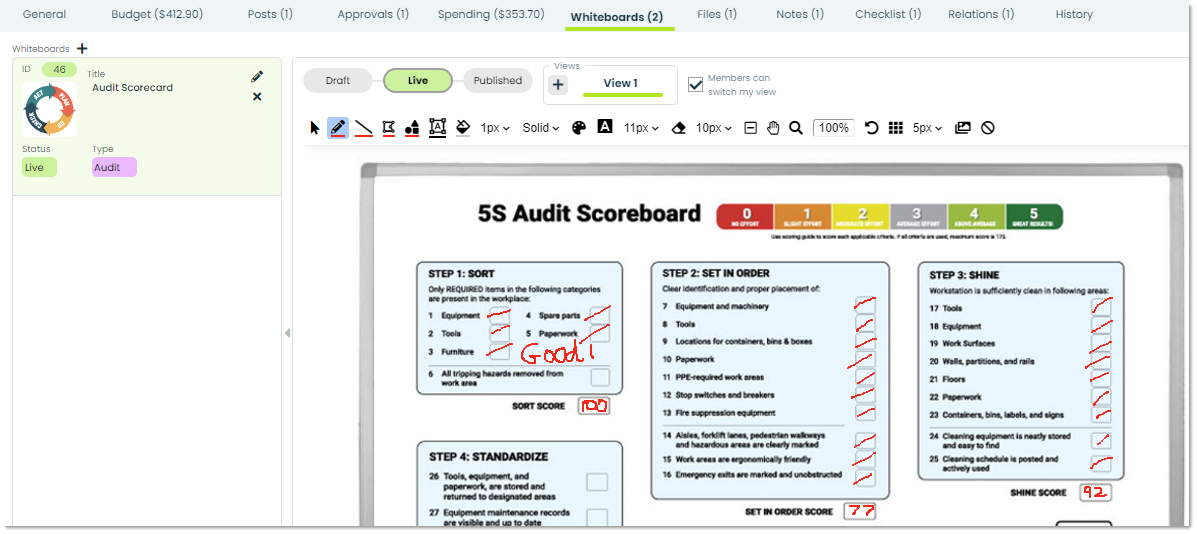
How to add a whiteboard to Changes
The Whiteboards tab incorporates the features from the Whiteboards app that our users love the most. Using a physical whiteboard is not always practical , and for that reason we’ve recreated one of the most popular tools for productivity and collaboration.
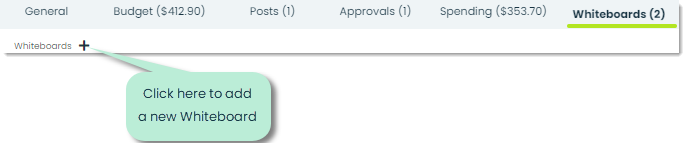
To add a whiteboard to your Changes record, go to the Whiteboards tab at the top of the details flyout and click on the + icon.
You’ll then be shown a popup where you can add details of the new whiteboard you are creating
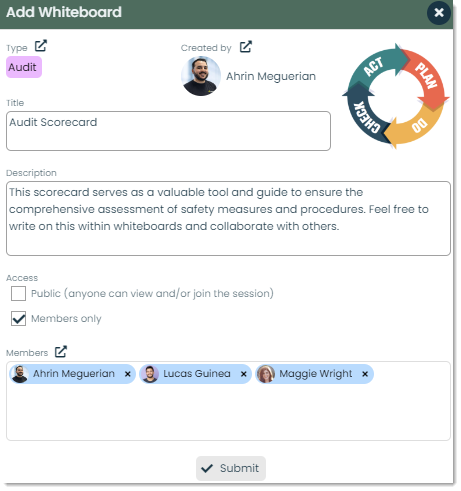
After you input all the necessary details and submit your whiteboard, you can view it within the Whiteboards tab. For more on whiteboards, please check out Getting Started with Whiteboards.
Frontline features of Changes
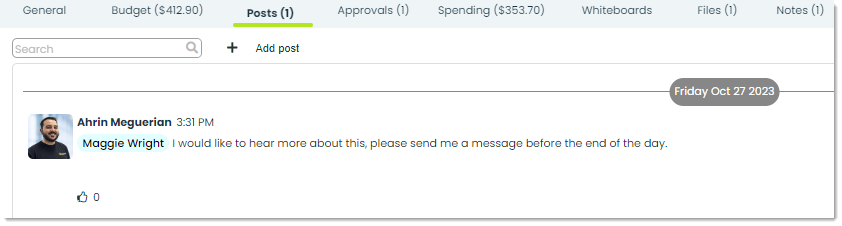
Posts – In Appward, a post is a comment that can be liked or replied to directly by other members of your organization. Within Changes, a common way of using posts is to write to parties associated with the change with any additional comments you’d like to make.
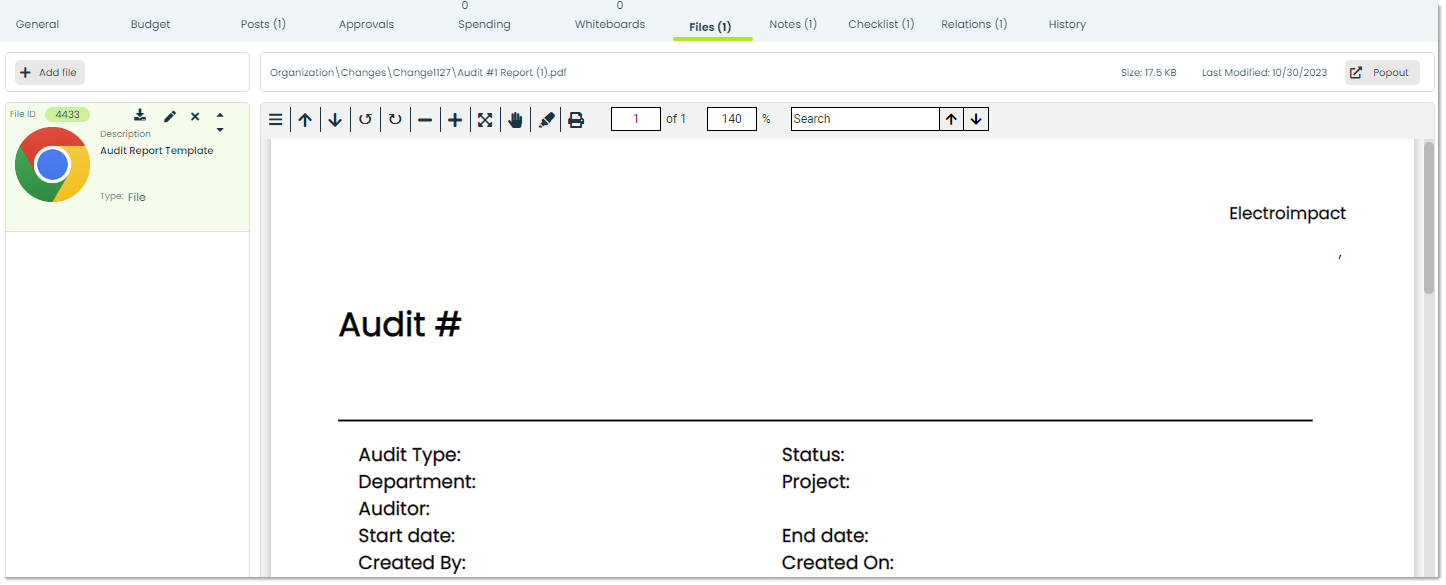
Files – Through the Files tab, you can attach essential documents to a Changes record. You can add files directly from your computer or from the Appward cloud. After adding a file, you can view it through an integrated document preview within the Files tab. Individuals within your organization with access to the record can view and download the file to their personal computers.
Budgets – With the Budgets tab, you can add in every expense and estimated cost of the Special Event, whether that’s for a product or service. You can add separate budgets for a more organized, modularized set of costs. For example, you may have a Food Budget which consists of costs several different food items, as well as an Entertainment Budget which consists of all the costs associated with the provided entertainment. This approach allows for clearer tracking and management of each aspect of your event expenditure.
Spending – While the Budgets tab is used for estimating expenses, the Spending tab is used for tracking your actual expenses.

Actions – With Actions you can centralize task assignment and track their progress through various stages. It is ideal for delegating and managing tasks for teams and projects. With features like customizable checklists, reminders, and approvals, it helps you manage tasks efficiently.

Timelog – You can control and monitor the time it takes to set up your events with the Timelog tab. You can use the Start and Stop buttons to start and stop the timer. You can provide a description for each timed session for extra traceability, and the combined time will automatically get calculated. If there are any inconsistencies in the logged times, you can edit the durations and/or descriptions by clicking the pencil icon on the right side of any logged time.

Notes – Within the Notes tab you can write, save, and share written records that help capture and convey your thoughts. You’ll be able to stay organized, provide better context to changes, and improve communication between you and your team.

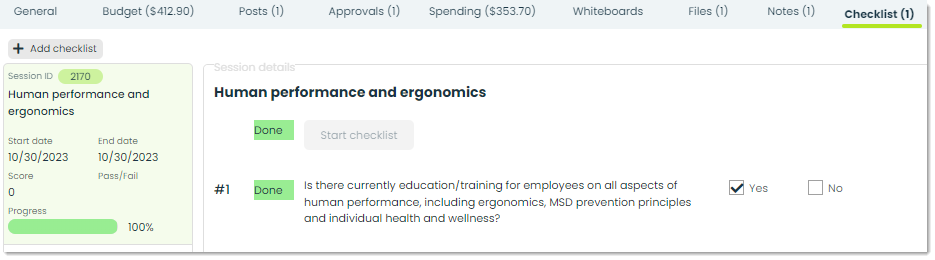
Checklists – You can use checklists to create a standardized process for a task within a change. To add a checklist to a change, go to the Checklists tab and select +Add checklist. This will open a popup where you can select from previously created checklists directly imported from the Checklist Creator app. For more on checklists please take a look at Getting Started with Checklist Creator.
Relations – Relations are a great option when looking to link two different records together. As an example, linking a safety incident that is directly related to a change is an ideal way to use relations. This allows for records from both the Safety Incidents app and Changes to be in the same, centralized location.

History – In History, you can view an activity log related to the Changes record you are viewing. You will see a list displaying the modifications date, activity description, modification author, and the application in which it was made.
