Table of contents
Getting Started with Problems
Friday September 29, 2023-20 min readIntroduction
All organizations have things that go wrong on a day by day basis – we call these things “Problems”. Problems include customer complaints, process failures, employee issues, or non-conforming product (ie. NCR) to name a few. All great organizations have a system to track problems and resolve them. Additionally, some problems might be things that reoccur, so putting in place a corrective action plan for can permanently resolve these issues.
The Problems app is used to record all problems in an organization, provide visibility of those problems to different departments and stakeholders, and provide clear workflows for executing the fix of the problem as well as a permanent corrective action. The Problem apps can also provide useful metrics and trends of specific problems by using Tagging and the custom Insights system.
Also, under ISO9000 quality standards, any qualified company must have a system to track non-conforming product. The Problems app will track all your NCRs and give you the metrics needed to meet your ISO requirements.
Getting Started
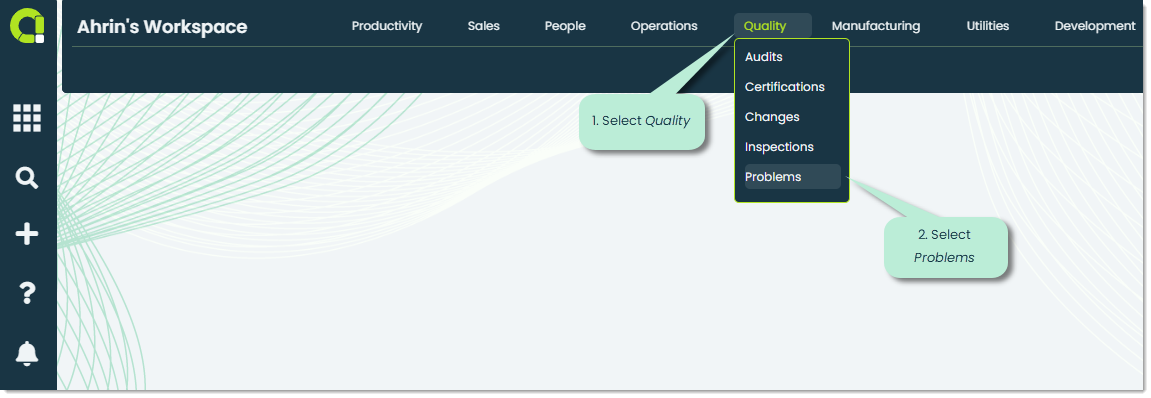
To open Problems, go to the Quality section of the main navigation bar and select Problems.
When you launch the app, you’ll see a screen displaying all the meeting records from your organization. Let’s explore the features of each tab.
Note: If this is your organizations first time using Problems, it will be blank.
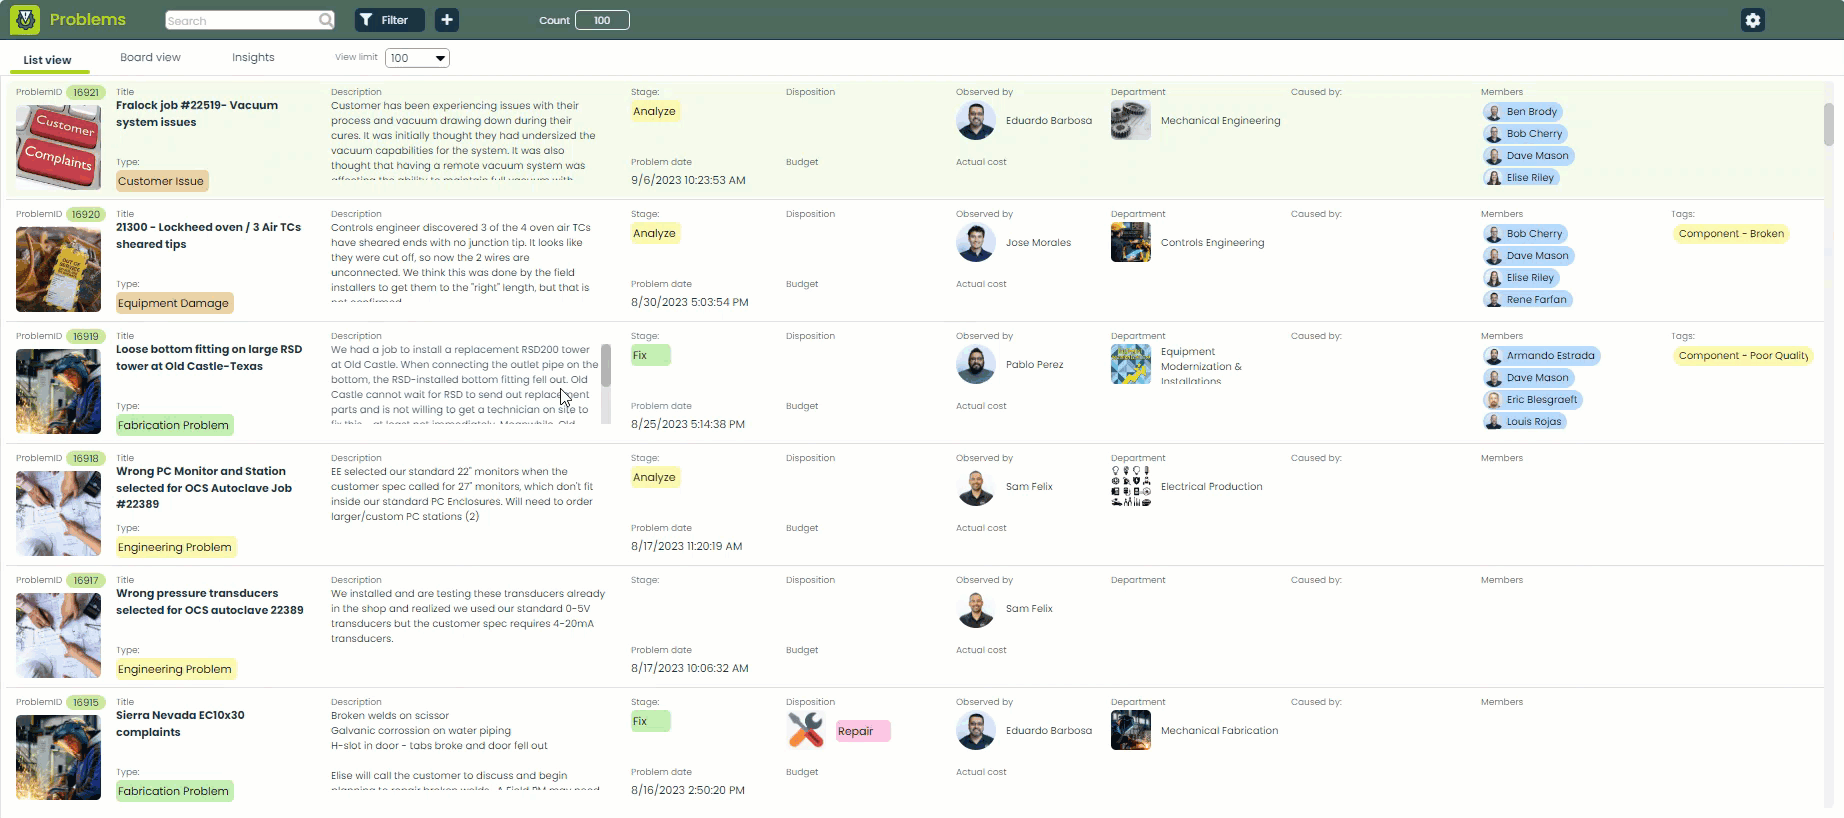
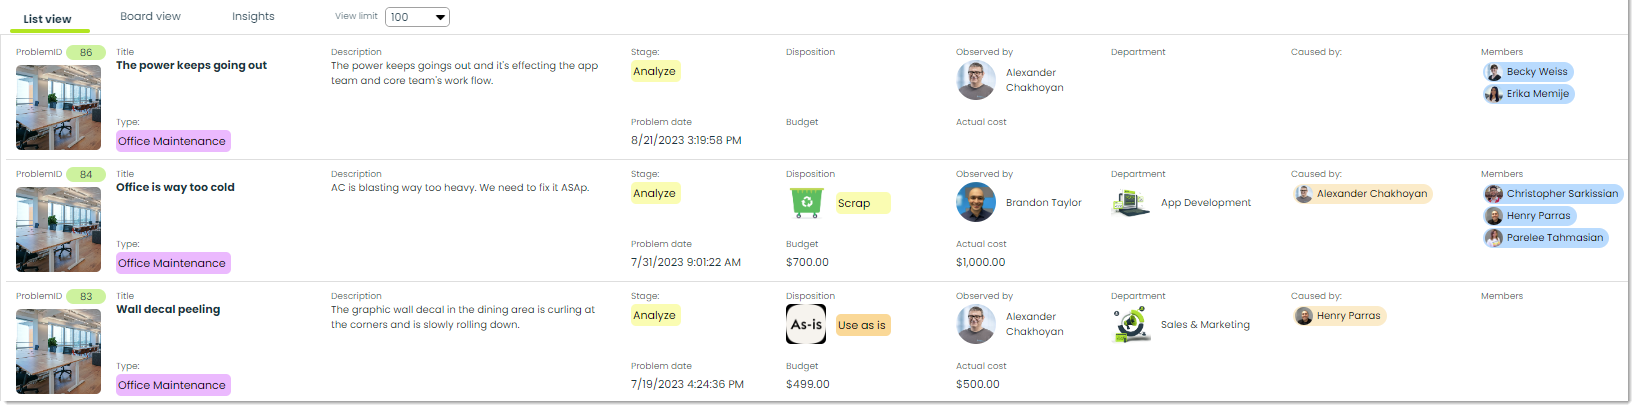
List View – This is the default tab you’ll see when you first open the app. This view provides a comprehensive overview of all the reported problems your organization is currently facing, making it easy to assess the scope and prioritize actions.
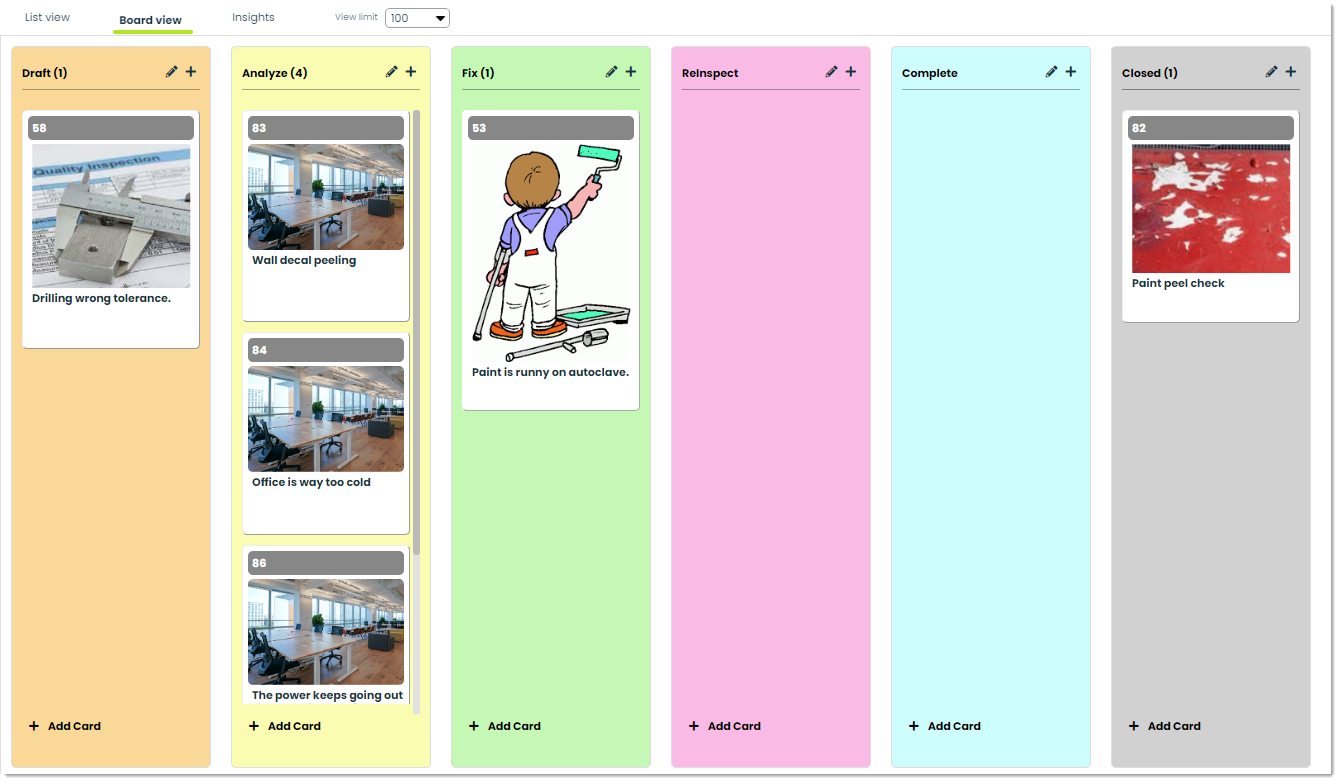
Board View – In Board View , you can view your organizations reported problems in a Kanban-style view. This view is designed to improve your ability to track progress, find solutions, and increase overall efficiency when addressing issues. You can easily drag and drop cards into columns to track problem statuses with ease.
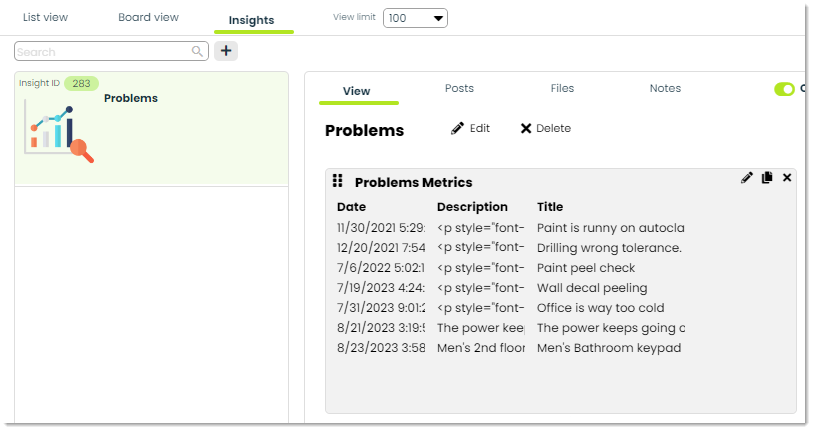
Insights – This tab is used to analyze collected data from your organization’s reported problems. With Insights, you can uncover valuable information pertaining to problem types, root causes, and resolutions. For more on Insights, please check out our Getting Started with Insights guide.
How to Add a Problem Record
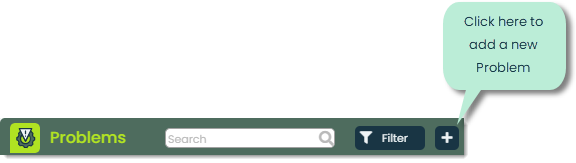
To report a new problem within your organization, click the + icon at the top of the app screen.
Next, you’ll be presented with the Add a new problem popup, where you can add essential details and notify team members about the problem you are reporting. Let’s go over the fields you’ll be populating.
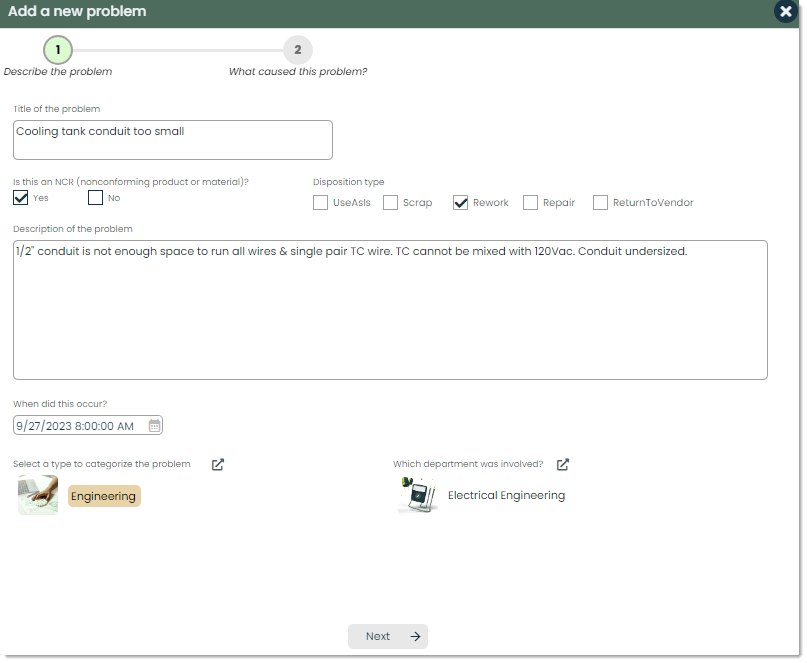
Progress bar – To monitor your progress during the process of reporting a problem, use the Progress bar field. The current step you are at is signified by the green numbers displayed within Progress bar.
Title – You can specify the problem’s title in Title of the problem field. It’s important to make problem titles both concise and descriptive, providing viewers with a preview of the record’s content before they access it.
Nonconforming product – A nonconforming product is a product that does not meet the requirements of its specifications. You can indicate if the problem you are reporting is a nonconforming product by ticking the Yes checkbox in the Is this an NCR(nonconforming product or material) field.

Disposition type – This field refers to the action your organization will take with the non conforming product you are reporting a problem about.
- UseAsIs – Maintain the product in its current condition.
- Scrap – Scrap the product, so it’s materials can be used for something else.
- Rework – Correct deformed, failed, or nonconforming items after inspection.
- Repair – Work on a nonconforming product to make it conforming so it can be useful for a project.
- ReturnToVendor – Return nonconforming item back to the original manufacturer.

Time of Occurrence – This field refers to the time at which someone in your organization observed the problem being reported. You can choose to input both a date and time for accurate time stamping. Alternatively, you can utilize the built-in calendar picker for a visual display of dates and select the date from there.
Type – You can categorize the problem you are reporting by the Type you select. At its simplest form, a type is a label with a custom name, color and image that you can assign to a record. Types not only provide a way to organize your data but a flexible, customizable system that suits the structure of your business. For example, if the reported issue relates to engineering, you can categorize it as “Engineering”.

Department – You can specify the department that was involved within Which department was involved. This helps you assign responsibility to the department that made the mistake, helping you prevent the problem from happening again.
Next – After you have described the problem by filling out all the fields, you can press next to specify some more details about the problem.

After pressing Next, you’ll be shown the second popup for the add process.
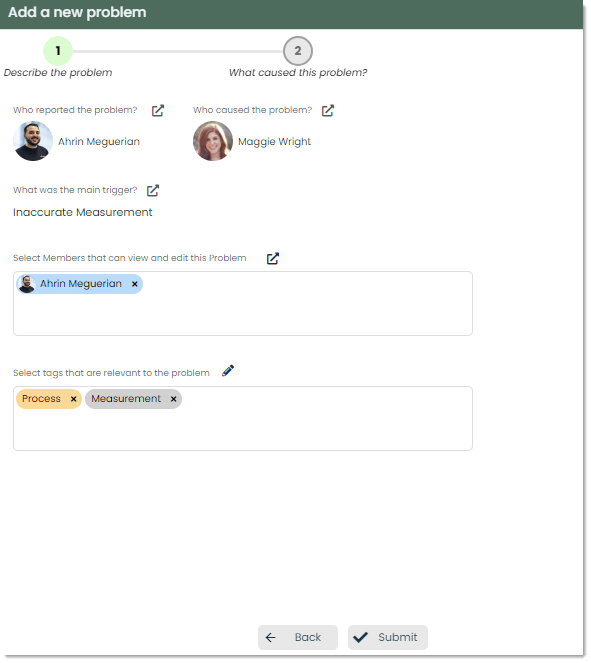
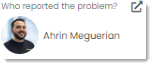
Reported by – You can specify the individual responsible for observing the problem in the Who reported the problem field.
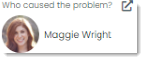
Caused by – The individual responsible for causing the problem goes in the Who caused the problem field. Keeping track of this helps you and your organization in preventing the problem from recurring by addressing and solving the issue.
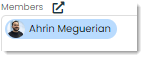
Members – Members are individuals whom you assign the ability to edit and view the problem. Members play an important role within Appward, as they allow you to provide specific individuals from your organization with access to particular records. Records in your organization can be categorized as private, member-based, or public for everyone to view.
Tags – Tags and Types are similar in that they both serve as keywords to classify and categorize problems. However, there is a key difference between them. Types are singular categories that each problem falls into, whereas tags offer more flexibility as they allow multiple keywords to be associated with a single problem. For instance, you can use a type like “Engineering” to broadly classify a problem under engineering, while tags can provide more specific information by naming the problematic process or specifying the observed cause of the issue.

Submit – Once you have provided all the essential details regarding who observed the problem, who caused it, assigned members, and applied tags, click on Submit to create the problem record.

Upon clicking Submit your newly created problem record will be visible to either members with access permissions or to everyone within your organization, depending on the access level you have chosen.
How to View and Manage Details of a Problem
To view a Problem’s details, click on the row of the record you wish to open up.

A flyout will appear, displaying all the particulars of the Problems record. Let’s explore the newly introduced fields in this view.
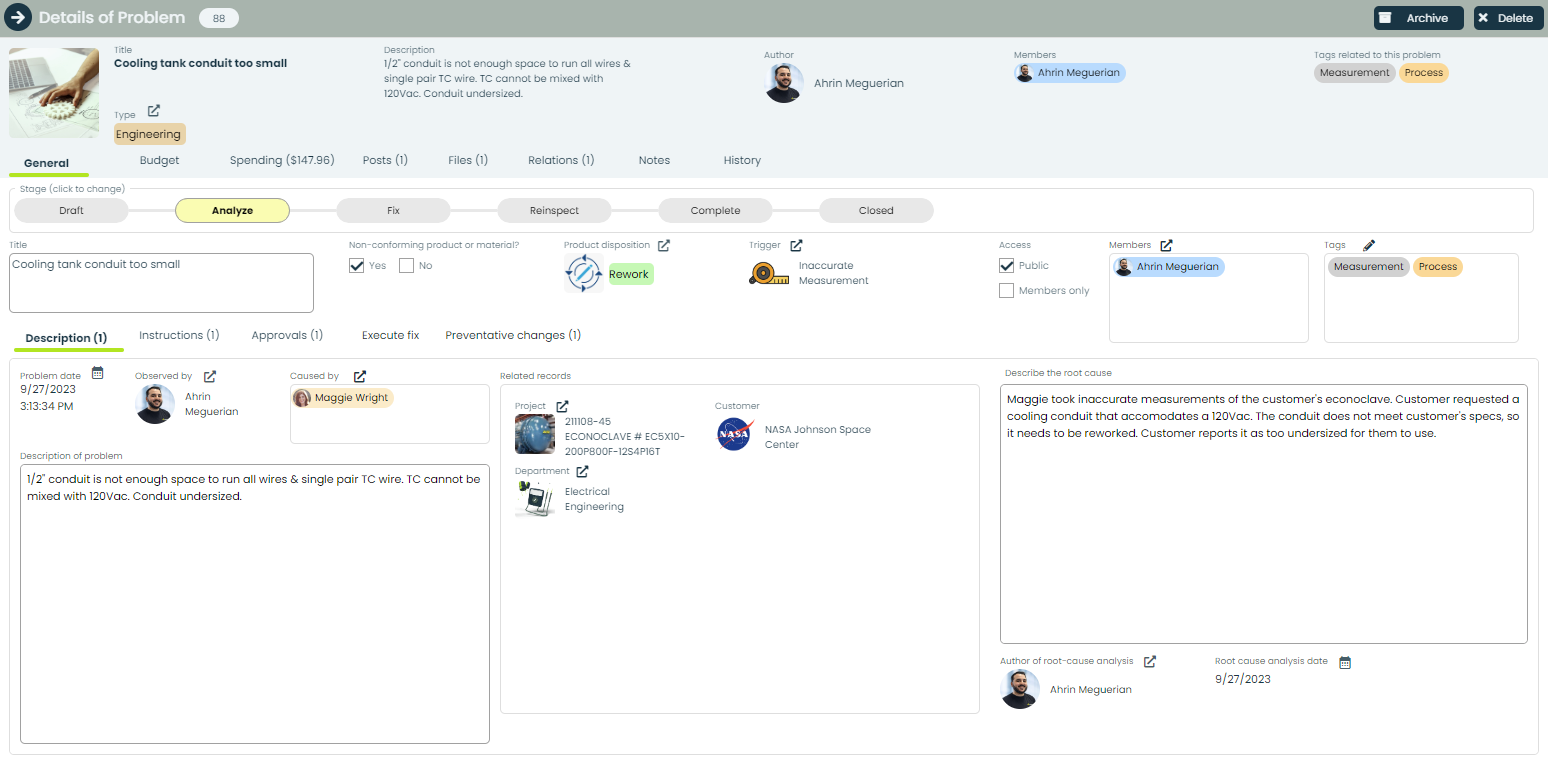
Stage – In Stage, you can see an interactive progress bar indicating what step the problem is on. Simply click on the stage you wish to set the problem to and the stage the problem is in will change.

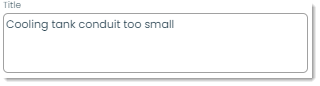
Title – Here, you can review or edit the title of the reported problem. The title should be clear, concise, and help viewers identify the subject of the problem at first glance.
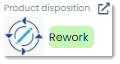
Disposition – Product disposition will display the disposition you selected during the add process of the problem.
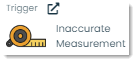
Trigger – In Appward, Trigger denotes the element that originally caused the problem. You can pinpoint the trigger by using the picker within Trigger.
Within the General tab of the Details of problem flyout, you’ll notice a collection of tabs that provide even more features to assist you in finalizing a solution.
Description – You can describe the action being assigned in Description. Descriptions should be clear and concise to make sure all parties involved share a mutual understanding.
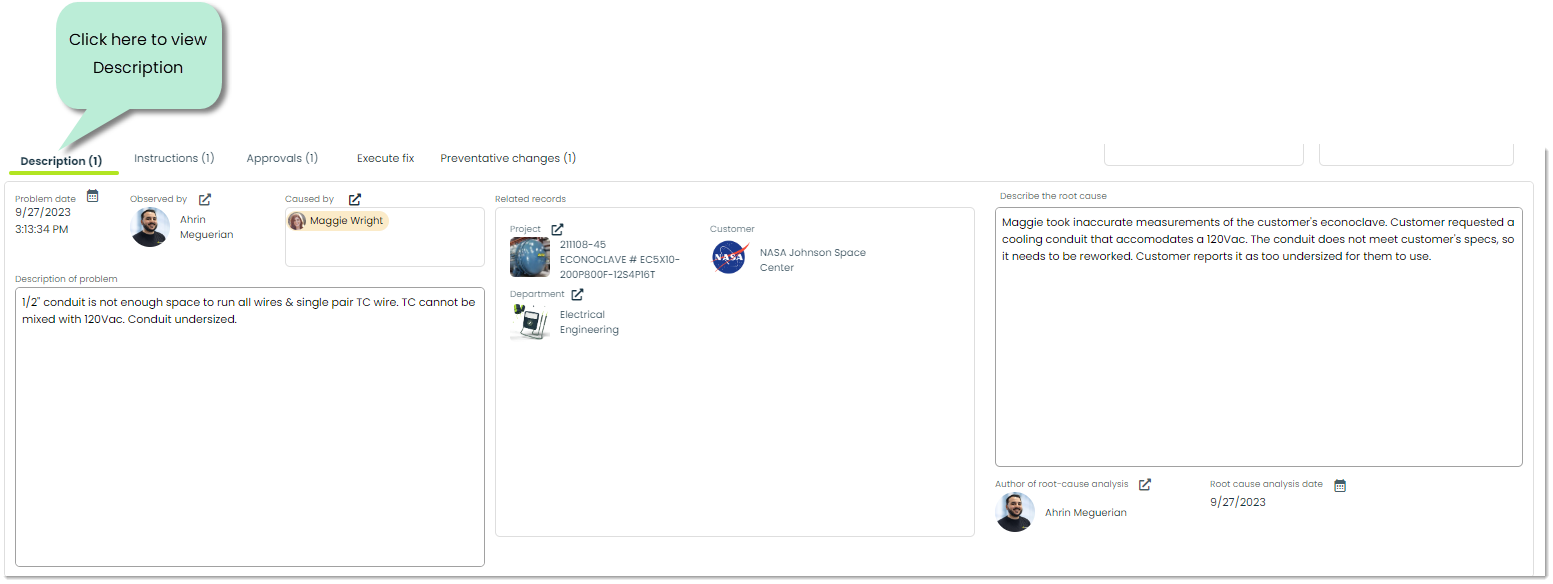
Within Description, there are a number of unfamiliar fields which we’ll go over.
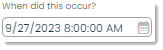
Problem Date – You can view or edit the problem time and date down to the second within Problem date. Simply click on the date picker in the Problem date field to access a visual calendar of available times to choose from.

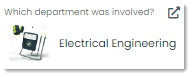
Department – You have the option to designate the department accountable for the problem reported. By clicking on the picker in Department, you’ll be presented with a roster of departments created within your organization. For example, if your organization is dealing with a problem related to the electrical wiring of a piece of machinery, you might select Electrical Engineering.

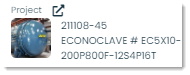
Project – Project refers to the project where this problem occurred. You can directly link to a record within Appward’s Projects app so information can easily be relayed between apps.
Customer – Promoting good quality control and maintaining strong customer relationships is an important aspect of every business. You can view and monitor the source of a reported problem, whether it is from an external or internal entity. The organization listed under Customer is brought in from the record imported into the Projects field, ensuring a seamless work flow when switching to other apps at Appward such as Projects, Changes, Audits, and Inspections.

Root cause – Root cause refers to the process of addressing the fundamental or underlying reasons for a problem. By identifying these root issues, you can implement corrective and preventative actions to improve overall quality of production. You can describe the root issues withing Describe the root cause in as much detail as you need.

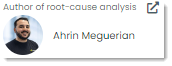
Author of Root cause – Keeping track of who identified the root cause allows for accountability for every step during the course of problem resolution. You can identify who is responsible for determining the root cause within Author of the root-cause analysis.
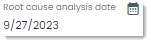
Root cause analysis date – This is where you can determine the date when the root cause analysis occurred. Simply select the date and time using the built in calendar picker within Root cause analysis date.
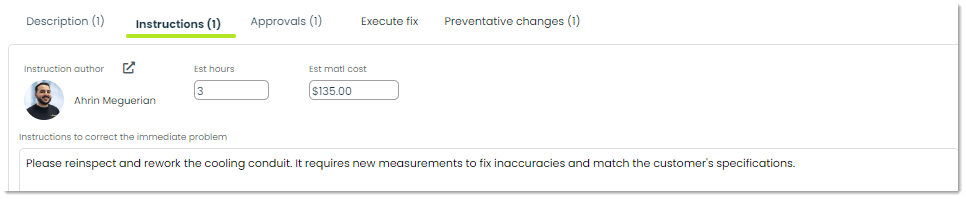
Instructions – Providing ample instructions on how to resolve the issue is a crucial part of the resolution process. You can specify all the essential details within the Instructions sections, including the instruction author, estimated hours, estimated material cost, and detailed instructions to address the immediate problem. This information is conveniently accessible in a dedicated tab within Problems, enhancing the end-to-end workflow of the process.
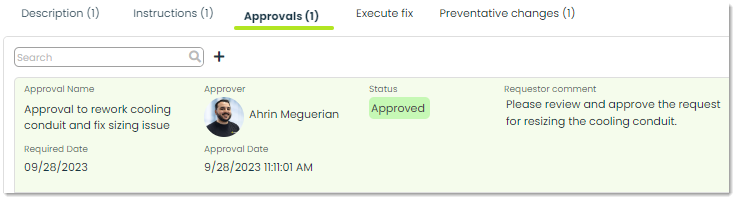
Approvals – Problems approvals play an important role in ensuring solutions are accurate, compliant with regulation and aligned with what your organization wants to accomplish. You have the capability to generate approval request, check their current status, and verify that your organization is making well-informed decisions. Ensure consensus is reached before making critical decisions, and track all pertinent details to prevent any potential oversight.
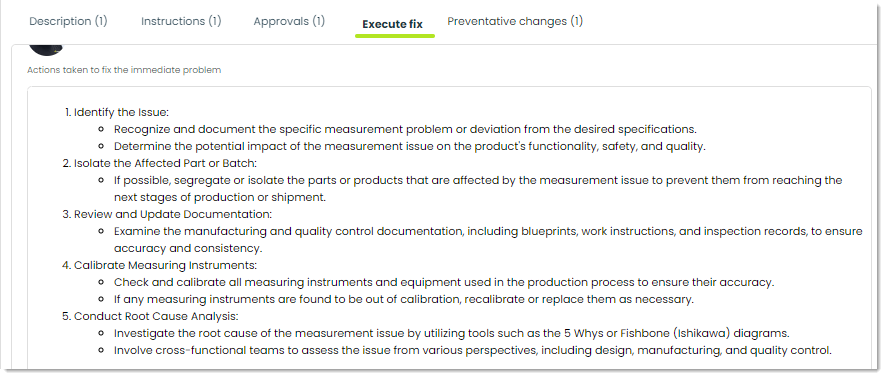
Execute fix – Execute fix is where you can specify how the problem was solved. You can provide details by describing the actions taken from start to finish during the process of solving the problem at hand.
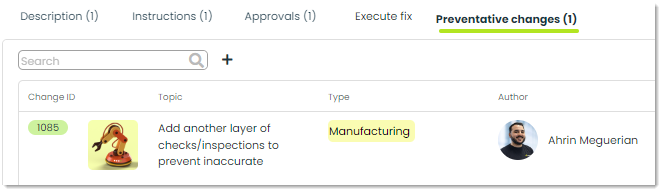
Preventative changes – In Appward, Preventative changes are defined as changes your organization can make to prevent the issue that was solved from happening again. Changes are directly imported from the Changes app and are used throughout many apps at Appward. Similar to Problems, Changes have types, authors and overall topics, keeping all the information your organization needs organized. For more information on Changes, please refer to our Getting Started with Changes guide.
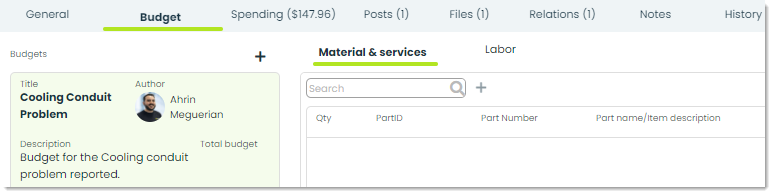
How to View the Budget for a Problem
To view the Budget allocated for a specific problem, navigate to the Budget tab within a problem’s detail flyout.
How to View the Spending for a Problem
To view the spending during the course of resolving a specific problem, navigate to the Spending tab within a problem’s details flyout.
Note: In the Spending tab count, you will find a dollar value that represents the cumulative total of all the spending amounts contained within that section.

Material & services – It’s crucial to monitor the expenses related to materials and services to ensure efficient spending while addressing a problem. You have the option to choose parts directly imported from Appward’s Parts app, which enables precise tracking of the costs associated with components.
Labor – Just like you can with materials and services, you have the option to include labor allocations for monitoring the expenses related to the workforce required while resolving an issue.
Frontline Features of Problems
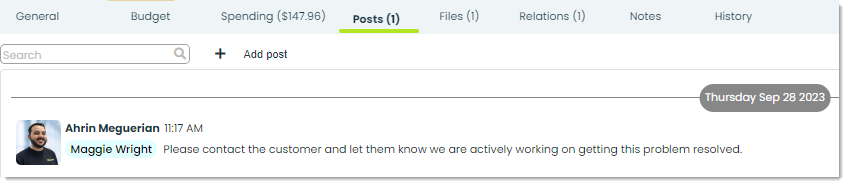
Posts – In Appward, a post is a comment that can be liked or replied to directly by other members of your organization. A common use of posts in Problems is to send a quick reminder about a step during the resolution process of a problem.
Files – Through the Files tab, you can attach essential documents to a problem record. You can add files directly from your computer or from the Appward cloud. After adding a file, you can view it through an integrated document preview within the Files section.

Relations – In Relations, you can include records from other apps within your organization that are relevant to the problem for which you’re creating a record.

Notes – You can record any thoughts or pieces of information you’d like to within the Notes tab. Notes are a great way to stay organized and ensure everything is in a well-organized and structured place.

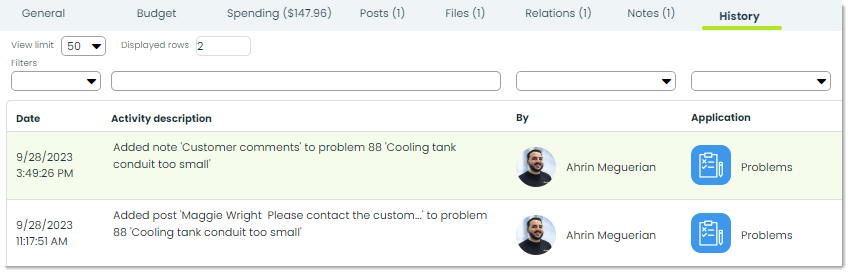
History – With History, you can access detailed information about the status changes of a problem, including the employee responsible for the update, the timestamp of the modification, the application, and a brief description of the activity performed.
Additional Features of Problems
Archive – Archiving is a common feature within the majority of apps in Appward. Archive serves as an effective tool when you wish to remove a record from sight without permanently deleting it. Archived records are essentially concealed from the main screen but remain accessible through specific search filters.

Delete – To delete a problem permanently, you can do so using the Delete button and removing it permanently. You will be prompted with a popup for additional verification of the request to delete.
