KnowledgeBase
Search or browse in depth articles, software resources and videos on everything about Appward.
-
Getting Started with Inspections (Last Modified on April 09, 2024)
Using a systematic approach to review operations is the initial step in setting quality, efficiency, and safety standards. With the Inspections app, you can create checklists, reference specs, log issues, and generate reports for quality, compliance, and improvement. Unlike manual methods, Inspections offer centralized and traceable assessments organization-wide.
-
Getting Started with Projects (Last Modified on October 20, 2023)
Relying on a paper-based system to manage manufacturing projects not only creates bottlenecks in productivity but also limits your organization’s ability to adapt and scale effectively. As project complexity grows, manual management methods become increasingly cumbersome, making it challenging to keep pace with industry changes and evolving project requirements.
-
Getting Started with Survey Director (Last Modified on October 19, 2023)
The Survey Director app, paired with Surveys, empowers you to gather feedback efficiently, equipping you with necessary insights for making well-informed, data-driven decisions. Engaging with both your employees and customers constitutes an important aspect of understanding and improving your business. In this guide, we’ll cover the process of creating, deploying, and managing surveys.
-
Getting Started with Departments (Last Modified on October 13, 2023)
This guide is designed for the administrators who handle the creation and management of departments within your company. It will cover features such as adding new departments, viewing and editing the employees and positions of each department and how to archive or delete unused departments.
-
Getting Started with Locations (Last Modified on August 21, 2024)
With the Locations app, your organization can designate specific spaces within your premises and define their intended purposes. Whether it’s a room for daily stand-up meetings or a warehouse for shipping products, Locations assists you in compartmentalizing and maintaining control over your business operations. This guide will walk you through the steps of creating a location, managing its details, and integrating them into other apps within your organization.
-
Getting Started with Progress Reports (Last Modified on October 11, 2023)
The Progress Reports app streamlines the creation, management, and administration of progress reports for your organization. Whether it’s an employee’s annual review or a financial report for your company, Progress Reports has you covered. In this guide, we’ll walk you through the entire process of creating and managing your reports to ensure they are tailored to your specific needs.
-
Getting Started with Announcements (Last Modified on October 09, 2023)
Whether it’s a message concerning a work assignment or an activity aimed at building team cohesion, announcements play a pivotal role in enhancing communication and laying the foundation for strong relationships within your team. Announcements, alongside Announcement Director gives your organization the ability to ensure strong communication between the people in your organization.
-
Getting Started with Companies (Last Modified on October 05, 2023)
The Companies app is a valuable tool for organizing your organization’s business relationships when working with external partners, clients or suppliers. This guide will cover how to add, view and edit a company, as well as how to qualify a company as a vendor/customer and use the Frontline Features of companies.
-
Getting Started with Announcement Director (Last Modified on October 09, 2023)
Important messages can easily get lost in email inboxes, especially during busy times. Announcement Director, in conjunction with Announcements, tackles this problem by sending messages and reminders directly to people in your organization. This guide will walk you through the process of creating, dispatching, and ensuring that your announcements are seen by the intended audience.
-
Getting Started with Certifications (Last Modified on October 04, 2023)
With Certifications, you can maintain up-to-date certifications for components and materials, to ensure compliance with industry standards and regulations. In this guide we’ll cover how to create, manage, and ensure timely updates of certifications across your organization.
-
Getting Started with Tickets (Last Modified on October 02, 2023)
The Tickets app is a powerful application used to create, track and manage the progress of your support inquiries. This guide will cover how to add, view, edit and keep up to date with your tickets and the parties working on them.
-
Getting Started with Problems (Last Modified on February 26, 2024)
The Problems app is designed to help your organization quickly document issues, identify root causes, plan solutions, and execute them with ease. This guide will walk you through the process of creating a new Problems record, managing it, and successfully identifying the root cause and implementing a solution.
-
Getting Started with Meetings (Last Modified on March 29, 2024)
Meetings is designed to help you efficiently arrange scheduled gatherings with well-defined details regarding topics, goals and agendas, ensuring that attendees are well-prepared and in sync even before the meeting commences.
-
Getting Started with Ticket Director (Last Modified on October 02, 2023)
While the Tickets app is designed to track the inquiries that you’ve made, Ticket Director is designed to manage how you handle incoming tickets. This guide will cover how to add, view, edit and respond to tickets from your customers and internal employees. We’ll also cover how to use the Appward API to integrate ticket creation into your web forms.
-
Getting Started with Leads (Last Modified on November 27, 2023)
The Leads app is a tool for capturing, tracking and managing these leads that your company has generated. This guide will go over the full lead pipeline from adding new leads to editing lead information and following up with prospective customers.
-
Getting Started with Positions (Last Modified on September 25, 2023)
Positions offers a comprehensive job management solution that helps you manage job descriptions, roles, departmental objectives, and training prerequisites all in one place. Leveraging positions with your organizational framework can pave the way for your business’s success.
-
Getting Started with Documents (Last Modified on September 19, 2023)
Documents is designed to help you create a comprehensive library of documents and media assets essential for everyday operation of your organization. Fully integrated with the Appward platform, your documents can be accessed from any app securely and efficiently.
-
Getting Started with Trips (Last Modified on September 14, 2023)
Trips is a dedicated application for efficiently handling travel logistics, bookings, and coordination. It simplifies the management of travel data, expenses, itineraries and traveler profiles across your organization.
-
Getting Started with Calendars (Last Modified on September 25, 2023)
Calendars is an app designed to help you keep track of yours and your colleague’s busy schedules and improving overall time management. You can utilize Calendars unified interface to add events and switch between monthly, weekly, and daily views. In this guide we’ll cover how to add events, calendars, and navigate the entire Calendars app.
-
Getting Started with Skills (Last Modified on October 12, 2023)
The Skills App is designed to offer thorough insight into employees’ skill sets, simplifying the process of determining their areas of expertise. With Skills, you can effectively address these obstacles, improve decision-making, and fully harness your workforce’s capabilities.
Getting Started Articles
Getting Started FAQs
Introduction
Appward's Labor Tracking app offers a comprehensive solution for monitoring employee productivity. Easily track work hours, compare estimates with actual time spent, and generate customizable reports for insightful labor metrics. With full transparency, ensure tasks are allocated effectively, promoting efficiency and productivity across the board.
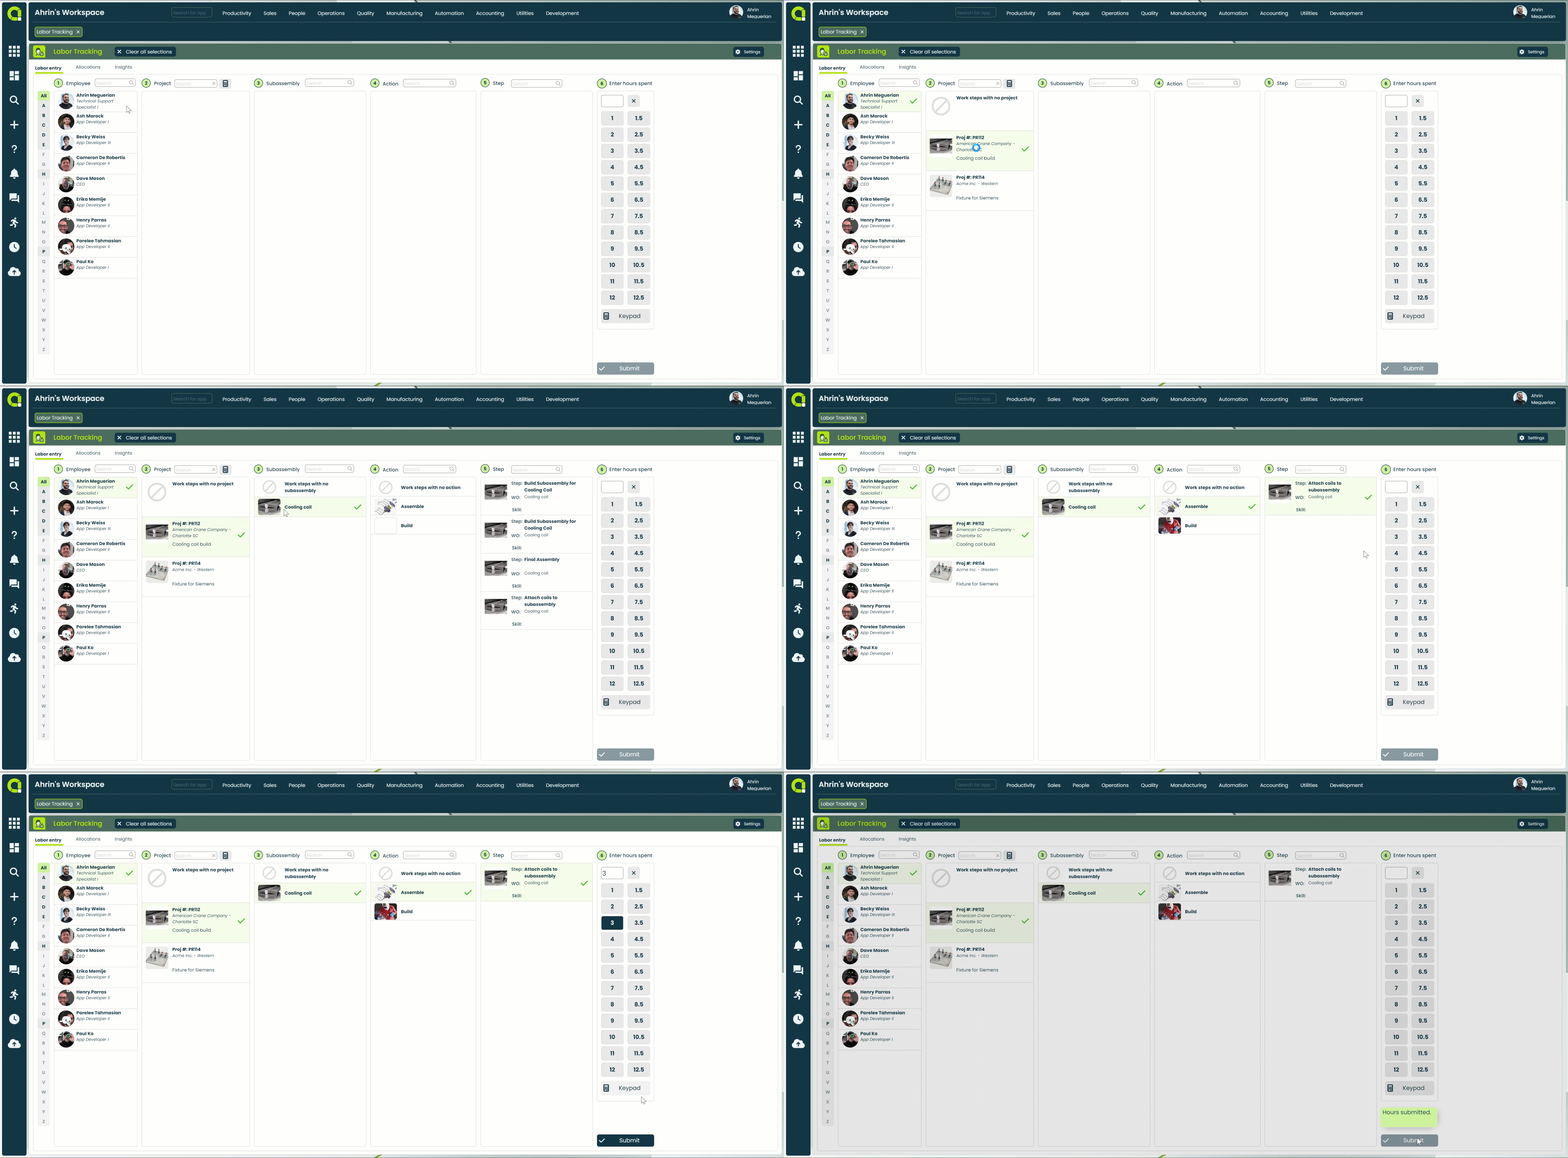
Let's get started
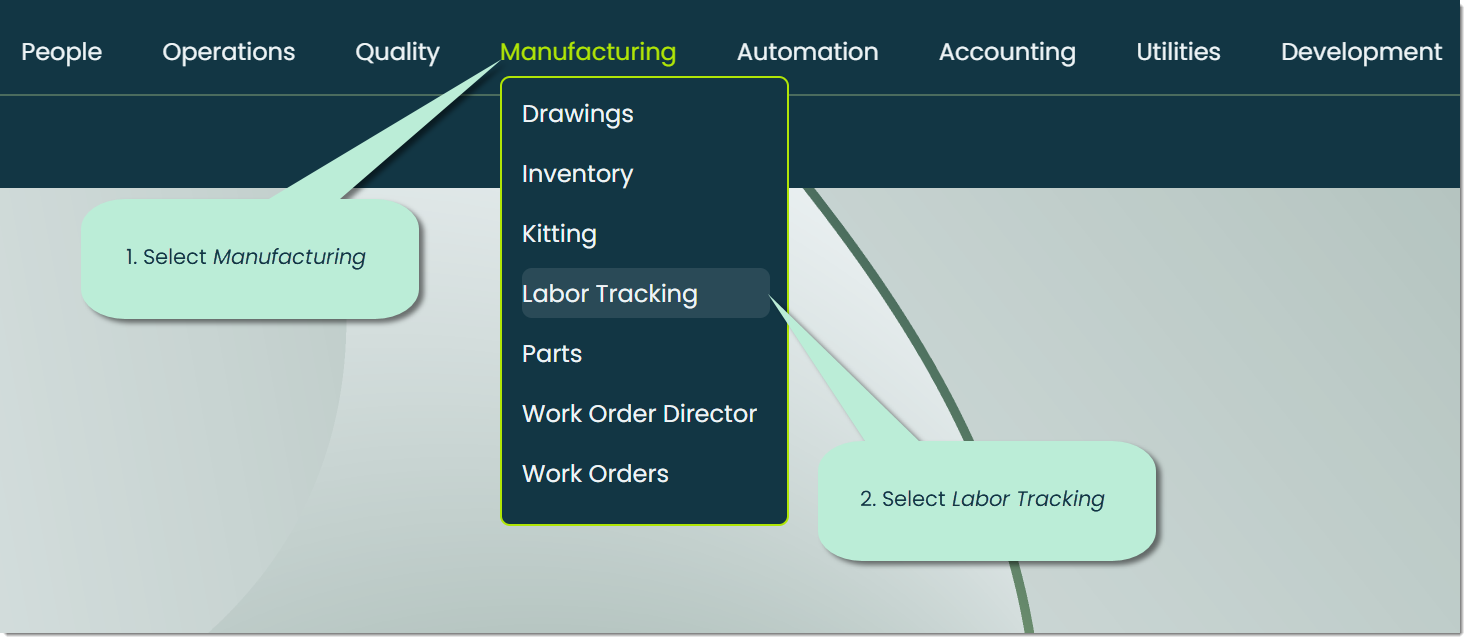
To open the Labor Tracking app, go to the Manufacturing category of the main navigation bar and select Labor Tracking.
When you open the app, the first thing you'll see is the Labor Entry tab, which will serve as the main hub for tracking time spent on labor.
Note: The functionality of this app relies on data from other applications, such as the Employees app. If you haven't set up any employee profiles yet, you won't be able to begin using Labor Tracking.
Let's go over each of the tabs from left to right.
Labor Entry - This tab is where you can begin the process of accurately tracking the time an employee spends on a labor task.

Allocations - The Allocations tab is where you can view a list of submitted labor entries.

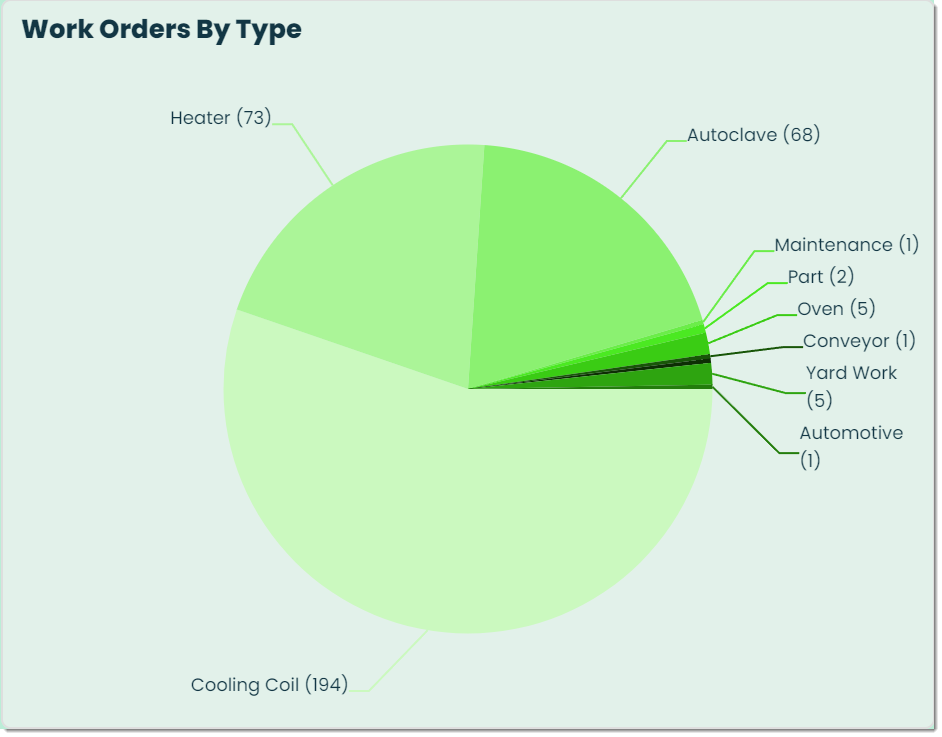
Insights - This tab is used to provide an analysis of your organization's labor data. You can configure highly-customizable queries that give you a full picture of measurable components such as employee time spent on specific projects.

How to add a labor entry
There are five steps to creating a labor entry, let's go over them.
Step 1: Employee
The first step of the labor entry process is to select an employee from a list directly imported from your organization's Employees app.
On the left side of this list, you'll find a convenient sorting feature for your employees. A highlighted letter signifies the presence of an employee whose first name begins with that letter. Conversely, a greyed-out letter indicates the absence of employees with names starting with that letter in the list.
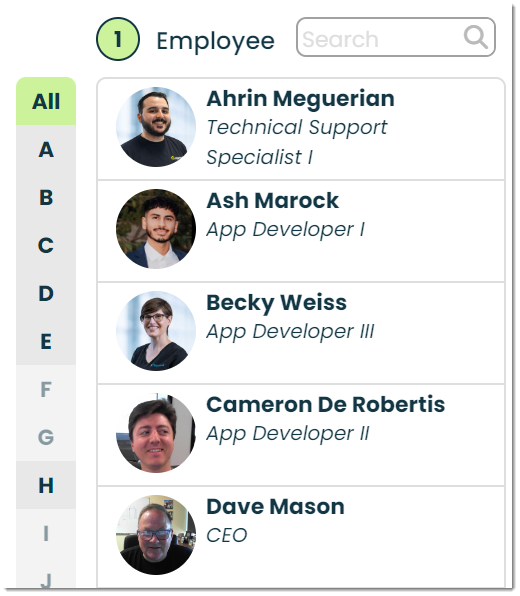
To select an employee, simply click on the employees name in the list. This will highlight them and make step 2 available.

Step 2: Project
The second step is to select a project that will be associated with the selected employee who is adding a labor entry.
To choose a project, simply search for the desired project and select it from the list of options available.
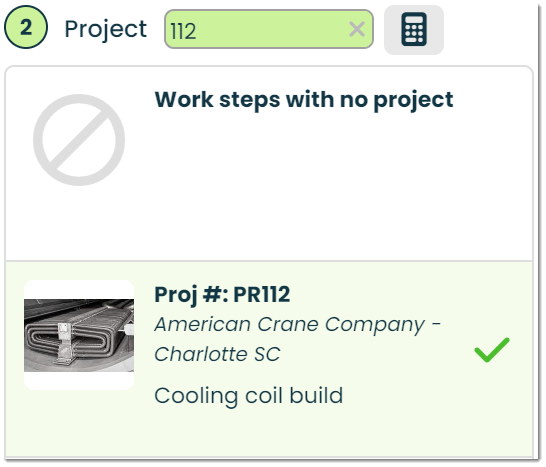
The Labor Tracking app features many tablet and mobile friendly features. We'll cover them throughout this guide.
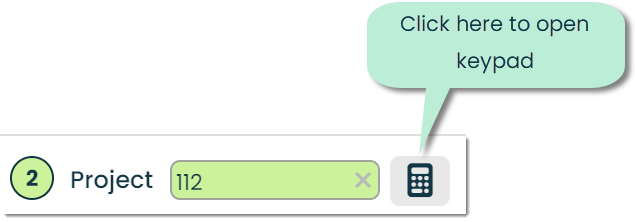
Searching with keypad - When using a tablet or handheld device, you can search records more conveniently by using a keypad instead of a traditional keyboard. Simply click on the keypad icon to enable this feature.
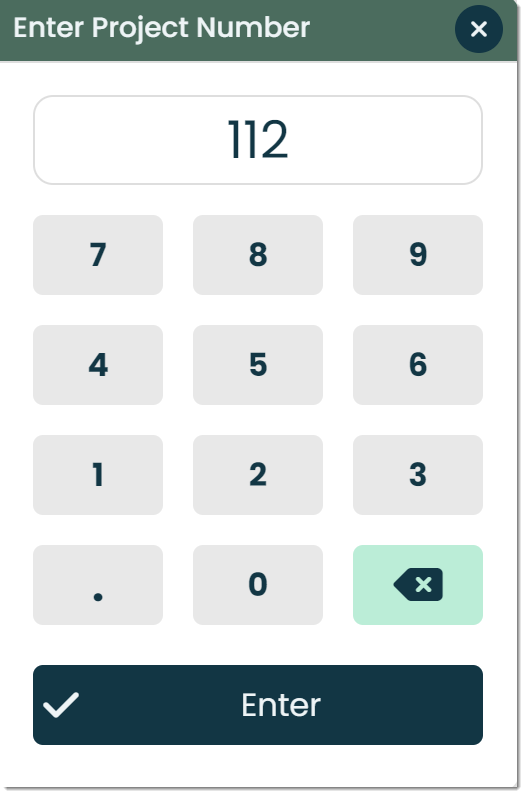
This will bring up the Enter Project Number popup, where you can use the tablet-friendly keypad to search for a project.
Step 3: Subassembly
After selecting the project you'd like to track labor on, you have the option of selecting a subassembly of the project.
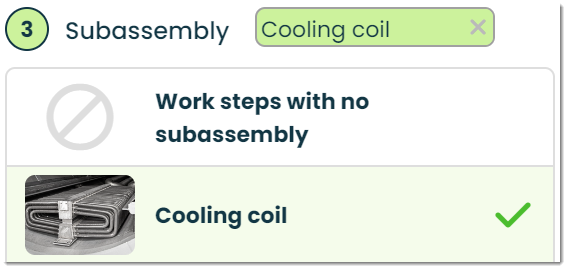
If there are no subassemblies associated with the specific labor you are trying to track, select the Work steps with no subassembly option.

Step 4: Actions
Narrowing it down even further, step 4 is where you can select specific actions related to a project & subassembly.
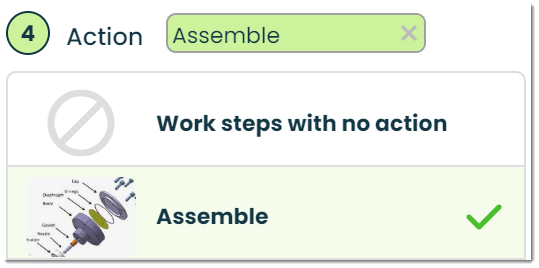
You can also select the Work steps with no action option if you wish to look for a work step (in step 5) that has no actions.

Step 5: Step
In step 5, you can select the specific step in relation to the subassembly selected that will be worked on.
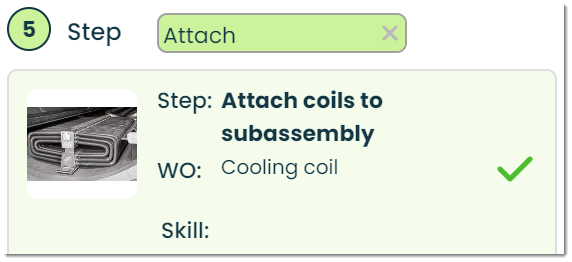
This list provides you with the name of the step , the specific work order, and the required skills to complete the step.
Step 6: Enter hours spent
The last step of the labor tracking process is to enter the hours spent. You can use the tablet friendly keypad-style buttons to enter in the hours spent on the labor task, or use text entry by typing in the value yourself.
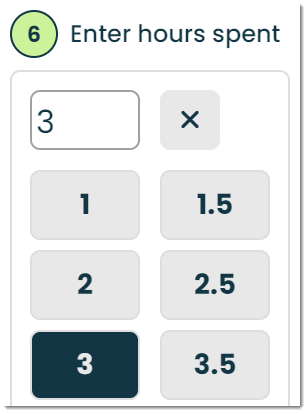
Similar to step 2 where we went over how to search for projects using a keypad, you can enter in the hours spent on a labor task by using the keypad found in step 6.
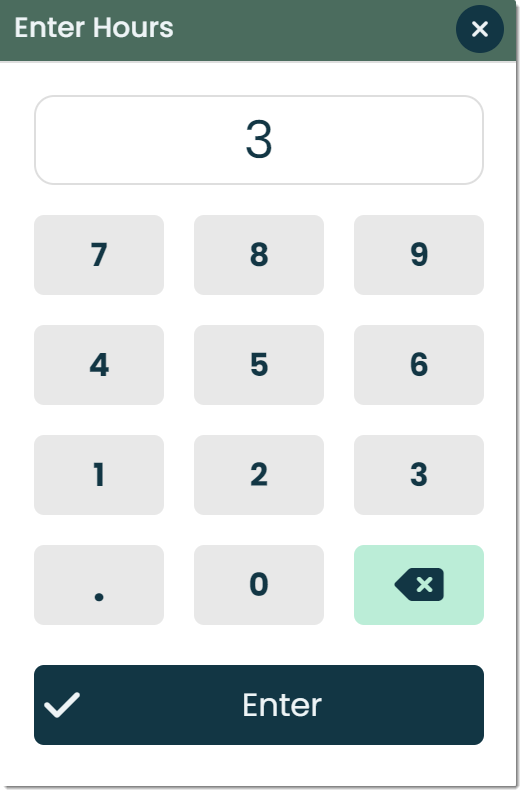
When you're ready to submit, simply click on the submit button to create your labor entry.

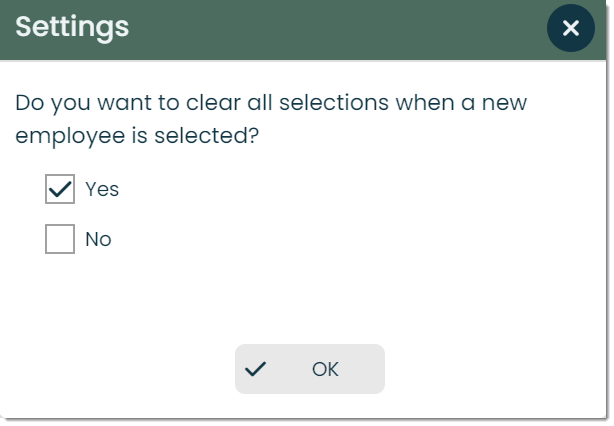
Additional settings - To access additional settings, click on the settings button found in the top right corner of the app screen. This will bring up the Settings popup, where you can decide if you'd like to clear the screen when a new employee is selected. This is especially helpful when multiple employees need to use the same device to track their labor.

Viewing allocations
To view a list of your organization's created labor entries, navigate to the Allocations tab. Let's cover what's available here.

Allocation ID - A unique identifier assigned to each labor allocation.
Total count - The total number of hours of labor entries in the list.

Name - The name, title, and image of the employee associated with the labor allocation.

Duration - The length of time or duration of the labor allocation.

Start date -The date when the labor allocation begins.

End date - The date when the labor allocation ends.

Project - The project to which the labor allocation is assigned.
Customer - The customer company associated with the labor allocation. This customer is assigned during the creation of the projects record.
Work order - The work order associated with the labor allocation..
Work order step - The particular step of the work order corresponding to the labor allocation.
Frontline features of Labor Tracking
Insights - This tab is used to analyze data from your organization’s labor allocations. Using Insights, you have the opportunity to uncover and make use of valuable information related to labor types, statuses, actions and more. For more on Insights, please check out our Getting Started with Insights guide.
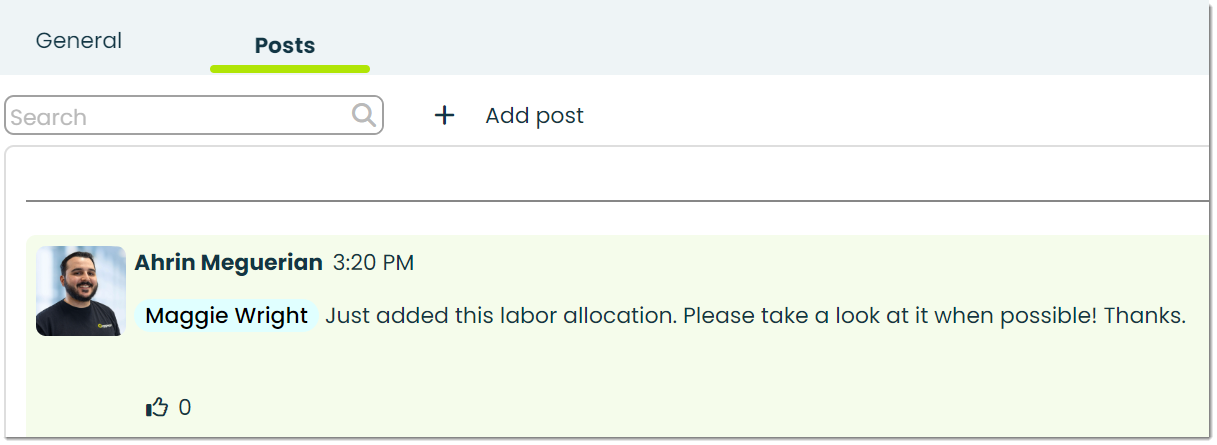
Posts - In Appward, a post is a comment that can be liked or replied to directly by other members of your organization. Within Labor Tracking, a common way of using posts is to write to management or other team members with comments or notes regarding a task.
Latest Articles
- Getting Started with Locations
- Getting Started with Changes
- Getting Started with Labor Tracking
- Getting Started with Conversations
- Getting Started with Report Builder
- Getting Started with Budgets
- Getting Started with Boards
- Getting Started with Whiteboards
- Getting Started with Inspections
- Getting Started with Support Contracts
